
eRig#
eRig Features
:Advanced Rigging & Generic Pipeline Functions Module:
The eRig module, tailored for Autodesk Maya, is crafted to streamline and enhance the rigging process with its assortment of generic rig functions. Building on the initial points, here’s a more comprehensive overview:
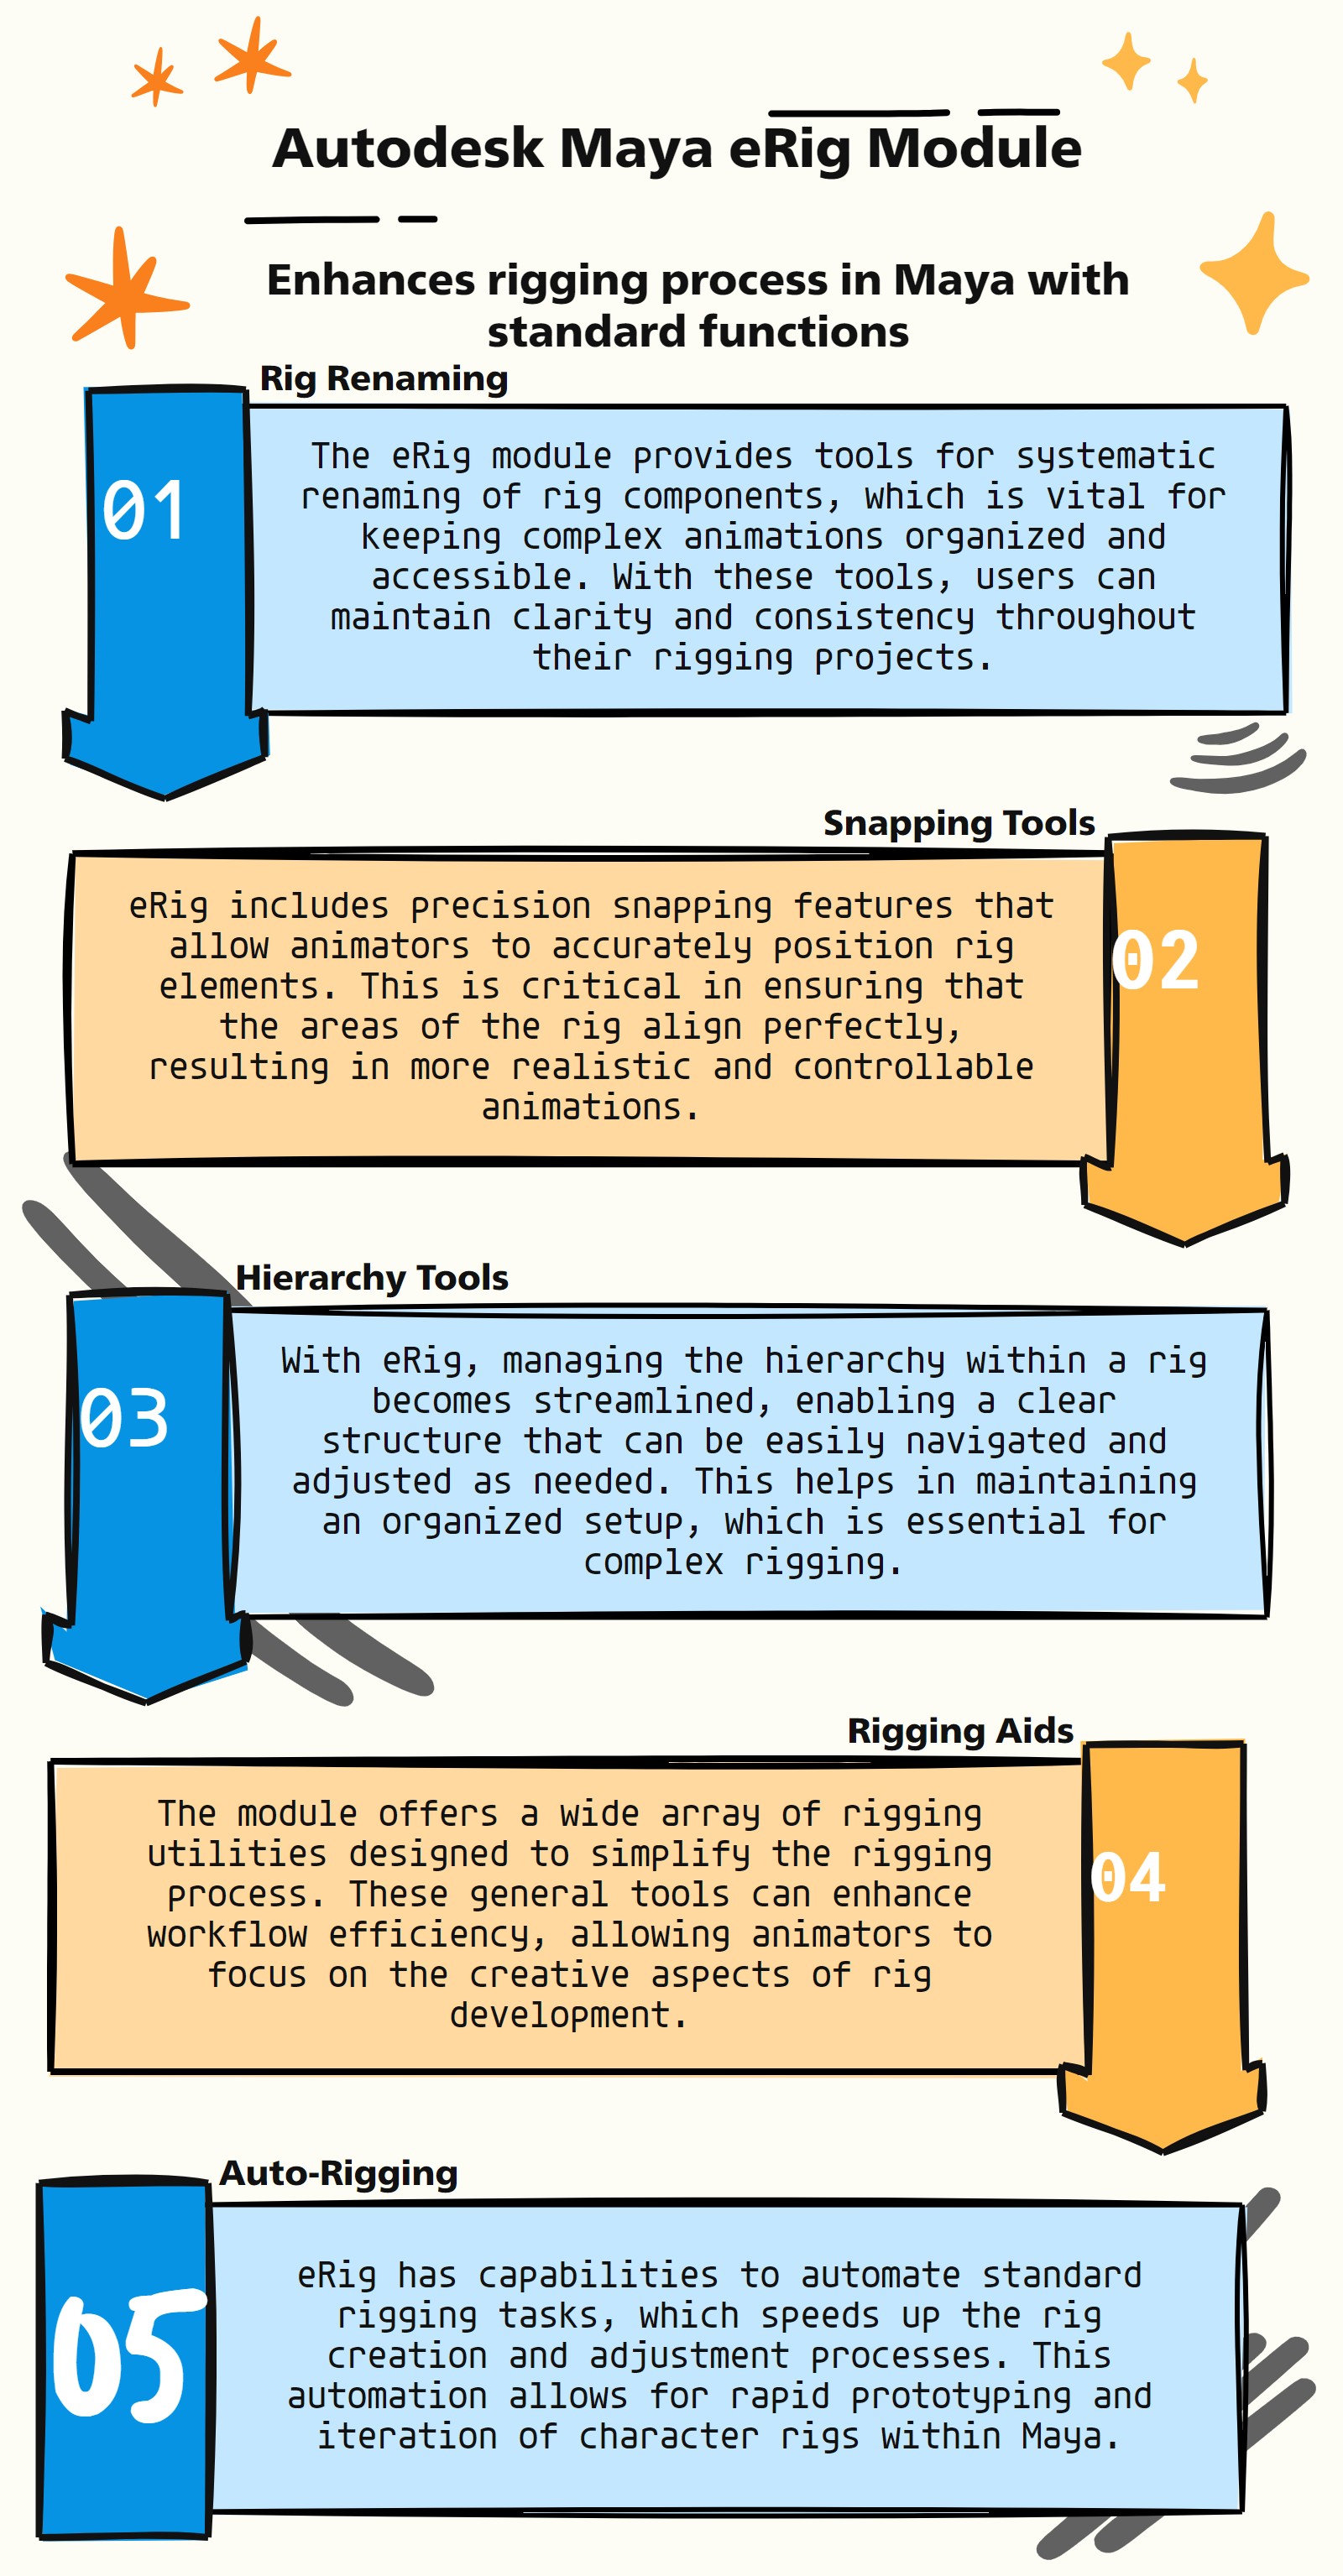
Rig Renaming Functions: eRig offers efficient tools for renaming rig components, crucial for maintaining clear naming conventions and organizational standards in complex rigs.
Snapping Utilities: The module includes precise snapping functionalities, allowing for the exact positioning of rig elements, essential for accurate rigging and alignment.
Hierarchy Management: eRig provides robust features for organizing and managing the hierarchy of rig elements, ensuring a well-structured and manageable rig setup.
General Rigging Tools: The module is equipped with a broad range of tools that simplify common rigging tasks, enhancing workflow efficiency in Maya.
Automated Rig Construction: eRig might facilitate the automation of standard rigging processes, significantly speeding up the rig setup and modification phases.
Constraint Management: The module likely includes functions for managing various constraints within a rig, essential for controlling the movement and relationships between different rig parts.
Custom Rigging Solutions: eRig could offer customizable rigging options, allowing for tailored solutions that fit specific animation or character requirements.
Integration with Animation Workflow: The module might be designed to integrate seamlessly with the overall animation workflow in Maya, aligning with keyframe animation and simulation processes.
User-Friendly Interface: eRig could feature a user-friendly interface, making complex rigging processes more accessible to artists with varying levels of technical expertise.
Compatibility with Other Maya Tools: The module may be built to work in tandem with other Maya tools and scripts, ensuring a cohesive and efficient rigging and animation process.
- eRig.__init__(self)#
To Support main auto rig scripts via eRig
Module Name
**as_eRigMain_v1.5**
About
Author: (Subbaiah) Subbu Addanki
Character Supervisor (Rigging) & Programmer
Visit
http://www.pythonscripting.com
http://subbuadd.blogspot.com
Contact
Mail Id: subbu.add@gmail.com
Mobile No: +91-9741454400 / +91-9949005359
Copyright (c) as_eRigMain
** (Subbaiah) Subbu Addanki. All Rights Reserved. **
- eRig.__myProgressWin(self, winTitle, progressNote, **shArgs)#
Purpose:
:: Creates a progress window with a specified title and progress note in Maya.
Useful for providing visual feedback during custom processes or operations in Maya.
Enhances user experience by offering a dedicated window to track progress with informative notes.
- Parameters:
winTitle – <str> # Title of the progress window.
progressNote – <str> # Note to display on the progress window.
- Returns:
None # This function does not return any value but creates a progress window.
Code Examples:
>>> window_title = "Processing Data"
>>> progress_note = "Please wait, processing..."
>>> __myProgressWin(window_title, progress_note)
# Creates and displays a progress window with the specified title and note.
graph TD Start[("fa:fa-play Start")] --> CheckWindowExists{"/fas:fa-question-circle Check if Window Exists"} CheckWindowExists --"Window Exists"--> DeleteExistingWindow{"/fas:fa-trash Delete Existing Window"} CheckWindowExists --"Window Doesn't Exist"--> CreateProgressBarWindow{"/fas:fa-cogs Create Progress Bar Window"} DeleteExistingWindow --"Delete Existing Window"--> CreateProgressBarWindow CreateProgressBarWindow --"Create Progress Bar Window"--> End["/fas:fa-stop End"] style Start fill:#00cc00,stroke:#000,stroke-width:3px style CheckWindowExists fill:#ffcc00,stroke:#000,stroke-width:2px style DeleteExistingWindow fill:#ff6666,stroke:#000,stroke-width:2px style CreateProgressBarWindow fill:#99ff99,stroke:#000,stroke-width:2px style End fill:#ff6666,stroke:#000,stroke-width:3px- Flow Chart Description:
This flowchart illustrates the __myProgressWin function:
The function starts with the provided arguments.
It checks if a window with the specified title exists.
If the window exists, it deletes the existing window.
If the window doesn’t exist or after deleting the existing window, it creates a new progress bar window.
The function ends after creating the progress bar window.
- eRig._isAttr(self, objNAttr, **shArgs)#
Purpose:
:: Checks if the given string represents an attribute in Maya.
Essential for scripting and automation in Maya to verify if a string corresponds to a valid attribute.
Helps in validating input and preventing errors in operations that involve attribute manipulation.
- Parameters:
objNAttr – <str> # Object and attribute combination to check.
- Returns:
<bool> # Boolean value indicating whether the input string is an attribute.
Code Examples:
>>> obj_attribute = "pCube1.translateX"
>>> is_attribute = _isAttr(obj_attribute)
# Returns True if 'translateX' is an attribute of 'pCube1', otherwise False.
graph TD Start[("fa:fa-play Start")] --> SplitString{"/fas:fa-code Split String by '.'"} SplitString --"Split Successful"--> CheckObjectExists{"/fas:fa-question-circle Check if Object Exists"} CheckObjectExists --"Object Exists"--> CheckAttributeExists{"/fas:fa-question-circle Check if Attribute Exists"} CheckObjectExists --"Object Doesn't Exist"--> End["/fas:fa-stop End"] CheckAttributeExists --"Attribute Exists"--> IsAttributeTrue[("fa:fa-check True")] CheckAttributeExists --"Attribute Doesn't Exist"--> IsAttributeFalse[("fa:fa-times False")] IsAttributeTrue --> End IsAttributeFalse --> End style Start fill:#00cc00,stroke:#000,stroke-width:3px style SplitString fill:#ffcc00,stroke:#000,stroke-width:2px style CheckObjectExists fill:#ffcc00,stroke:#000,stroke-width:2px style CheckAttributeExists fill:#ffcc00,stroke:#000,stroke-width:2px style IsAttributeTrue fill:#99ff99,stroke:#000,stroke-width:2px style IsAttributeFalse fill:#ff6666,stroke:#000,stroke-width:2px style End fill:#ff6666,stroke:#000,stroke-width:3px- Flow Chart Description:
This flowchart illustrates the _isAttr function:
The function starts by splitting the input string by ‘.’ to separate the object and attribute.
It checks if the object specified in the split string exists in Maya.
If the object exists, it checks if the attribute specified in the split string exists for that object.
If the attribute exists, it returns True, indicating that the input string represents a valid attribute.
If the attribute doesn’t exist or if the object doesn’t exist, it returns False.
The function ends after returning True or False based on the checks.
- eRig._isNum(self, obj, **shArgs)#
Purpose:
:: Checks if the given object is a number in Maya.
Useful for scripts that require validation of input types, particularly for ensuring numerical data.
Helps in preventing errors in operations where specific data types, like numbers, are required.
- Parameters:
obj – <int/float> # The object to check if it’s a number.
- Returns:
<bool> # Boolean value indicating whether the object is a number.
Code Examples:
>>> input_object = 5
>>> is_number = _isNum(input_object)
# Returns True if 'input_object' is a number (int or float), otherwise False.
graph TD Start[("fa:fa-play Start")] --> CheckType{"/fas:fa-question-circle Check Type"} CheckType --"Type is int or float"--> IsNumberTrue[("fa:fa-check True")] CheckType --"Type is not int or float"--> IsNumberFalse[("fa:fa-times False")] IsNumberTrue --> End["/fas:fa-stop End"] IsNumberFalse --> End style Start fill:#00cc00,stroke:#000,stroke-width:3px style CheckType fill:#ffcc00,stroke:#000,stroke-width:2px style IsNumberTrue fill:#99ff99,stroke:#000,stroke-width:2px style IsNumberFalse fill:#ff6666,stroke:#000,stroke-width:2px style End fill:#ff6666,stroke:#000,stroke-width:3px- Flow Chart Description:
This flowchart illustrates the _isNum function:
The function starts by checking the type of the input object.
If the type is either int or float, it returns True, indicating that the input object is a number.
If the type is not int or float, it returns False, indicating that the input object is not a number.
The function ends after returning True or False based on the type check.
- eRig._isPosList(self, posList, **shArgs)#
Purpose:
:: Checks if the provided list is a list of position values in Maya.
Crucial for scripts dealing with position data, ensuring the input is in the correct format for spatial calculations.
Facilitates error-checking in operations involving coordinates, such as object placement or vertex manipulation.
- Parameters:
posList – <list/tuple> # The list to check if it contains position values.
- Returns:
<bool> # Boolean value indicating whether the list is a valid list of position values.
Code Examples:
>>> position_list = [1, 3, 10.5]
>>> is_position_list = _isPosList(position_list)
# Returns True if 'position_list' is a valid list or tuple of three numerical position values, otherwise False.
graph TD Start[("fa:fa-play Start")] --> CheckType{"/fas:fa-question-circle Check Type"} CheckType --"Type is list or tuple"--> CheckLength{"/fas:fa-question-circle Check Length"} CheckType --"Type is not list or tuple"--> IsPositionListFalse[("fa:fa-times False")] CheckLength --"Length is 3"--> CheckValues{"/fas:fa-question-circle Check Values"} CheckLength --"Length is not 3"--> IsPositionListFalse CheckValues --"All values are numbers"--> IsPositionListTrue[("fa:fa-check True")] CheckValues --"Not all values are numbers"--> IsPositionListFalse IsPositionListTrue --> End["/fas:fa-stop End"] IsPositionListFalse --> End style Start fill:#00cc00,stroke:#000,stroke-width:3px style CheckType fill:#ffcc00,stroke:#000,stroke-width:2px style CheckLength fill:#ffcc00,stroke:#000,stroke-width:2px style CheckValues fill:#ffcc00,stroke:#000,stroke-width:2px style IsPositionListTrue fill:#99ff99,stroke:#000,stroke-width:2px style IsPositionListFalse fill:#ff6666,stroke:#000,stroke-width:2px style End fill:#ff6666,stroke:#000,stroke-width:3px- Flow Chart Description:
This flowchart illustrates the _isPosList function:
The function starts by checking the type of the input list.
If the type is either a list or tuple, it proceeds to check the length of the list.
If the length is 3, it checks whether all values in the list are numbers.
If all values are numbers, it returns True, indicating that the input list is a valid list of position values.
If the length is not 3 or if not all values are numbers, it returns False, indicating that the input list is not valid.
If the type is not a list or tuple, it returns False.
The function ends after returning True or False based on the checks.
- eRig._mayaVer(self, **shArgs)#
Retrieves the current version of Autodesk Maya in use. :return: Maya Version 2022 etc [Integer indicating the current Maya version.]
- eRig.about_as_eRigMain(self, **shArgs)#
Provides information about the main eRig system in use. :return: UI with detailed information about the eRig system.
- eRig.addAttr(self, node, attr, addDivider=0, sdkAttr=False, *args, **kwargs)#
[**shArgs : n=node, a=attr, ad=addDivider, sa=sdkAttr]
Purpose:
:: Adds an attribute to a node in Maya with options for different attribute types and settings.
Utilized in rigging, animation, and scripting to customize node attributes for various requirements.
Enables the addition of custom attributes to nodes, facilitating greater control and flexibility in Maya scenes.
- Parameters:
node – <str> # The node to which the attribute will be added.
attr – <str> # The attribute to add.
addDivider – <int, optional> # Whether to add a divider for the attribute. Defaults to 0.
sdkAttr – <bool, optional> # Specifies if the attribute is an SDK attribute. Defaults to False.
- Returns:
None
Code Examples:
# Enum Attribute Example
>>> addAttr("parentTo", en="Wrist:Root:", at="enum", k=1)

# Other Attribute Examples
>>> addAttr('persp', ln='test', at='double', k=1)
>>> addAttr('persp.test', query=1, hasMaxValue=True)
False
>>> addAttr('persp.test', edit=1, hasMaxValue=False)
>>> addAttr('persp.test', query=1, hasMaxValue=True)
True
graph TB Start[("fa:fa-play Start")] --> CheckKwargs{{"/fas:fa-question Check Kwargs"}} style Start fill:#00cc00,stroke:#000,stroke-width:3px CheckKwargs --"If kwargs provided" --> UpdateArgs["/fas:fa-sync-alt Update Args"] style CheckKwargs fill:#ffcc00,stroke:#000,stroke-width:2px UpdateArgs --> SetNcTypes["/fas:fa-stream Set ncTypes"] style UpdateArgs fill:#ff9999,stroke:#000,stroke-width:2px CheckKwargs --"If no kwargs" --> SetNcTypes SetNcTypes --> CreateAttrList["/fas:fa-list Create Attr List"] style SetNcTypes fill:#99ccff,stroke:#000,stroke-width:2px CreateAttrList --> CheckAddDivider{{"/fas:fa-code-branch Check AddDivider"}} style CreateAttrList fill:#cc99ff,stroke:#000,stroke-width:2px CheckAddDivider --"If addDivider" --> AddDivider["/fas:fa-plus Add Divider"] style CheckAddDivider fill:#99ff99,stroke:#000,stroke-width:2px CheckAddDivider --"If not addDivider" --> ForAttr["/fas:fa-repeat For Each Attr in attrList"] AddDivider --> ForAttr style AddDivider fill:#ffcc99,stroke:#000,stroke-width:2px ForAttr --> CheckEditAttr{{"/fas:fa-edit Check Edit Attribute"}} style ForAttr fill:#ccffcc,stroke:#000,stroke-width:2px CheckEditAttr --"If edit attribute" --> EditAttribute["/fas:fa-pencil-alt Edit Attribute"] style CheckEditAttr fill:#99ff99,stroke:#000,stroke-width:2px CheckEditAttr --"If not edit attribute" --> AddAttribute["/fas:fa-plus Add Attribute"] style EditAttribute fill:#ff9999,stroke:#000,stroke-width:2px style AddAttribute fill:#99ccff,stroke:#000,stroke-width:2px EditAttribute --> ProcessResults AddAttribute --> ProcessResults style ProcessResults fill:#cc99ff,stroke:#000,stroke-width:2px ProcessResults --> CheckSdkAttr{{"/fas:fa-question-circle Check SDK Attr"}} style CheckSdkAttr fill:#99ff99,stroke:#000,stroke-width:2px CheckSdkAttr --"If sdkAttr"--> AddSdkAttr["/fas:fa-plus-circle Add SDK Attr"] CheckSdkAttr --"If not sdkAttr"--> CheckSecondDivider{{"/fas:fa-code-branch Check Second Divider"}} style AddSdkAttr fill:#ffcc99,stroke:#000,stroke-width:2px AddSdkAttr --> CheckSecondDivider CheckSecondDivider --"If addDivider == 2"--> AddSecondDivider["/fas:fa-plus-square Add Second Divider"] style CheckSecondDivider fill:#99ff99,stroke:#000,stroke-width:2px CheckSecondDivider --"If addDivider != 2"--> Finalize style AddSecondDivider fill:#ffcc99,stroke:#000,stroke-width:2px AddSecondDivider --> Finalize Finalize --> End[("fas:fa-stop End")] style Finalize fill:#cc99ff,stroke:#000,stroke-width:2px style End fill:#ff6666,stroke:#000,stroke-width:3px- Flow Chart Description:
This flowchart illustrates the addAttr function:
The function begins by checking if keyword arguments (kwargs) are provided.
If kwargs are provided, the function updates the arguments for node, attr, addDivider, and sdkAttr.
It then sets ncTypes, a variable defining node component types.
The function creates a list of attributes from the attr parameter.
Checks if addDivider is specified and adds a divider to the attribute if needed.
For each attribute in the list, it checks if it’s an edit attribute and processes accordingly.
The function then processes the results of adding or editing attributes.
If sdkAttr is specified, an SDK attribute is added.
Checks if a second divider needs to be added based on addDivider value.
The process concludes with the finalization of attribute addition or editing.
- eRig.addAttrDivider(self, nodeList, dividerName=None, **shArgs)#
[shArgs : nl=nodeList, dn=dividerName]
Purpose:
:: Adds a divider attribute to a list of nodes.
Argument | Description:
:param nodeList: (<type list or str>) # List of nodes to add the attribute divider to.
:param dividerName: (<type str or list, optional>) # Name of the divider attribute. Default is None.
:return: None
Code Examples:
>>> node_list = ["pSphere1", "pCube1"]  # Example list of nodes
>>> addAttrDivider(nodeList=node_list, dividerName="MyDivider")
# Adds a divider attribute "MyDivider" to the nodes in the list.

>>> addAttrDivider(nodeList=node_list)
# Adds a default divider attribute to the nodes in the list.
This function allows you to add a divider attribute to a list of nodes. You can specify the name of the divider attribute.
graph TD Start[("fa:fa-play Start")] --> CheckShArgs{"/fas:fa-question-circle Check shArgs"} CheckShArgs --"If shArgs Exist"--> ParseShArgs["/fas:fa-cogs Parse shArgs"] CheckShArgs --"If shArgs Does Not Exist"--> InitializeParameters["/fas:fa-wrench Initialize Parameters"] InitializeParameters --> LoopThroughNodes{"/fas:fa-list-ul Loop Through Nodes"} LoopThroughNodes --> CheckDividerName{"/fas:fa-question-circle Check Divider Name"} CheckDividerName --"If DividerName Not Provided"--> GenerateDividerName{"/fas:fa-asterisk Generate Divider Name"} CheckDividerName --"If DividerName Provided"--> AddDividerAttribute{"/fas:fa-plus Add Divider Attribute"} GenerateDividerName --> AddDividerAttribute{"/fas:fa-plus Add Divider Attribute"} AddDividerAttribute --> End["/fas:fa-stop End"] style Start fill:#00cc00,stroke:#000,stroke-width:3px style CheckShArgs fill:#ffcc00,stroke:#000,stroke-width:2px style ParseShArgs fill:#ff9999,stroke:#000,stroke-width:2px style InitializeParameters fill:#99ccff,stroke:#000,stroke-width:2px style LoopThroughNodes fill:#ccffcc,stroke:#000,stroke-width:2px style CheckDividerName fill:#ffcc99,stroke:#000,stroke-width:2px style GenerateDividerName fill:#ffcc99,stroke:#000,stroke-width:2px style AddDividerAttribute fill:#cc99ff,stroke:#000,stroke-width:2px style End fill:#ff6666,stroke:#000,stroke-width:3px- Flow Chart Description:
This flowchart illustrates the addAttrDivider function:
Checks if shArgs exist, and if so, parses the nl and dn from it.
If shArgs do not exist, initializes parameters with default values.
Loops through the provided list of nodes.
Checks if a divider name is provided, and if not, generates a divider name.
Adds the divider attribute to each node in the list with the generated or provided name.
The flowchart ends after processing all nodes.
- eRig.add_ComponentNum(self, intFld, **shArgs)#
[**shArgs : i=intFld]
Purpose:
:: Adds Component Number as Input in any Window for interaction with components in Maya.
Useful in UI scripts and tools for interactive selection and manipulation of components (vertices, edges, faces).
Provides a way to dynamically input and display the number of a selected component in a custom UI field.
- Parameters:
intFld – <str> # Field for inputting the component number.
- Returns:
<int> # The component number of the selected component.
Code Examples:
>>> int_field_name = "componentNumberField"
>>> component_number = add_ComponentNum(int_field_name)
# Adds the number of the selected component to the specified UI field and returns it.
Usage:#
Select a component (e.g., vertex or edge) in Maya.
The function updates the provided UI field with the number of the selected component.
Useful for creating tools that require user input of component numbers.
graph TB Start[("fa:fa-play Start")] --> CheckShArgs{{"/fas:fa-question-circle Check shArgs"}} style Start fill:#00cc00,stroke:#000,stroke-width:3px CheckShArgs --"If shArgs Exist"--> UpdateIntFld["/fas:fa-sync-alt Update intFld"] style CheckShArgs fill:#ffcc00,stroke:#000,stroke-width:2px CheckShArgs --"If shArgs Do Not Exist"--> SelectComponents{"/fas:fa-mouse-pointer Select Components"} UpdateIntFld --> SelectComponents style UpdateIntFld fill:#ff9999,stroke:#000,stroke-width:2px SelectComponents --"If Components Selected"--> ExtractComponentNum["/fas:fa-search Extract Component Number"] SelectComponents --"If No Components Selected"--> SetFieldZero["/fas:fa-times-circle Set Field to Zero"] style SelectComponents fill:#99ccff,stroke:#000,stroke-width:2px ExtractComponentNum --> UpdateUIField["/fas:fa-edit Update UI Field"] style ExtractComponentNum fill:#cc99ff,stroke:#000,stroke-width:2px SetFieldZero --> End[("fas:fa-stop End")] style SetFieldZero fill:#ffcc99,stroke:#000,stroke-width:2px UpdateUIField --> ReturnComponentNum["/fas:fa-check-circle Return Component Number"] style UpdateUIField fill:#99ff99,stroke:#000,stroke-width:2px ReturnComponentNum --> End style ReturnComponentNum fill:#ccffcc,stroke:#000,stroke-width:2px style End fill:#ff6666,stroke:#000,stroke-width:3px- Flow Chart Description:
This flowchart illustrates the add_ComponentNum function:
The function begins by checking if shArgs are provided, updating intFld if necessary.
It then selects components (like vertices, edges, faces) in Maya.
If components are selected, it extracts the component number using a regular expression.
The function updates the specified UI field with the extracted component number.
If no components are selected, the function sets the UI field to zero.
Finally, the function returns the component number or zero.
- eRig.add_Prefix(self, txtFldName, **shArgs)#
[shArgs : tfn=txtFldName]
Purpose:
:: Adds the prefix of the selected object as input in any window for a “<==” button.
Argument | Description:
:param txtFldName: (<type str>) # The text field name where the prefix will be added.
:return: None
Code Examples:
>>> text_field_name = "textField1"  # Example text field name
>>> add_Prefix(txtFldName=text_field_name)
# Adds the prefix of the selected object to the specified text field.
This function allows you to add the prefix of the selected object as input to any window with a “<==” button.
graph TB Start[("fa:fa-play Start")] --> CheckShArgs{"/fas:fa-question-circle Check shArgs"} CheckShArgs --"If shArgs Exist"--> ParseShArgs["/fas:fa-cogs Parse shArgs"] CheckShArgs --"If shArgs Do Not Exist"--> GetSelectedObjects{"/fas:fa-list-ol Get Selected Objects"} ParseShArgs --> GetSelectedObjects GetSelectedObjects --"If Objects are Selected"--> ExtractPrefix{"/fas:fa-cut Extract Prefix"} GetSelectedObjects --"If No Objects Selected"--> ClearTextField["/fas:fa-eraser Clear TextField"] ExtractPrefix --"Extract Prefix from First Object"--> UpdateTextField["/fas:fa-pencil-alt Update TextField"] ClearTextField --> End[("fas:fa-stop End")] UpdateTextField --> End style Start fill:#00cc00,stroke:#000,stroke-width:3px style CheckShArgs fill:#ffcc00,stroke:#000,stroke-width:2px style ParseShArgs fill:#ff9999,stroke:#000,stroke-width:2px style GetSelectedObjects fill:#99ccff,stroke:#000,stroke-width:2px style ExtractPrefix fill:#cc99ff,stroke:#000,stroke-width:2px style ClearTextField fill:#99ff99,stroke:#000,stroke-width:2px style UpdateTextField fill:#ffcc99,stroke:#000,stroke-width:2px style End fill:#ff6666,stroke:#000,stroke-width:3px- Flow Chart Description:
This flowchart illustrates the add_Prefix function:
The function starts by checking if shArgs are provided and updates txtFldName accordingly.
It then retrieves the list of currently selected objects.
If objects are selected, it extracts the prefix from the first object’s name.
The extracted prefix is then used to update the specified text field.
If no objects are selected, the function clears the specified text field.
The process ends after updating or clearing the text field.
- eRig.add_SelectedAttr(self, textFld, onlyAttrs=False, **shArgs)#
[shArgs : tf=textFld, oa=onlyAttrs]
Purpose:
:: Adds the selected object’s attribute from the channel box as input in any window for a “<==” button.
Argument | Description:
:param textFld: (<type str>) # The text field where the attribute will be added.
:param onlyAttrs: (<type bool, optional>) # If True, adds only attribute names; if False, adds 'object.attribute'.
:return: None
Code Examples:
>>> text_field_name = "textField1"  # Example text field name
>>> add_SelectedAttr(textFld=text_field_name, onlyAttrs=True)
# Adds the names of selected attributes to the specified text field.

>>> add_SelectedAttr(textFld="textField2", onlyAttrs=False)
# Adds 'object.attribute' of the selected attribute to the specified text field.
This function allows you to add the selected object’s attribute from the channel box as input to any window with a “<==” button.
graph TB Start[("fa:fa-play Start")] --> CheckSelectedObject{"/fas:fa-question-circle Check Selected Object"} CheckSelectedObject --"If Object Selected"--> RetrieveAttributes{"/fas:fa-list Retrieve Attributes"} CheckSelectedObject --"If No Object Selected"--> ClearTextField["/fas:fa-eraser Clear Text Field"] RetrieveAttributes --"If onlyAttrs is True"--> AddOnlyAttributes["/fas:fa-text-width Add Only Attributes"] RetrieveAttributes --"If onlyAttrs is False"--> AddObjectAttribute["/fas:fa-code Add Object.Attribute"] AddOnlyAttributes --> UpdateTextField["/fas:fa-text-width Update Text Field"] AddObjectAttribute --> UpdateTextField ClearTextField --> End["/fas:fa-stop End"] UpdateTextField --> End style Start fill:#00cc00,stroke:#000,stroke-width:3px style CheckSelectedObject fill:#ffcc00,stroke:#000,stroke-width:2px style RetrieveAttributes fill:#99ccff,stroke:#000,stroke-width:2px style ClearTextField fill:#ff9999,stroke:#000,stroke-width:2px style AddOnlyAttributes fill:#99ff99,stroke:#000,stroke-width:2px style AddObjectAttribute fill:#99ccff,stroke:#000,stroke-width:2px style UpdateTextField fill:#99ff99,stroke:#000,stroke-width:2px style End fill:#ff6666,stroke:#000,stroke-width:3px- Flow Chart Description:
This flowchart illustrates the add_SelectedAttr function:
The process starts by checking if an object is selected.
If an object is selected, it retrieves the object’s attributes.
Based on the onlyAttrs parameter, it either adds only attribute names or ‘object.attribute’ to the text field.
If no object is selected, the text field is cleared.
The process ends after updating or clearing the text field.
- eRig.add_Selection(self, textFld, multiSelect=False, **shArgs)#
[shArgs : tf=textFld, ms=multiSelect]
Purpose:
:: Adds the selected object’s name as input in any window for a “<==” button.
Argument | Description:
:param textFld: (<type str>) # The text field where the object name will be added.
:param multiSelect: (<type bool, optional>) # If set to True, allows multiple objects to be selected.
:return: None
Code Examples:
>>> text_field_name = "textField1"  # Example text field name
>>> add_Selection(textFld=text_field_name, multiSelect=True)
# Adds the names of selected objects (comma-separated) to the specified text field.

>>> add_Selection(textFld="textField2", multiSelect=False)
# Adds the name of the selected object to the specified text field.
This function allows you to add the selected object’s name as input to any window with a “<==” button.
graph TB Start[("fa:fa-play Start")] --> CheckShArgs{"/fas:fa-question-circle Check shArgs"} CheckShArgs --"If shArgs Exist"--> ParseShArgs["/fas:fa-cogs Parse shArgs"] CheckShArgs --"If shArgs Does Not Exist"--> InitializeParameters["/fas:fa-wrench Initialize Parameters"] InitializeParameters --> CheckMultiSelect{"/fas:fa-check-square Check MultiSelect"} CheckMultiSelect --"If MultiSelect is True"--> GetSelectedObjects{"/fas:fa-list Get Selected Objects"} GetSelectedObjects --"If Multiple Objects are Selected"--> JoinSelectedObjects["/fas:fa-compress Join Selected Objects"] JoinSelectedObjects --"Join Selected Object Names"--> SetTextFieldValue["/fas:fa-edit Set Text Field Value"] CheckMultiSelect --"If MultiSelect is False"--> GetSingleSelectedObject{"/fas:fa-dot-circle Get Single Selected Object"} GetSingleSelectedObject --"If a Single Object is Selected"--> SetTextFieldValue["/fas:fa-edit Set Text Field Value"] SetTextFieldValue --"Set Text Field Value"--> End["/fas:fa-stop End"] style Start fill:#00cc00,stroke:#000,stroke-width:3px style CheckShArgs fill:#ffcc00,stroke:#000,stroke-width:2px style ParseShArgs fill:#ff9999,stroke:#000,stroke-width:2px style InitializeParameters fill:#99ccff,stroke:#000,stroke-width:2px style CheckMultiSelect fill:#cc99ff,stroke:#000,stroke-width:2px style GetSelectedObjects fill:#ccffcc,stroke:#000,stroke-width:2px style JoinSelectedObjects fill:#ffcc99,stroke:#000,stroke-width:2px style GetSingleSelectedObject fill:#ffcc99,stroke:#000,stroke-width:2px style SetTextFieldValue fill:#00cc00,stroke:#000,stroke-width:3px style End fill:#ff6666,stroke:#000,stroke-width:3px- Flow Chart Description:
This flowchart illustrates the add_Selection function:
Checks if shArgs exist, and if so, parses the tf and ms from it.
If shArgs do not exist, initializes parameters with default values.
Checks if multiSelect is True or False.
If multiSelect is True, it gets the names of multiple selected objects, joins them into a comma-separated string, and sets the text field’s value.
If multiSelect is False, it gets the name of a single selected object and sets the text field’s value accordingly.
- eRig.add_SkinMesh_TF(self, textFld, leftTF='as_LPrefix_TF', rightTF='as_RPrefix_TF', checkAllPrefixes=False, **shArgs)#
[shArgs : tf=textFld, ltf=leftTF, rtf=rightTF, cp=checkAllPrefixes]
Purpose:
:: Adds specific text fields related to a skin mesh in a user interface.
Argument | Description:
:param textFld: (<type str>) # The text field in the window related to the skin mesh.
:param leftTF: (<type str, optional>) # Name of the left text field.
:param rightTF: (<type str, optional>) # Name of the right text field.
:param checkAllPrefixes: (<type bool, optional>) # If set to True, checks all prefixes related to the skin mesh.
:return: None
Code Examples:
>>> text_field_name = "textField_skinMesh"  # Example text field name
>>> left_text_field = "leftPrefixTextField"  # Example left text field name
>>> right_text_field = "rightPrefixTextField"  # Example right text field name
>>> add_SkinMesh_TF(textFld=text_field_name, leftTF=left_text_field, rightTF=right_text_field, checkAllPrefixes=True)
# Adds text fields related to the skin mesh in the UI, including left and right prefixes.

>>> add_SkinMesh_TF(textFld="textField_skinMesh")
# Adds a text field related to the skin mesh in the UI.
This function allows you to add specific text fields related to a skin mesh in a user interface.
graph TD Start[("fa:fa-play Start")] --> CheckShArgs{"/fas:fa-question-circle Check shArgs"} CheckShArgs --"If shArgs Exist"--> ParseShArgs["/fas:fa-cogs Parse shArgs"] CheckShArgs --"If shArgs Does Not Exist"--> InitializeParameters["/fas:fa-wrench Initialize Parameters"] InitializeParameters --> SetPrefixOrSuffix{"/fas:fa-pen-nib Set Prefix or Suffix"} SetPrefixOrSuffix --> GetSelectedObjects{"/fas:fa-list Get Selected Objects"} GetSelectedObjects --"If Objects are Selected"--> CheckSkinCluster{"/fas:fa-check-square Check Skin Cluster"} CheckSkinCluster --"If Skin Cluster Exists"--> GetSkinClusterJoints{"/fas:fa-list Get Skin Cluster Joints"} GetSkinClusterJoints --"If Joints Exist"--> SetTextFieldValue["/fas:fa-edit Set Text Field Value"] CheckSkinCluster --"If Skin Cluster Does Not Exist"--> SetTextFieldValue["/fas:fa-edit Set Text Field Value"] SetTextFieldValue --"Set Text Field Value"--> CheckLeftPrefix{"/fas:fa-check-square Check Left Prefix"} CheckLeftPrefix --"If Check All Prefixes"--> CheckAllPrefixes{"/fas:fa-check-square Check All Prefixes"} CheckLeftPrefix --"If Not Check All Prefixes"--> CheckRightPrefix{"/fas:fa-check-square Check Right Prefix"} CheckAllPrefixes --"If Check All Prefixes"--> CheckRightPrefix{"/fas:fa-check-square Check Right Prefix"} CheckRightPrefix --"If Check All Prefixes"--> CheckAllPrefixes{"/fas:fa-check-square Check All Prefixes"} CheckRightPrefix --"If Not Check All Prefixes"--> End["/fas:fa-stop End"] style Start fill:#00cc00,stroke:#000,stroke-width:3px style CheckShArgs fill:#ffcc00,stroke:#000,stroke-width:2px style ParseShArgs fill:#ff9999,stroke:#000,stroke-width:2px style InitializeParameters fill:#99ccff,stroke:#000,stroke-width:2px style SetPrefixOrSuffix fill:#99ccff,stroke:#000,stroke-width:2px style GetSelectedObjects fill:#ccffcc,stroke:#000,stroke-width:2px style CheckSkinCluster fill:#cc99ff,stroke:#000,stroke-width:2px style GetSkinClusterJoints fill:#ffcc99,stroke:#000,stroke-width:2px style SetTextFieldValue fill:#00cc00,stroke:#000,stroke-width:3px style CheckLeftPrefix fill:#cc99ff,stroke:#000,stroke-width:2px style CheckAllPrefixes fill:#ccffcc,stroke:#000,stroke-width:2px style CheckRightPrefix fill:#cc99ff,stroke:#000,stroke-width:2px style End fill:#ff6666,stroke:#000,stroke-width:3px- Flow Chart Description:
This flowchart illustrates the add_SkinMesh_TF function:
Checks if shArgs exist, and if so, parses the tf, ltf, rtf, and cp from it.
If shArgs do not exist, initializes parameters with default values.
Sets the prefix or suffix based on the user’s choice.
Gets the names of selected objects.
Checks if a skin cluster exists on the selected object.
If a skin cluster exists, it gets the joints influenced by the skin cluster.
Sets the text field’s value to the object’s name.
Checks if the user wants to check all prefixes.
If checkAllPrefixes is True, it checks both left and right prefixes.
If checkAllPrefixes is False, it checks the right prefix.
The flowchart ends after checking the prefixes.
- eRig.add_StripNumSelection(self, txtFldName, **shArgs)#
Purpose:
:: Adds objects name after stripping the end number as input in any window for <== button. :param txtFldName: The name of the text field in the window where the stripped object name will be added. :return: None
Usage:
obj10 # Adds ‘obj’ While pressing Enter.. <== button box25 # Adds ‘box’ While pressing Enter.. <== button
Code Examples:
>>> text_field_name = "textField_name"  # Example text field name
>>> add_StripNumSelection(txtFldName=text_field_name)
# Adds the stripped object name to the specified text field.
This function allows you to add the object’s name after stripping the end number as input in a window.
graph TD Start[("fa:fa-play Start")] --> CheckShArgs{"/fas:fa-question-circle Check shArgs"} CheckShArgs --"If shArgs Exist"--> ParseShArgs["/fas:fa-cogs Parse shArgs"] CheckShArgs --"If shArgs Does Not Exist"--> InitializeParameters["/fas:fa-wrench Initialize Parameters"] InitializeParameters --> GetSelectedObjects{"/fas:fa-list Get Selected Objects"} GetSelectedObjects --"If Objects Selected"--> StripEndNumber{"/fas:fa-minus-circle Strip End Number"} GetSelectedObjects --"If No Objects Selected"--> End["/fas:fa-stop End"] StripEndNumber --> SetTextFieldValue{"/fas:fa-pencil-alt Set Text Field Value"} SetTextFieldValue --> End["/fas:fa-stop End"] style Start fill:#00cc00,stroke:#000,stroke-width:3px style CheckShArgs fill:#ffcc00,stroke:#000,stroke-width:2px style ParseShArgs fill:#ff9999,stroke:#000,stroke-width:2px style InitializeParameters fill:#99ccff,stroke:#000,stroke-width:2px style GetSelectedObjects fill:#ccffcc,stroke:#000,stroke-width:2px style StripEndNumber fill:#ffcc99,stroke:#000,stroke-width:2px style SetTextFieldValue fill:#cc99ff,stroke:#000,stroke-width:2px style End fill:#ff6666,stroke:#000,stroke-width:3px- Flow Chart Description:
This flowchart illustrates the add_StripNumSelection function:
Checks if shArgs exist, and if so, parses the tf from it.
If shArgs do not exist, initializes parameters with default values.
Gets the currently selected objects.
If objects are selected, it strips the end number from the first selected object’s name.
Sets the value of the specified text field with the stripped object name.
If no objects are selected, the flowchart ends.
- eRig.as_GetConnections_NodeEditor(self, connectionType='input', **shArgs)#
[shArgs : ct=connectionType]
Purpose:
:: Retrieves the connected nodes in the Node Editor for a selected object in Maya, based on the type of connection.
Useful in visualizing and editing node connections for complex rigs and shading networks.
Enhances efficiency in navigating and understanding the node-based relationships in a scene.
- Parameters:
connectionType – <str> # Type of connection to query. Accepts ‘input’ or ‘output’.
- Returns:
None # This function does not return a value but operates on the Node Editor UI.
Code Examples:
>>> connection_type = "input"
>>> as_GetConnections_NodeEditor(connection_type)

# Opens the Node Editor and displays the input connections for the selected node.
graph TB style Start fill:#00cc00,stroke:#000,stroke-width:3px style CheckShArgs fill:#ffcc00,stroke:#000,stroke-width:2px style RetrieveNode fill:#ff9999,stroke:#000,stroke-width:2px style DetermineConnectionType fill:#99ccff,stroke:#000,stroke-width:2px style OpenNodeEditor fill:#99ff99,stroke:#000,stroke-width:2px style DisplayConnections fill:#99ff99,stroke:#000,stroke-width:2px style End fill:#ff6666,stroke:#000,stroke-width:3px Start[("fa:fa-play Start")] --> CheckShArgs{"/fas:fa-question-circle Check shArgs"} CheckShArgs --"If shArgs provided"--> RetrieveNode["/fas:fa-mouse-pointer Retrieve Node"] CheckShArgs --"If shArgs not provided"--> RetrieveNode RetrieveNode --> DetermineConnectionType["/fas:fa-exchange-alt Determine Connection Type"] DetermineConnectionType --> OpenNodeEditor["/fas:fa-window-restore Open Node Editor"] OpenNodeEditor --> DisplayConnections["/fas:fa-sitemap Display Connections"] DisplayConnections --> End[("fas:fa-stop End")]- Flow Chart Description:
This flowchart illustrates the as_GetConnections_NodeEditor function:
The process starts by checking if shArgs are provided, updating the connectionType parameter accordingly.
It retrieves the currently selected node.
The type of connection (input or output) to be displayed is determined.
The Node Editor UI is opened.
The specified connections of the node are displayed in the Node Editor.
The function concludes after displaying the connections in the Node Editor.
- eRig.as_SaveScenePlus(self, **shArgs)#
Purpose:
:: Performs an enhanced save operation for the current Maya scene to version up.
Automates the versioning process for Maya scene files, ensuring organized and consistent file management.
Useful in production environments where frequent saving and version tracking is essential.
- Returns:
None # This function does not return a value but saves the current scene file with an incremented version number.
Code Examples:
>>> as_SaveScenePlus()
# Saves the current Maya scene as a new version, incrementing the existing version number in the filename.
graph TB style Start fill:#00cc00,stroke:#000,stroke-width:3px style SetProject fill:#ffcc00,stroke:#000,stroke-width:2px style RetrieveFileName fill:#ff9999,stroke:#000,stroke-width:2px style DetermineVersion fill:#99ccff,stroke:#000,stroke-width:2px style CheckExistence fill:#99ff99,stroke:#000,stroke-width:2px style SaveFile fill:#99ff99,stroke:#000,stroke-width:2px style End fill:#ff6666,stroke:#000,stroke-width:3px Start[("fa:fa-play Start")] --> SetProject["/fas:fa-folder Set Project"] SetProject --> RetrieveFileName["/fas:fa-file-alt Retrieve File Name"] RetrieveFileName --> DetermineVersion["/fas:fa-sort-numeric-up Determine Version"] DetermineVersion --> CheckExistence{"/fas:fa-search Check File Existence"} CheckExistence --"If File Exists"--> SaveFile["/fas:fa-save Save File"] CheckExistence --"If File Does Not Exist"--> SaveFile SaveFile --> End[("fas:fa-stop End")]- Flow Chart Description:
This flowchart illustrates the as_SaveScenePlus function:
The process begins by setting the project directory.
It then retrieves the current file name of the Maya scene.
The version number in the file name is determined and incremented.
The existence of the file with the new version number is checked.
The Maya scene is saved with the incremented version number, overwriting if the file already exists.
The function concludes after saving the scene file with the new version.
- eRig.as_eRig(self)#
To Support main scripts with repetitive tasks via eRig
- eRig.attrDivider(self, ctrlList, dividerName=None, **shArgs)#
[**shArgs : cl=ctrlList, dn=dividerName]
Purpose:
:: Adds a named divider to a list of controls, aiding in the organization and visual grouping of attributes in Maya.
Enhances the user interface by clearly separating groups of controls.
Customizable to fit different naming conventions and requirements.
- Parameters:
ctrlList – <list> # List of controls to add the divider to.
dividerName – <str, optional> # Name of the divider. Defaults to None. Adds divider : ‘_’ *(4 to 12) | dividerName
- Returns:
No return value.
Usage:
>>> attrDivider(['ctrl1', 'ctrl2'], dividerName='Custom Divider')
# Adds a divider named 'Custom Divider' to 'ctrl1' and 'ctrl2'.
graph TB style Start fill:#00cc00,stroke:#000,stroke-width:3px style CheckShArgs fill:#ffcc00,stroke:#000,stroke-width:2px style SetCtrlList fill:#ff9999,stroke:#000,stroke-width:2px style LoopThroughCtrlList fill:#99ccff,stroke:#000,stroke-width:2px style AddDivider fill:#99ff99,stroke:#000,stroke-width:2px style End fill:#ff6666,stroke:#000,stroke-width:3px Start[("fa:fa-play Start")] --> CheckShArgs{"/fas:fa-question-circle Check shArgs"} CheckShArgs --"If shArgs provided"--> SetCtrlList["/fas:fa-th-list Set CtrlList"] CheckShArgs --"If shArgs not provided"--> SetCtrlList SetCtrlList --> LoopThroughCtrlList["/fas:fa-repeat Loop Through CtrlList"] LoopThroughCtrlList --> AddDivider["/fas:fa-minus-square Add Divider"] AddDivider --> End[("fas:fa-stop End")]- Flow Chart Description:
This flowchart illustrates the attrDivider function:
The process starts by checking if shArgs are provided, updating ctrlList and dividerName.
It converts ctrlList into a list format if it’s not already one.
The function then iterates over each control in the ctrlList.
For each control, it adds a named divider or a default divider based on the given parameters.
The function concludes after adding dividers to all controls in the list.
- eRig.calcBoundingBox(self, ptList, **shArgs)#
[**shArgs : None]
Purpose:
:: Return bounding box that contains the specified list of points.
- Parameters:
ptList – (<list of str>) # List of points for which the bounding box is calculated.
- Returns:
(<MBoundingBox>) # Bounding box dimensions for the given points.
Example Usage:
>>> pointList = ["point1", "point2", "point3"]
>>> calcBoundingBox(pointList)
# Calculate bounding box for the specified list of points
graph TB Start[("fa:fa-play Start")] --> CheckPoints{"/fas:fa-question-circle Check Points"} CheckPoints --"Points Provided"--> InitializeBB[("/fas:fa-border-all Initialize Bounding Box")] CheckPoints --"No Points Provided"--> Error[("fa:fa-times Error")] InitializeBB --> ExpandBoundingBox[("/fas:fa-expand-arrows-alt Expand Bounding Box")] ExpandBoundingBox --> End[("/fas:fa-stop End")] style Start fill:#00cc00,stroke:#000,stroke-width:3px style CheckPoints fill:#ffcc00,stroke:#000,stroke-width:2px style InitializeBB fill:#99ff99,stroke:#000,stroke-width:2px style ExpandBoundingBox fill:#cc99ff,stroke:#000,stroke-width:2px style Error fill:#ff6666,stroke:#000,stroke-width:3px style End fill:#ff6666,stroke:#000,stroke-width:3px- Flow Chart Description:
This flowchart represents the calcBoundingBox function:
The process starts by checking if a list of points is provided.
If the points are provided, the function initializes the bounding box.
If no points are provided, an error is raised.
The function then expands the bounding box to include all the points in the list.
The function concludes after expanding the bounding box or encountering an error.
- eRig.captureHistory_SE(self, function, **shArgs)#
[shArgs : f=function]
Purpose:
:: A decorator function that captures output sent to the Maya Script Editor.
Argument | Description:
:param function: (<type function>) # The function whose script editor output you want to capture.
:return: (<type str>) # The Script Editor history.
Usage:
>>> @captureHistory_SE
>>> def functionName():
>>>     # Your function's code here
>>>     pass
>>> history = functionName()
# Returns the Script Editor history.
This decorator allows you to capture the output of a function when it’s executed in the Maya Script Editor.
Note: Make sure to decorate the function you want to capture as shown in the example.
graph TB Start_captureHistory_SE[("fa:fa-play Start")] --> CheckShArgs_captureHistory_SE{{"/fas:fa-question Check shArgs"}} CheckShArgs_captureHistory_SE --"If shArgs provided" --> UpdateFunction_captureHistory_SE["/fas:fa-sync-alt Update Function"] CheckShArgs_captureHistory_SE --"If shArgs not provided" --> PrepareTempFile_captureHistory_SE["/fas:fa-file-alt Prepare Temp File"] UpdateFunction_captureHistory_SE --> PrepareTempFile_captureHistory_SE PrepareTempFile_captureHistory_SE --> WrapFunction_captureHistory_SE["/fas:fa-layer-group Wrap Function"] WrapFunction_captureHistory_SE --> EnableHistory_captureHistory_SE["/fas:fa-clock Enable History"] EnableHistory_captureHistory_SE --> ExecuteFunction_captureHistory_SE["/fas:fa-play-circle Execute Function"] ExecuteFunction_captureHistory_SE --> DisableHistory_captureHistory_SE["/fas:fa-clock-o Disable History"] DisableHistory_captureHistory_SE --> ReadHistory_captureHistory_SE["/fas:fa-book-open Read History"] ReadHistory_captureHistory_SE --> ReturnHistory_captureHistory_SE["/fas:fa-check-circle-o Return History"] style Start_captureHistory_SE fill:#00cc00,stroke:#000,stroke-width:3px style CheckShArgs_captureHistory_SE fill:#ffcc00,stroke:#000,stroke-width:2px style UpdateFunction_captureHistory_SE fill:#99ccff,stroke:#000,stroke-width:2px style PrepareTempFile_captureHistory_SE fill:#99ccff,stroke:#000,stroke-width:2px style WrapFunction_captureHistory_SE fill:#99ccff,stroke:#000,stroke-width:2px style EnableHistory_captureHistory_SE fill:#99ccff,stroke:#000,stroke-width:2px style ExecuteFunction_captureHistory_SE fill:#99ccff,stroke:#000,stroke-width:2px style DisableHistory_captureHistory_SE fill:#99ccff,stroke:#000,stroke-width:2px style ReadHistory_captureHistory_SE fill:#99ccff,stroke:#000,stroke-width:2px style ReturnHistory_captureHistory_SE fill:#99ff99,stroke:#000,stroke-width:2px- Flow Chart Description:
This flowchart illustrates the captureHistory_SE function:
The function starts by checking for shArgs and updates the function if provided.
It prepares a temporary file to capture Script Editor output.
The function then wraps the given function to capture its output.
It enables history recording in the Script Editor and executes the function.
After execution, it disables history recording.
The function reads the captured history from the temporary file.
It returns the captured Script Editor history.
- eRig.centerPiv(self, objName, **shArgs)#
[shArgs : on=objName]
Purpose:
:: Centers the pivot of a given object in Maya.
Useful for adjusting the pivot point of an object to its geometric center, which is critical for proper transformations and animations.
Enhances precision and ease in manipulating objects within complex scenes or rigs.
- Parameters:
objName – <str> # The name of the object whose pivot is to be centered.
- Returns:
None # This function does not return any value.
Code Examples:
>>> object_name = "model_part"
>>> centerPiv(object_name)
graph TB style Start fill:#00cc00,stroke:#000,stroke-width:3px style CheckShArgs fill:#ffcc00,stroke:#000,stroke-width:2px style SelectObject fill:#ff9999,stroke:#000,stroke-width:2px style CenterPivot fill:#99ccff,stroke:#000,stroke-width:2px style End fill:#ff6666,stroke:#000,stroke-width:3px Start[("fa:fa-play Start")] --> CheckShArgs{"/fas:fa-question-circle Check shArgs"} CheckShArgs --"If shArgs provided"--> SelectObject["/fas:fa-mouse-pointer Select Object"] CheckShArgs --"If shArgs not provided"--> SelectObject SelectObject --> CenterPivot["/fas:fa-crosshairs Center Pivot"] CenterPivot --> End[("fas:fa-stop End")]- Flow Chart Description:
This flowchart illustrates the centerPiv function:
The process begins by checking if shArgs are provided, updating objName accordingly.
The function then selects the specified object in Maya.
The pivot of the selected object is centered using Maya’s Center Pivot command.
The function concludes after centering the pivot of the object.
- eRig.closeWindows(self, scriptEd=1, nodeEd=1, commandLine=0, **shArgs)#
[shArgs : se=scriptEd, ne=nodeEd, cl=commandLine]
Purpose:
:: Closes specified windows in the Maya interface, including the script editor, node editor, and command line.
Useful for streamlining the Maya interface and closing unnecessary windows during specific operations.
Enhances user experience by providing control over the visibility of various interface components.
- Parameters:
scriptEd – <int, optional> # Indicates whether the script editor should be closed. Default is 1.
nodeEd – <int, optional> # Indicates whether the node editor should be closed. Default is 1.
commandLine – <int, optional> # Indicates whether the command line should be closed. Default is 0.
- Returns:
None # This function does not return any value.
Code Examples:
>>> close_script_editor = 1
>>> close_node_editor = 1
>>> close_command_line = 0
>>> closeWindows(close_script_editor, close_node_editor, close_command_line)
# Closes the script editor and node editor, but keeps the command line open.
graph TB Start[("fa:fa-play Start")] --> CheckScriptEditor{"/fas:fa-code Check Script Editor"} CheckScriptEditor --"If scriptEd is True" --> CloseScriptEditor["/fas:fa-window-close Close Script Editor"] CheckScriptEditor --"If scriptEd is False" --> CheckNodeEditor{"/fas:fa-project-diagram Check Node Editor"} CloseScriptEditor --> CheckNodeEditor CheckNodeEditor --"If nodeEd is True" --> CloseNodeEditor["/fas:fa-window-close Close Node Editor"] CheckNodeEditor --"If nodeEd is False" --> CheckCommandLine{"/fas:fa-terminal Check Command Line"} CloseNodeEditor --> CheckCommandLine CheckCommandLine --"If commandLine is True" --> CloseCommandLine["/fas:fa-times-circle Close Command Line"] CheckCommandLine --"If commandLine is False" --> End[("/fas:fa-stop End")] CloseCommandLine --> End style Start fill:#00cc00,stroke:#000,stroke-width:3px style CheckScriptEditor fill:#ffcc00,stroke:#000,stroke-width:2px style CloseScriptEditor fill:#ff9999,stroke:#000,stroke-width:2px style CheckNodeEditor fill:#99ccff,stroke:#000,stroke-width:2px style CloseNodeEditor fill:#cc99ff,stroke:#000,stroke-width:2px style CheckCommandLine fill:#ffcc00,stroke:#000,stroke-width:2px style CloseCommandLine fill:#ff9999,stroke:#000,stroke-width:2px style End fill:#ff6666,stroke:#000,stroke-width:3px- Flow Chart Description:
This flowchart illustrates the closeWindows function:
The process starts by checking if the script editor should be closed.
If scriptEd is True, closes the script editor and then checks the node editor.
If nodeEd is True, closes the node editor and then checks the command line.
If commandLine is True, closes the command line.
The function concludes successfully.
- eRig.computeTime(self, killTime=False, processName=None, runCompute=True, overallCompute=False, refreshView=True, **shArgs)#
Purpose:
:: Computes and returns the time taken by a process or a set of processes in Maya.
Essential for tracking and analyzing the duration of various operations in Maya, especially in scripting and tool development.
Offers insight into performance and helps optimize processes by providing detailed timing information.
- Parameters:
killTime – <bool, optional> # If True, stops the time computation. Default is False.
processName – <str, optional> # Name of the process for time computation. Default is None.
runCompute – <bool, optional> # If True, runs the time computation. Default is True.
overallCompute – <bool, optional> # If True, computes the overall time for all processes. Default is False.
refreshView – <bool, optional> # If True, refreshes the view after computation. Default is True.
- Returns:
<list> # Array containing hours, minutes, seconds of computed time and a string representation of the same. | [[progressHour, progressMinute, progressSecond], ‘%dHr %dMin %dSec’ % (progressHour, progressMinute, progressSecond)] | For Ex, Returns: | [[0, 10, 25], ‘0Hr 10Min 25Sec’]
Code Examples:
>>> process_name = "Rigging Operation"
>>> compute_result = computeTime(processName=process_name)
# Returns an array containing the computed time and a formatted string.
graph TB Start[("fa:fa-play Start")] --> CheckComponentList{"/fas:fa-check-circle Check Component List"} CheckComponentList --"If component list is empty" --> GetSelection["/fas:fa-hand-pointer Get Selection"] GetSelection --> InitializePosition["/fas:fa-location-arrow Initialize Position"] CheckComponentList --"If component list is provided" --> FlattenList["/fas:fa-stream Flatten List"] FlattenList --> InitializePosition InitializePosition --> AppendComponentPosition["/fas:fa-plus-square Append Component Position"] AppendComponentPosition --"For each component" --> AveragePosition{"/fas:fa-calculator Average Position"} AveragePosition --"Calculate average position" --> ReturnResult["/fas:fa-share Return Result"] style Start fill:#00cc00,stroke:#000,stroke-width:3px style CheckComponentList fill:#ffcc00,stroke:#000,stroke-width:2px style GetSelection fill:#ff9999,stroke:#000,stroke-width:2px style FlattenList fill:#99ccff,stroke:#000,stroke-width:2px style InitializePosition fill:#cc99ff,stroke:#000,stroke-width:2px style AppendComponentPosition fill:#99ff99,stroke:#000,stroke-width:2px style AveragePosition fill:#ff6666,stroke:#000,stroke-width:2px style ReturnResult fill:#00cc00,stroke:#000,stroke-width:3px- Flow Chart Description:
This flowchart illustrates the getCenter function:
Begins by checking if the component list is provided.
If the component list is empty, it gets the current selection in Maya.
Initializes a position variable to store component positions.
Appends the position of each component in the provided list.
Calculates the average position of all components.
Returns the computed average position as [x, y, z] coordinates.
- eRig.confirmAction(self, action, raiseErr=False, trueVal='Yes', falseVal='No', ex1Btn=None, ex1Action=None, ex2Btn=None, ex2Action=None, ex3Btn=None, ex3Action=None, ex4Btn=None, ex4Action=None, **shortArgs)#
[shArgs : a=action, e=raiseErr, tv=trueVal, fv=falseVal, eb1=ex1Btn, ea1=ex1Action, eb2=ex2Btn, ea2=ex2Action, eb3=ex3Btn, ea3=ex3Action, eb4=ex4Btn, ea4=ex4Action]
Purpose:
:: Displays a confirmation dialog for a specific action in Maya and returns the user’s response.
Argument | Description:
:param action: (<type str>) # The action for which confirmation is required.
:param raiseErr: (<type bool, optional>) # If True, raises an error upon a negative response.
:param trueVal: (<type str, optional>) # Value to return if the action is confirmed. Defaults to 'Yes'.
:param falseVal: (<type str, optional>) # Value to return if the action is denied. Defaults to 'No'.
:param ex1Btn: (<type str, optional>) # Additional button for extended options.
:param ex1Action: (<type function, optional>) # Action to perform if the additional button is clicked.
:param ex2Btn: (<type str, optional>) # Additional button for extended options.
:param ex2Action: (<type function, optional>) # Action to perform if the additional button is clicked.
:param ex3Btn: (<type str, optional>) # Additional button for extended options.
:param ex3Action: (<type function, optional>) # Action to perform if the additional button is clicked.
:param ex4Btn: (<type str, optional>) # Additional button for extended options.
:param ex4Action: (<type function, optional>) # Action to perform if the additional button is clicked.
:return: (<type str, bool, None>) # The user’s response to the confirmation dialog.
Usage:
>>> action_text = "Are you sure you want to delete this object?"  # Example action text
>>> confirmation = confirmAction(action_text)
# Displays a confirmation dialog and returns 'Yes', 'No', or None based on the user's response.

>>> action_text = "Are you sure you want to delete this object?"  # Example action text
>>> confirmation = confirmAction(action_text, raiseErr=True)
# Displays a confirmation dialog and raises a RuntimeError if the user responds with 'No'.

>>> action_text = "Are you sure you want to save changes?"  # Example action text
>>> confirmation = confirmAction(action_text, trueVal='Save', falseVal='Cancel', ex1Btn='Don't Save')
# Displays a confirmation dialog with extended options and returns 'Save', 'Cancel', 'Don't Save', or None based on the user's response.
This function displays a confirmation dialog for a specific action in Maya and returns the user’s response. You can customize the buttons and actions when extended options are available.
graph TB Start_confirmAction[("fa:fa-play Start")] --> CheckShArgs_confirmAction{{"/fas:fa-question Check shArgs"}} CheckShArgs_confirmAction --"If shArgs provided" --> UpdateParams_confirmAction["/fas:fa-sync-alt Update Parameters"] CheckShArgs_confirmAction --"If shArgs not provided" --> DisplayDialog_confirmAction["/fas:fa-window-maximize Display Dialog"] UpdateParams_confirmAction --> DisplayDialog_confirmAction DisplayDialog_confirmAction --> DecisionPoint_confirmAction{{"/fas:fa-hand-pointer Decision Point"}} DecisionPoint_confirmAction --"User selects TrueVal" --> ReturnTrue_confirmAction["/fas:fa-check-circle-o Return True or TrueVal"] DecisionPoint_confirmAction --"User selects FalseVal" --> ReturnFalse_confirmAction["/fas:fa-times-circle-o Return False or FalseVal"] DecisionPoint_confirmAction --"User selects Ex1Btn" --> ExecuteEx1_confirmAction["/fas:fa-play Execute Ex1 Action"] ExecuteEx1_confirmAction --> ReturnEx1_confirmAction["/fas:fa-check-circle-o Return Ex1Btn or None"] DecisionPoint_confirmAction --"User selects Ex2Btn" --> ExecuteEx2_confirmAction["/fas:fa-play Execute Ex2 Action"] ExecuteEx2_confirmAction --> ReturnEx2_confirmAction["/fas:fa-check-circle-o Return Ex2Btn or None"] DecisionPoint_confirmAction --"User selects Ex3Btn" --> ExecuteEx3_confirmAction["/fas:fa-play Execute Ex3 Action"] ExecuteEx3_confirmAction --> ReturnEx3_confirmAction["/fas:fa-check-circle-o Return Ex3Btn or None"] DecisionPoint_confirmAction --"User selects Ex4Btn" --> ExecuteEx4_confirmAction["/fas:fa-play Execute Ex4 Action"] ExecuteEx4_confirmAction --> ReturnEx4_confirmAction["/fas:fa-check-circle-o Return Ex4Btn or None"] style Start_confirmAction fill:#00cc00,stroke:#000,stroke-width:3px style CheckShArgs_confirmAction fill:#ffcc00,stroke:#000,stroke-width:2px style UpdateParams_confirmAction fill:#99ccff,stroke:#000,stroke-width:2px style DisplayDialog_confirmAction fill:#99ccff,stroke:#000,stroke-width:2px style DecisionPoint_confirmAction fill:#ffcc00,stroke:#000,stroke-width:2px style ReturnTrue_confirmAction fill:#99ff99,stroke:#000,stroke-width:2px style ReturnFalse_confirmAction fill:#ff6666,stroke:#000,stroke-width:2px style ExecuteEx1_confirmAction fill:#99ccff,stroke:#000,stroke-width:2px style ReturnEx1_confirmAction fill:#99ff99,stroke:#000,stroke-width:2px style ExecuteEx2_confirmAction fill:#99ccff,stroke:#000,stroke-width:2px style ReturnEx2_confirmAction fill:#99ff99,stroke:#000,stroke-width:2px style ExecuteEx3_confirmAction fill:#99ccff,stroke:#000,stroke-width:2px style ReturnEx3_confirmAction fill:#99ff99,stroke:#000,stroke-width:2px style ExecuteEx4_confirmAction fill:#99ccff,stroke:#000,stroke-width:2px style ReturnEx4_confirmAction fill:#99ff99,stroke:#000,stroke-width:2px- Flow Chart Description:
This flowchart illustrates the confirmAction function:
The function starts by checking for shArgs and updates parameters if provided.
It then displays a confirmation dialog for the specified action.
Based on the user’s decision, the function returns True, False, or executes extended actions and returns their respective values.
The function supports customizing the dialog with additional buttons and actions.
- eRig.copyConstraints(self, src, dest, **shArgs)#
[shArgs : s=src, d=dest]
Purpose:
:: Copies constraints from a source object to a destination object in Maya.
Argument | Description:
:param src: (<type str>) # The source object from which constraints are copied.
:param dest: (<type str>) # The destination object to which constraints are applied.
:return: None
Code Examples:
>>> source_object = "source_node"  # Example source object
>>> destination_object = "destination_node"  # Example destination object
>>> copyConstraints(source_object, destination_object)
# Copies constraints from source_object to destination_object.
This function allows you to copy constraints from one object to another in Maya.
graph TB Start_copyConstraints[("fa:fa-play Start")] --> CheckShArgs_copyConstraints{{"/fas:fa-question Check shArgs"}} CheckShArgs_copyConstraints --"If shArgs provided" --> UpdateSrcDest_copyConstraints["/fas:fa-sync-alt Update Src & Dest"] CheckShArgs_copyConstraints --"If shArgs not provided" --> GetSrcDest_copyConstraints{{"/fas:fa-exchange-alt Get Src & Dest"}} UpdateSrcDest_copyConstraints --> GetSrcDest_copyConstraints GetSrcDest_copyConstraints --> ListConstraints_copyConstraints{{"/fas:fa-list-ul List Constraints"}} ListConstraints_copyConstraints --"List constraints from Src" --> ForEachConstraint_copyConstraints{{"/fas:fa-repeat For Each Constraint"}} ForEachConstraint_copyConstraints --"Process each constraint" --> DetermineConType_copyConstraints{{"/fas:fa-cog Determine Constraint Type"}} DetermineConType_copyConstraints --> ApplyConstraints_copyConstraints["/fas:fa-link Apply Constraints to Dest"] ApplyConstraints_copyConstraints --> End_copyConstraints[("fas:fa-stop End")] style Start_copyConstraints fill:#00cc00,stroke:#000,stroke-width:3px style CheckShArgs_copyConstraints fill:#ffcc00,stroke:#000,stroke-width:2px style UpdateSrcDest_copyConstraints fill:#99ccff,stroke:#000,stroke-width:2px style GetSrcDest_copyConstraints fill:#99ccff,stroke:#000,stroke-width:2px style ListConstraints_copyConstraints fill:#99ccff,stroke:#000,stroke-width:2px style ForEachConstraint_copyConstraints fill:#ffcc00,stroke:#000,stroke-width:2px style DetermineConType_copyConstraints fill:#ffcc00,stroke:#000,stroke-width:2px style ApplyConstraints_copyConstraints fill:#99ccff,stroke:#000,stroke-width:2px style End_copyConstraints fill:#ff6666,stroke:#000,stroke-width:3px- Flow Chart Description:
This flowchart illustrates the copyConstraints function:
The function starts by checking for shArgs and updates the source (src) and destination (dest) if provided.
It retrieves the constraints from the source object.
For each constraint, the function determines its type and applies similar constraints to the destination object.
The process ends once all constraints have been copied and applied.
- eRig.createJnts(self, jntNames, objOrPosList=[0, 0, 0], parentChain=True, jntRadius=1.0, **shArgs)#
[shArgs : jn=jntNames, opl=objOrPosList, pc=parentChain, jr=jntRadius]
Purpose:
:: Creates joints with given names at given objects or positions in Maya.
Argument | Description:
:param jntNames: (<type str/list>) # The names of the joints to be created. If it's a single string, it will be treated as a joint prefix.
:param objOrPosList: (<type str/list/list of lists>) # The objects or positions where the joints will be created.
:param parentChain: (<type bool, optional>) # If True, parents the created joints one under another in the given order. The first joint is the root joint.
:param jntRadius: (<type float, optional>) # Radius for the created joints.
:return: (<type list>) # A list of the created joints.
Code Examples:
>>> joint_names = ['joint1', 'joint2', 'joint3']  # Example joint names
>>> positions = [[1.0, 2.0, 1.5], [1, 3, 2], [2, 2, 2]]  # Example positions
>>> createJnts(jntNames=joint_names, objOrPosList=positions, parentChain=True, jntRadius=1.0)
# Creates joints with the specified names at the given positions and parents them in a chain.

>>> createJnts(jntNames='prefix_', objOrPosList=['pSphere1', 'pSphere2'], jntRadius=0.5)
# Creates joints with the specified prefix at the positions of the objects.
This function allows you to create joints in Maya, either with specified names or using a joint prefix. You can also specify whether to parent the joints in a chain and set the joint radius.
Creates Joints with given names at given objects or positions Args: —- jntNames –> 1. Ideally num of jntNames and num of objOrPosList should match
If jntNames is ‘str’, Then it will be treated as jntPrefix
To use single as it is, use list [‘hai’]: then ‘hai’ won’t be treated as jntPrefix
objOrPosList –> This can be obj or pos or list of any of these parentChain –> Parents created joints one under another in given order. First jnt is root jnt jntRadius–> (Optional) Radius for the created joints.
Usage:#
eRig.createJnts([‘a’, ‘b’], [[1.0, 2.0, 1.5], [1, 3, 2]]) eRig.createJnts(‘a’, [‘R_Hand_01_Skn_Jnt’, ‘R_Hand_02_Skn_Jnt’]) #_ ‘a’ will be treated as jntPrefix eRig.createJnts(‘a’, [1, 2, 1]) eRig.createJnts(‘a’, ‘pSphere2’) eRig.createJnts([‘a’, ‘b’], [‘pSphere2’, ‘pSphere1’])
graph TB Start[("fa:fa-play Start")] --> CheckInitJntNames{"/fas:fa-question-circle Check initJntNames Type"} CheckInitJntNames --"If initJntNames is a String"--> ConvertToSingleItemList["/fas:fa-list-ol Convert initJntNames to Single Item List"] CheckInitJntNames --"If initJntNames is a List"--> ProceedWithList["/fas:fa-arrow-right Proceed With initJntNames List"] ConvertToSingleItemList --> DetermineObjOrPosListType{"/fas:fa-stream Determine objOrPosList Type"} ProceedWithList --> DetermineObjOrPosListType DetermineObjOrPosListType --"If objOrPosList is a List"--> CheckFirstElement{"/fas:fa-question-circle Check First Element Type"} DetermineObjOrPosListType --"If objOrPosList is Not a List"--> CheckObjectExists{"/fas:fa-search Check if Object Exists"} CheckFirstElement --"If First Element is a List"--> UseAsPositionList["/fas:fa-map-marker-alt Use as Position List"] CheckFirstElement --"If First Element is Not a List"--> CheckIfObjectExists{"/fas:fa-search Check if Object Exists"} UseAsPositionList --> CreateJoints{"/fas:fa-bone Create Joints"} CheckIfObjectExists --"If Object Exists"--> GetPositions["/fas:fa-map-pin Get Positions"] CheckIfObjectExists --"If Object Does Not Exist"--> UseAsPositionList CheckObjectExists --"If Object Exists"--> GetPositions CheckObjectExists --"If Object Does Not Exist"--> End[("fas:fa-stop End")] GetPositions --> CreateJoints CreateJoints --"Create Joints"--> End style Start fill:#00cc00,stroke:#000,stroke-width:3px style CheckInitJntNames fill:#ffcc00,stroke:#000,stroke-width:2px style ConvertToSingleItemList fill:#ff9999,stroke:#000,stroke-width:2px style ProceedWithList fill:#99ccff,stroke:#000,stroke-width:2px style DetermineObjOrPosListType fill:#cc99ff,stroke:#000,stroke-width:2px style CheckFirstElement fill:#99ff99,stroke:#000,stroke-width:2px style UseAsPositionList fill:#ffcc99,stroke:#000,stroke-width:2px style CheckIfObjectExists fill:#ccffcc,stroke:#000,stroke-width:2px style GetPositions fill:#99ccff,stroke:#000,stroke-width:2px style CreateJoints fill:#cc99ff,stroke:#000,stroke-width:2px style CheckObjectExists fill:#99ff99,stroke:#000,stroke-width:2px style End fill:#ff6666,stroke:#000,stroke-width:3px- Flow Chart Description:
This flowchart illustrates the createJnts function:
The function begins by checking the type of initJntNames.
If initJntNames is a string, it is converted into a single-item list.
Next, it determines the type of objOrPosList.
If objOrPosList is a list, the function checks the type of its first element.
Depending on the element type, objOrPosList is either used directly as a position list or further checked for object existence.
If objOrPosList is not a list, the function checks if the referenced object exists.
Based on these checks, the function proceeds to either get positions or directly create joints.
The joints are created at the determined positions.
- eRig.cv(self, mNode, cvNum, **shArgs)#
[shArgs : mn=mNode, cn=cvNum]
Purpose:
:: Returns the CV (Control Vertex) name of a NURBS curve object in Maya.
Argument | Description:
:param mNode: (<type str>) # The NURBS curve object for which to return the CV name.
:param cvNum: (<type int>) # The CV number on the NURBS curve.
:return: (<type str>) # The CV name in the format ‘obj.cv[205]’.
Code Examples:
>>> curve_name = "nurbs_curve"  # Example NURBS curve name
>>> cv_number = 205  # Example CV number
>>> cv_name = cv(curve_name, cv_number)
# Returns 'nurbs_curve.cv[205]'
graph TB Start[("fa:fa-play Start")] --> CheckShArgs{"/fas:fa-question-circle Check shArgs"} CheckShArgs --"If shArgs Exist"--> ParseShArgs["/fas:fa-cogs Parse shArgs"] CheckShArgs --"If shArgs Does Not Exist"--> InitializeParameters["/fas:fa-wrench Initialize Parameters"] InitializeParameters --> ConstructCVName{"/fas:fa-list-alt Construct CV Name"} ConstructCVName --"Construct CV Name"--> End["/fas:fa-stop End"] style Start fill:#00cc00,stroke:#000,stroke-width:3px style CheckShArgs fill:#ffcc00,stroke:#000,stroke-width:2px style ParseShArgs fill:#ff9999,stroke:#000,stroke-width:2px style InitializeParameters fill:#99ccff,stroke:#000,stroke-width:2px style ConstructCVName fill:#00cc00,stroke:#000,stroke-width:3px style End fill:#ff6666,stroke:#000,stroke-width:3px- Flow Chart Description:
This flowchart illustrates the cv function:
Checks if shArgs exist, and if so, parses the mn and cn from it.
If shArgs do not exist, initializes parameters with default values.
Constructs the CV (Control Vertex) name in the format ‘obj.cv[205]’ based on the provided NURBS curve object and CV number.
- eRig.deleteHistory(self, nodeObj, **shArgs)#
[**shArgs : no=nodeObj]
Purpose:
:: Deletes the history of a node object in Maya.
- Parameters:
nodeObj – (<str>) # The object whose history is to be deleted.
- Returns:
None
Example Usage:
>>> object_to_clean = "myObject"  # Specify the object whose history needs to be deleted
>>> deleteHistory(nodeObj=object_to_clean)
graph TB Start[("fa:fa-play Start")] --> CheckNodeObj{"/fas:fa-question-circle Check Node Object"} CheckNodeObj --"Node Object Provided"--> DeleteHistory[("/fas:fa-eraser Delete History")] CheckNodeObj --"No Node Object Provided"--> Error[("fa:fa-times Error")] DeleteHistory --> End[("/fas:fa-stop End")] style Start fill:#00cc00,stroke:#000,stroke-width:3px style CheckNodeObj fill:#ffcc00,stroke:#000,stroke-width:2px style DeleteHistory fill:#99ff99,stroke:#000,stroke-width:2px style Error fill:#ff6666,stroke:#000,stroke-width:3px style End fill:#ff6666,stroke:#000,stroke-width:3px- Flow Chart Description:
This flowchart represents the deleteHistory function:
The process begins by checking if a node object is provided.
If a node object is provided, it proceeds to delete the history of that node.
If no node object is provided, an error is raised.
The function concludes after the history is deleted or an error occurs.
- eRig.deleteNodes(self, delList=None, **shArgs)#
[**shArgs : dl=delList]
Purpose:
:: Deletes a list of specified nodes in Maya.
- Parameters:
delList – (<list, optional>) # List of nodes to be deleted. If not provided, a default set of nodes will be considered.
- Returns:
None
Example Usage:
>>> nodes_to_delete = ["node1", "node2", "node3"]  # Specify the list of nodes to be deleted
>>> deleteNodes(delList=nodes_to_delete)
graph TB Start[("fa:fa-play Start")] --> CheckDelList{"/fas:fa-question-circle Check Delete List"} CheckDelList --"Delete List Provided"--> IterateAndDelete[("/fas:fa-trash-alt Iterate and Delete Nodes")] CheckDelList --"No Delete List Provided"--> Error[("fa:fa-times Error")] IterateAndDelete --> End[("/fas:fa-stop End")] style Start fill:#00cc00,stroke:#000,stroke-width:3px style CheckDelList fill:#ffcc00,stroke:#000,stroke-width:2px style IterateAndDelete fill:#99ff99,stroke:#000,stroke-width:2px style Error fill:#ff6666,stroke:#000,stroke-width:3px style End fill:#ff6666,stroke:#000,stroke-width:3px- Flow Chart Description:
This flowchart represents the deleteNodes function:
The process begins by checking if a list of nodes to delete is provided.
If the delete list is provided, the function iterates through the list and deletes each node.
If no delete list is provided, an error is raised.
The function concludes after all nodes in the list are deleted or an error occurs.
- eRig.deleteUnknownNodes(self, toPrint=False, **shArgs)#
[**shArgs : tp=toPrint]
Purpose:
:: Identifies and deletes unknown nodes in the Maya scene.
- Parameters:
toPrint – (<bool, optional>) # If True, prints the names of the unknown nodes that are deleted. Default is False.
- Returns:
None
Example Usage:
>>> deleteUnknownNodes(toPrint=True)  # Delete unknown nodes and print their names
>>> deleteUnknownNodes()  # Delete unknown nodes without printing their names
graph TB Start[("fa:fa-play Start")] --> FindUnknownNodes{"/fas:fa-search Find Unknown Nodes"} FindUnknownNodes --"Unknown Nodes Found"--> DecideToPrint{"/fas:fa-question-circle Decide to Print"} DecideToPrint --"Print Names"--> PrintNames[("/fas:fa-print Print Node Names")] DecideToPrint --"Don't Print"--> DeleteNodes[("/fas:fa-trash-alt Delete Nodes")] FindUnknownNodes --"No Unknown Nodes"--> NoAction[("fa:fa-ban No Action")] PrintNames --> End[("/fas:fa-stop End")] DeleteNodes --> End NoAction --> End style Start fill:#00cc00,stroke:#000,stroke-width:3px style FindUnknownNodes fill:#ffcc00,stroke:#000,stroke-width:2px style DecideToPrint fill:#ff9999,stroke:#000,stroke-width:2px style PrintNames fill:#99ccff,stroke:#000,stroke-width:2px style DeleteNodes fill:#99ff99,stroke:#000,stroke-width:2px style NoAction fill:#cccccc,stroke:#000,stroke-width:2px style End fill:#ff6666,stroke:#000,stroke-width:3px- Flow Chart Description:
This flowchart illustrates the deleteUnknownNodes function:
The process starts by searching for unknown nodes in the Maya scene.
If unknown nodes are found, the function decides whether to print their names based on the toPrint parameter.
If toPrint is True, it prints the names of the unknown nodes.
If toPrint is False, it deletes the unknown nodes.
If no unknown nodes are found, the function takes no action.
The process ends after printing names, deleting nodes, or taking no action.
- eRig.dupeNVersionUp(self, topGrp=None, parentOnly=0, inputGraph=0, sameNumbers=1, **shArgs)#
[**shArgs : tg=topGrp, po=parentOnly, ig=inputGraph, sn=sameNumbers]
Purpose:
:: Duplicates the specified top group in Maya and optionally versions up the duplicate.
- Parameters:
topGrp – (<str>, Optional) # Top group to be duplicated. If not provided, a default group is considered.
parentOnly – (<int>, Optional) # If True, only the parent node is duplicated.
inputGraph – (<int>, Optional) # If True, includes the input graph in the duplication.
sameNumbers – (<int>, Optional) # If True, retains the same number in the duplicate name.
- Returns:
None
Example Usage:
>>> top_group = "myTopGroup"  # Specify the top group to be duplicated
>>> parent_only = 1  # Specify whether to duplicate only the parent node
>>> include_input_graph = 0  # Specify whether to include the input graph in duplication
>>> retain_same_numbers = 1  # Specify whether to retain the same numbers in the duplicate names
>>> dupeNVersionUp(topGrp=top_group, parentOnly=parent_only, inputGraph=include_input_graph, sameNumbers=retain_same_numbers)
graph TD Start[("fa:fa-play Start")] --> CheckTopGroup{"/fas:fa-question-circle Check Top Group"} CheckTopGroup --"Top Group Provided"--> DuplicateGroup[("/fas:fa-copy Duplicate Group")] CheckTopGroup --"No Top Group Provided"--> UseDefaultGroup[("/fas:fa-cogs Use Default Group")] DuplicateGroup --> VersionUpDuplication[("/fas:fa-arrow-up Version Up Duplication")] UseDefaultGroup --> VersionUpDuplication VersionUpDuplication --> End[("/fas:fa-stop End")] style Start fill:#00cc00,stroke:#000,stroke-width:3px style CheckTopGroup fill:#ffcc00,stroke:#000,stroke-width:2px style DuplicateGroup fill:#99ff99,stroke:#000,stroke-width:2px style UseDefaultGroup fill:#99ccff,stroke:#000,stroke-width:2px style VersionUpDuplication fill:#ff9999,stroke:#000,stroke-width:2px style End fill:#ff6666,stroke:#000,stroke-width:3px- Flow Chart Description:
This flowchart represents the dupeNVersionUp function:
The process starts by checking if the top group is provided.
If the top group is provided, it proceeds to duplicate the specified group.
If no top group is provided, it uses a default group for duplication.
After duplication, it performs a version up operation on the duplicated group.
The function concludes after the version up operation.
- eRig.endProgressBar(self, progBar, **shArgs)#
[shArgs : pb=progBar]
Purpose:
:: Completes and closes a progress bar in Maya.
Essential for signaling the completion of a process or operation in scripts and tools within Maya.
Provides a clean and user-friendly way to end progress tracking, enhancing script usability.
- Parameters:
progBar – <str> # The progress bar to be closed.
- Returns:
None # This function does not return any value but displays the completion time.
Code Examples:
>>> progress_bar_name = "myProgressBar"
>>> endProgressBar(progress_bar_name)
# Closes the progress bar and displays the total processing time.
graph TD Start[("fa:fa-play Start")] --> CheckShArgs{"/fas:fa-question-circle Check shArgs"} CheckShArgs --"Arguments Provided"--> CloseProgressBar{"/fas:fa-cogs Close Progress Bar"} CloseProgressBar --"Close Progress Bar"--> End["/fas:fa-stop End"] style Start fill:#00cc00,stroke:#000,stroke-width:3px style CheckShArgs fill:#ffcc00,stroke:#000,stroke-width:2px style CloseProgressBar fill:#99ff99,stroke:#000,stroke-width:2px style End fill:#ff6666,stroke:#000,stroke-width:3px- Flow Chart Description:
This flowchart illustrates the endProgressBar function:
The function starts with the provided arguments.
It checks if arguments are provided.
It closes the specified progress bar.
The function ends after closing the progress bar and displaying the completion time.
- eRig.endProgressWin(self, numItems=None, stopProgress=True, refreshView=0, useProgress=1, **shArgs)#
[shArgs : ni=numItems, sp=stopProgress, rv=refreshView, up=useProgress]
Purpose:
:: Completes and closes a progress window in Maya, with additional control over display and functionality.
Ideal for signaling the completion of lengthy operations or scripts in Maya, providing a clean end to progress tracking.
Offers options to display the number of items processed and to refresh the viewport upon completion.
- Parameters:
numItems – <int, optional> # Number of items processed in the progress window. Default is None.
stopProgress – <bool, optional> # If True, stops the progress. Default is True.
refreshView – <bool, optional> # If True, refreshes the Maya viewport. Default is False.
useProgress – <bool, optional> # If True, uses the progress data for closing. Default is True.
- Returns:
None # This function does not return any value but closes the progress window.
Code Examples:
>>> number_of_items = 100
>>> endProgressWin(number_of_items, stopProgress=True, refreshView=True, useProgress=True)
# Closes the progress window and displays the total number of items processed.
graph TB Start[("fa:fa-play Start")] --> CheckUseProgress{"/fas:fa-tasks Check Use Progress"} CheckUseProgress --"If useProgress is False" --> End[("/fas:fa-stop End")] CheckUseProgress --"If useProgress is True" --> CheckNumItems{"/fas:fa-list-ol Check Num Items"} CheckNumItems --"If numItems provided" --> UpdateNumItems["/fas:fa-sync Update Num Items"] UpdateNumItems --> StopProgress["/fas:fa-hand-paper Stop Progress"] StopProgress --> DisplayCompleted["/fas:fa-smile-beam Display Completed"] CheckNumItems --"If numItems not provided" --> StopProgress DisplayCompleted --> End style Start fill:#00cc00,stroke:#000,stroke-width:3px style CheckUseProgress fill:#ffcc00,stroke:#000,stroke-width:2px style CheckNumItems fill:#ff9999,stroke:#000,stroke-width:2px style UpdateNumItems fill:#99ccff,stroke:#000,stroke-width:2px style StopProgress fill:#cc99ff,stroke:#000,stroke-width:2px style DisplayCompleted fill:#99ff99,stroke:#000,stroke-width:2px style End fill:#ff6666,stroke:#000,stroke-width:3px- Flow Chart Description:
This flowchart depicts the endProgressWin function:
Begins by checking if progress windows are utilized.
If useProgress is False, the process ends.
If useProgress is True, it checks if numItems are provided.
Updates the progress window with the number of items processed.
Stops the progress and displays a completion message.
The function concludes by closing the progress window.
- eRig.error(self, errorMsg='Error.. Error..', **shArgs)#
[shArgs : em=errorMsg]
Purpose:
:: Displays an error message in a confirm dialog window and raises a RuntimeError in Maya.
Argument | Description:
:param errorMsg: (<type str, optional>) # The error message to be displayed in the dialog window.
:return: None (but raises a RuntimeError after the dialog is closed)
Code Examples:
>>> custom_error_message = "An error occurred!"  # Example error message
>>> error(errorMsg=custom_error_message)
# Displays an error dialog with the custom error message and raises a RuntimeError.
This function allows you to display an error message in a confirm dialog window and raise a RuntimeError in Maya.
graph TB Start[("fa:fa-play Start")] --> CheckErrorType{"/fas:fa-question-circle Check Error Type"} CheckErrorType --"If errorMsg is a list"--> JoinErrorMessage["/fas:fa-stream Join Error Message"] CheckErrorType --"If errorMsg is a string"--> DisplayErrorDialog["/fas:fa-exclamation-triangle Display Error Dialog"] JoinErrorMessage --> DisplayErrorDialog DisplayErrorDialog --"Display error in dialog"--> RaiseError["/fas:fa-exclamation-triangle Raise RuntimeError"] RaiseError --> End[("/fas:fa-stop End")] style Start fill:#00cc00,stroke:#000,stroke-width:3px style CheckErrorType fill:#ffcc00,stroke:#000,stroke-width:2px style JoinErrorMessage fill:#ff9999,stroke:#000,stroke-width:2px style DisplayErrorDialog fill:#99ccff,stroke:#000,stroke-width:2px style RaiseError fill:#cc99ff,stroke:#000,stroke-width:2px style End fill:#ff6666,stroke:#000,stroke-width:3px- Flow Chart Description:
This flowchart illustrates the error function:
The function starts by checking if errorMsg is a list.
If errorMsg is a list, it joins the list items into a single string.
Displays the error message in a dialog window.
Raises a RuntimeError with the error message.
- eRig.extractNum(self, objName, fromEnd=True, skipCount=0, **shArgs)#
[**shArgs : on=objName, fe=fromEnd, sc=skipCount]
Purpose:
:: Extracts a number from the end of an object’s name in Maya.
Helpful in scripts that need to parse and utilize numerical suffixes in object names for various reasons.
Analyzes an object’s name to extract a numerical value, typically used for indexing or identification.
- Parameters:
objName – <str> # The name of the object from which the number is to be extracted.
fromEnd – <bool, optional> # If True, extracts the number from the end of the name. Defaults to True.
skipCount – <int, optional> # Number of characters to skip from the end while extracting. Defaults to 0.
- Returns:
<list> [int, str] # The extracted number as an integer, and the number as a string.
Usage Examples:
>>> object_name = "cube105"
>>> extracted_number = extractNum(object_name)
# Returns [105, '105'] from 'cube105'.
graph TD Start[("fa:fa-play Start")] --> CheckShArgs{"/fas:fa-question-circle Check shArgs"} CheckShArgs --"If shArgs Exist"--> ParseShArgs["/fas:fa-cogs Parse shArgs"] CheckShArgs --"If shArgs Does Not Exist"--> InitializeParameters["/fas:fa-wrench Initialize Parameters"] InitializeParameters --> ExtractNumbers{"/fas:fa-search Extract Numbers"} ExtractNumbers --> CheckNumbers{"/fas:fa-question-circle Check Numbers"} CheckNumbers --"If Numbers Exist"--> ExtractNumber{"/fas:fa-plus Extract Number"} CheckNumbers --"If Numbers Do Not Exist"--> NoNumber["/fas:fa-stop No Number Found"] ExtractNumber --> End["/fas:fa-stop End"] NoNumber --> End["/fas:fa-stop End"] style Start fill:#00cc00,stroke:#000,stroke-width:3px style CheckShArgs fill:#ffcc00,stroke:#000,stroke-width:2px style ParseShArgs fill:#ff9999,stroke:#000,stroke-width:2px style InitializeParameters fill:#99ccff,stroke:#000,stroke-width:2px style ExtractNumbers fill:#ccffcc,stroke:#000,stroke-width:2px style CheckNumbers fill:#ffcc99,stroke:#000,stroke-width:2px style ExtractNumber fill:#cc99ff,stroke:#000,stroke-width:2px style NoNumber fill:#ff6666,stroke:#000,stroke-width:2px style End fill:#ff6666,stroke:#000,stroke-width:3px- Flow Chart Description:
This flowchart illustrates the extractNum function:
Checks if shArgs exist, and if so, parses the on, fe, and sc from it.
If shArgs do not exist, initializes parameters with default values.
Extracts numbers from the object name.
Checks if numbers exist in the object name.
If numbers exist, extracts the number and its string representation.
If no numbers are found, it terminates with a message.
- eRig.freeze(self, obj, **kwargs)#
[kwargs : o=obj]
Purpose:
:: Freezes transformations on a specified object in Maya.
Essential for resetting transformation values to zero without changing the object’s position, rotation, or scale in the scene.
Commonly used in 3D modeling and animation to clean up and standardize object transformations.
- Parameters:
obj – <str> # The object on which transformations are to be frozen.
kwargs – <dict> # Keyword arguments for custom freezing options.
- Returns:
None # This function does not return any value.
Code Examples:
>>> object_to_freeze = "model_part"
>>> freeze_options = {'t': 1, 'r': 1, 's': 1}
>>> freeze(object_to_freeze, **freeze_options)
graph TB style Start fill:#00cc00,stroke:#000,stroke-width:3px style CheckKwargs fill:#ffcc00,stroke:#000,stroke-width:2px style SelectObject fill:#ff9999,stroke:#000,stroke-width:2px style FreezeTransformations fill:#99ff99,stroke:#000,stroke-width:2px style ClearSelection fill:#99ff99,stroke:#000,stroke-width:2px style End fill:#ff6666,stroke:#000,stroke-width:3px Start[("fa:fa-play Start")] --> CheckKwargs{"/fas:fa-question-circle Check kwargs"} CheckKwargs --"If kwargs provided"--> SelectObject["/fas:fa-mouse-pointer Select Object"] CheckKwargs --"If kwargs not provided"--> SelectObject SelectObject --> FreezeTransformations["/fas:fa-snowflake-o Freeze Transformations"] FreezeTransformations --> ClearSelection["/fas:fa-times-circle Clear Selection"] ClearSelection --> End[("fas:fa-stop End")]- Flow Chart Description:
This flowchart illustrates the freeze function:
The process begins by checking if kwargs are provided, updating the obj parameter accordingly.
It selects the specified object.
Transformations (translation, rotation, and scale) are frozen on the object based on the kwargs.
The selection is cleared.
The function concludes after freezing the transformations and clearing the selection.
- eRig.generateCurv(self, curvName='as_Curv', deg=3, step=1, objOrPosList=None, showCVs=True, showEditor=False, printCommand=True, **shArgs)#
[shArgs: n=curvName, d=deg, s=step, opl=objOrPosList, sc=showCVs, se=showEditor, pc=printCommand]
Function:: generateCurv
Purpose:
:: Generates a curve with specified parameters in Maya.
- Parameters:
curvName – (<str>) # Name for the generated curve. Default is ‘as_Curv’.
deg – (<int>) # Degree of the curve. Default is 3.
step – (<int>) # Step value for the curve. Default is 1.
objOrPosList – (<list>) # List of objects or positions to define the curve.
showCVs – (<bool>) # If True, shows the CVs of the curve.
showEditor – (<bool>) # If True, opens the curve editor.
printCommand – (<bool>) # If True, prints the command used to create the curve.
- Returns:
curvNode # asNode
- Usage::
#_ (Usage: Select the vertices or objects not the curve itself)
>>> generateCurv(curvName="myCurve", deg=2, step=2, objOrPosList=["obj1", "obj2", "obj3"], showCVs=True, showEditor=False, printCommand=True)
graph TB style Start fill:#00cc00,stroke:#000,stroke-width:3px style CheckShArgs fill:#ffcc00,stroke:#000,stroke-width:2px style RetrievePositions fill:#ff9999,stroke:#000,stroke-width:2px style ReducePositionList fill:#99ccff,stroke:#000,stroke-width:2px style BuildCurveString fill:#99ff99,stroke:#000,stroke-width:2px style ExecuteCurveCommand fill:#99ff99,stroke:#000,stroke-width:2px style ShowCVs fill:#99ff99,stroke:#000,stroke-width:2px style ShowEditor fill:#99ff99,stroke:#000,stroke-width:2px style PrintCommand fill:#99ff99,stroke:#000,stroke-width:2px style ReturnCurveNode fill:#99ff99,stroke:#000,stroke-width:2px style End fill:#ff6666,stroke:#000,stroke-width:3px Start[("fa:fa-play Start")] --> CheckShArgs{"/fas:fa-question-circle Check shArgs"} CheckShArgs --"If shArgs provided"--> RetrievePositions["/fas:fa-object-group Retrieve Positions"] CheckShArgs --"If shArgs not provided"--> RetrievePositions RetrievePositions --> ReducePositionList["/fas:fa-compress-arrows-alt Reduce Position List"] ReducePositionList --> BuildCurveString["/fas:fa-pencil-ruler Build Curve String"] BuildCurveString --> ExecuteCurveCommand["/fas:fa-play-circle Execute Curve Command"] ExecuteCurveCommand --> ShowCVs{"/fas:fa-eye Show CVs"} ShowCVs --"If True"--> ShowEditor{"/fas:fa-edit Show Editor"} ShowCVs --"If False"--> PrintCommand{"/fas:fa-print Print Command"} ShowEditor --"If True"--> PrintCommand ShowEditor --"If False"--> PrintCommand PrintCommand --"If True"--> ReturnCurveNode["/fas:fa-curve Return Curve Node"] PrintCommand --"If False"--> ReturnCurveNode ReturnCurveNode --> End[("fas:fa-stop End")]- Flow Chart Description:
This flowchart illustrates the generateCurv function:
The process starts by checking if shArgs are provided, updating parameters accordingly.
It retrieves the positions from the objects or positions list.
The position list is reduced based on the step value.
A curve creation command string is built using the positions and curve parameters.
The curve command is executed to generate the curve.
If showCVs is True, the Curve Vertices (CVs) are displayed.
If showEditor is True, the curve editor is shown.
If printCommand is True, the curve creation command is printed.
The function concludes by returning the created curve node.
- eRig.geometryBoundingBox(self, geometry, precision=None, worldSpace=True, noIntermediate=True, visibleOnly=True, **shArgs)#
[**shArgs : p=precision, ws=worldSpace, ni=noIntermediate, vo=visibleOnly]
Purpose:
:: Calculates an accurate bounding box for specified geometry in Maya.
- Parameters:
geometry – (<str>) # The geometry for which the bounding box is calculated.
precision – (<int, optional>) # Precision level for bounding box calculation.
worldSpace – (<bool, optional>) # If True, calculates bounding box in world space. Default is True.
noIntermediate – (<bool, optional>) # If True, excludes intermediate shapes. Default is True.
visibleOnly – (<bool, optional>) # If True, considers only visible geometry. Default is True.
- Returns:
(<list of floats>) # Bounding box dimensions for the specified geometry as [minX, minY, minZ, maxX, maxY, maxZ].
Example Usage:
>>> geometryBoundingBox("myObject", precision=2, worldSpace=True, noIntermediate=False, visibleOnly=True)
# Calculate bounding box with precision 2, including intermediate shapes, and considering only visible geometry
>>> geometryBoundingBox("myObject")
# Calculate bounding box with default parameters
graph TB Start[("fa:fa-play Start")] --> GetGeometry{"/fas:fa-cube Get Geometry"} GetGeometry --"Geometry Provided"--> CalculateBoundingBox[("/fas:fa-expand-arrows-alt Calculate Bounding Box")] GetGeometry --"No Geometry Provided"--> Error[("fa:fa-times Error")] CalculateBoundingBox --> FormatResult[("/fas:fa-calculator Format Result")] FormatResult --> End[("/fas:fa-stop End")] style Start fill:#00cc00,stroke:#000,stroke-width:3px style GetGeometry fill:#ffcc00,stroke:#000,stroke-width:2px style CalculateBoundingBox fill:#99ff99,stroke:#000,stroke-width:2px style FormatResult fill:#cc99ff,stroke:#000,stroke-width:2px style Error fill:#ff6666,stroke:#000,stroke-width:3px style End fill:#ff6666,stroke:#000,stroke-width:3px- Flow Chart Description:
This flowchart represents the geometryBoundingBox function:
The process starts with obtaining the specified geometry.
If the geometry is provided, the function proceeds to calculate the bounding box.
If no geometry is provided, an error is raised.
After calculating, the function formats the bounding box dimensions.
The function concludes after formatting the result or encountering an error.
- eRig.getAsNodes(self, selList=None, showProgress=0, progressNote=0, createNodes=True, createType='transform', parent=None, **shArgs)#
[shArgs: sl=selList, sp=showProgress, pn=progressNote, cn=createNodes, ct=createType, p=parent]
Purpose:
Retrieves a list of asNodes based on the provided selection or criteria in Maya.
- Parameters:
selList – (Optional) # List of objects to be converted to asNodes. If not provided, a default selection is used.
showProgress – (Optional) # If True, shows a progress bar during the operation.
progressNote – (Optional) # Note to display on the progress bar.
createNodes – (Optional) # If True, creates new asNodes if they do not exist.
createType – (Optional) # Specifies the type of node to create if createNodes is True.
parent – (Optional) # Specifies a parent node for newly created asNodes.
- Returns:
list of asNodes # List of asNodes based on the provided selection or criteria.
Code Examples:
>>> getAsNodes(sl=['pCube1', 'pSphere1'], sp=1, pn='Generating asNodes !!', cn=1, ct='transform', p='group1')
# Retrieves a list of asNodes for 'pCube1' and 'pSphere1', shows progress bar, creates nodes if they don't exist, and sets 'group1' as the parent.

>>> getAsNodes(sp=1, pn='Generating asNodes !!', cn=1, ct='transform', p='group1')
# Retrieves a list of asNodes for the current selection, shows progress bar, creates nodes if they don't exist, and sets 'group1' as the parent.
graph TB Start[("fa:fa-play Start")] --> CheckShArgs{"/fas:fa-question-circle Check shArgs"} CheckShArgs --"If shArgs Exist"--> ParseShArgs["/fas:fa-cogs Parse shArgs"] CheckShArgs --"If shArgs Does Not Exist"--> InitializeParameters["/fas:fa-wrench Initialize Parameters"] InitializeParameters --> GetSelectedList{"/fas:fa-check-square Get Selected List"} GetSelectedList --"Get Selected List"--> CheckCreateNodes{"/fas:fa-question-circle Check Create Nodes"} CheckCreateNodes --"If Create Nodes is True"--> CreateNodes["/fas:fa-plus Create Nodes"] CheckCreateNodes --"If Create Nodes is False"--> SkipCreateNodes{"/fas:fa-arrow-right Skip Create Nodes"} SkipCreateNodes --> SelectObjects{"/fas:fa-mouse-pointer Select Objects"} CreateNodes --> SelectObjects SelectObjects --"Select Objects"--> CheckParent{"/fas:fa-question-circle Check Parent"} CheckParent --"If Parent is Specified"--> CreateWithParent["/fas:fa-sitemap Create with Parent"] CheckParent --"If No Parent is Specified"--> CreateWithoutParent["/fas:fa-sitemap Create without Parent"] CreateWithParent --"Create with Parent"--> AppendAsNodes{"/fas:fa-arrow-right Append asNodes"} CreateWithoutParent --"Create without Parent"--> AppendAsNodes AppendAsNodes --"Append asNodes"--> StartProgressWin{"/fas:fa-play Start Progress Window"} StartProgressWin --"Start Progress Window"--> IterateSelection{"/fas:fa-cogs Iterate Selection"} IterateSelection --"Iterate Selection"--> AppendAsNodeList{"/fas:fa-arrow-right Append asNode List"} AppendAsNodeList --"Append asNode List"--> ShowProgressWin{"/fas:fa-spinner Show Progress Window"} ShowProgressWin --"Show Progress Window"--> End["/fas:fa-stop End"] style Start fill:#00cc00,stroke:#000,stroke-width:3px style CheckShArgs fill:#ffcc00,stroke:#000,stroke-width:2px style ParseShArgs fill:#ff9999,stroke:#000,stroke-width:2px style InitializeParameters fill:#99ccff,stroke:#000,stroke-width:2px style GetSelectedList fill:#cc99ff,stroke:#000,stroke-width:2px style CheckCreateNodes fill:#ffcc99,stroke:#000,stroke-width:2px style SkipCreateNodes fill:#ccffcc,stroke:#000,stroke-width:2px style CreateNodes fill:#99ff99,stroke:#000,stroke-width:2px style SelectObjects fill:#cc99ff,stroke:#000,stroke-width:2px style CheckParent fill:#ffcc99,stroke:#000,stroke-width:2px style CreateWithParent fill:#ccffcc,stroke:#000,stroke-width:2px style CreateWithoutParent fill:#99ff99,stroke:#000,stroke-width:2px style AppendAsNodes fill:#cc99ff,stroke:#000,stroke-width:2px style StartProgressWin fill:#ffcc99,stroke:#000,stroke-width:2px style IterateSelection fill:#ccffcc,stroke:#000,stroke-width:2px style AppendAsNodeList fill:#99ff99,stroke:#000,stroke-width:2px style ShowProgressWin fill:#cc99ff,stroke:#000,stroke-width:2px style End fill:#ff6666,stroke:#000,stroke-width:3px- Flow Chart Description:
This flowchart illustrates the getAsNodes function:
Checks if shArgs exist and if so, parses various arguments from it.
If shArgs do not exist, initializes parameters with default values.
Retrieves a list of selected objects or uses the provided selList.
Checks if new nodes should be created (createNodes).
If new nodes should be created, checks if a parent is specified.
If a parent is specified, creates nodes with the parent.
If no parent is specified, creates nodes without a parent.
Appends the created or existing nodes to the asNodeList.
Initiates a progress window if showProgress is True.
Iterates over the selection, appending asNodes to asNodeList.
Updates the progress window during the operation.
Closes the progress window.
- eRig.getBoundingBox(self, geometry, worldSpace=True, **shArgs)#
[**shArgs : None]
Purpose:
:: Calculates the bounding box for specified geometry in Maya.
- Parameters:
geometry – (<str>) # The geometry for which the bounding box is calculated.
worldSpace – (<bool, Optional>) # If True, calculates bounding box in world space.
- Returns:
(<MBoundingBox>) # Bounding box dimensions for the specified geometry.
Example Usage:
>>> geometry = "myGeometry"
>>> getBoundingBox(geometry, worldSpace=True)
# Calculate bounding box for specified geometry in world space
graph TB Start[("fa:fa-play Start")] --> CheckGeometry{"/fas:fa-question-circle Check Geometry"} CheckGeometry --"Geometry Provided"--> CalculateBB[("/fas:fa-calculator Calculate Bounding Box")] CheckGeometry --"No Geometry Provided"--> Error[("fa:fa-times Error")] CalculateBB --> End[("/fas:fa-stop End")] style Start fill:#00cc00,stroke:#000,stroke-width:3px style CheckGeometry fill:#ffcc00,stroke:#000,stroke-width:2px style CalculateBB fill:#99ff99,stroke:#000,stroke-width:2px style Error fill:#ff6666,stroke:#000,stroke-width:3px style End fill:#ff6666,stroke:#000,stroke-width:3px- Flow Chart Description:
This flowchart represents the getBoundingBox function:
The function begins by verifying if the geometry is provided.
If the geometry is provided, it proceeds to calculate the bounding box of the specified geometry.
If no geometry is provided, an error is indicated.
The function concludes after calculating the bounding box or encountering an error.
- eRig.getBoundingBoxCenter(self, geometry, precision=None, worldSpace=True, **shArgs)#
[**shArgs : None]
Purpose:
:: Calculates the center of the bounding box for specified geometry in Maya.
- Parameters:
geometry – (<str>) # The geometry for which the bounding box center is calculated.
precision – (<int, Optional>) # Precision level for bounding box center calculation.
worldSpace – (<bool, Optional>) # If True, calculates the bounding box center in world space.
- Returns:
(<list>) # Center of the bounding box for the specified geometry as a list [x, y, z].
Example Usage:
>>> geometry = "myGeometry"
>>> getBoundingBoxCenter(geometry, precision=2, worldSpace=True)
# Calculate the center of the bounding box for specified geometry in world space with precision of 2 decimal places
graph TD Start[("fa:fa-play Start")] --> CheckGeometry{"/fas:fa-question-circle Check Geometry"} CheckGeometry --"Geometry Provided"--> CalculateCenter[("/fas:fa-cogs Calculate Bounding Box Center")] CheckGeometry --"No Geometry Provided"--> Error[("fa:fa-times Error")] CalculateCenter --> End[("/fas:fa-stop End")] style Start fill:#00cc00,stroke:#000,stroke-width:3px style CheckGeometry fill:#ffcc00,stroke:#000,stroke-width:2px style CalculateCenter fill:#99ff99,stroke:#000,stroke-width:2px style Error fill:#ff6666,stroke:#000,stroke-width:3px style End fill:#ff6666,stroke:#000,stroke-width:3px- Flow Chart Description:
This flowchart illustrates the logic of the getBoundingBoxCenter function:
The function starts by checking if the geometry is provided as input.
If the geometry is provided, it proceeds to calculate the center of the bounding box.
If the geometry is not provided, it raises an error.
The function ends after calculating the center or encountering an error.
- eRig.getBoundingBoxMax(self, geometry, worldSpace=True, **shArgs)#
[**shArgs : None]
Purpose:
:: Calculates the maximum point of the bounding box for specified geometry in Maya.
- Parameters:
geometry – (<str>) # The geometry for which the maximum point of the bounding box is calculated.
worldSpace – (<bool, Optional>) # If True, calculates the bounding box in world space.
- Returns:
(<list>) # Maximum point of the bounding box for the specified geometry as a list [x, y, z].
Example Usage:
>>> geometry = "myGeometry"
>>> getBoundingBoxMax(geometry, worldSpace=True)
# Calculate the maximum point of the bounding box for specified geometry in world space
graph TB Start[("fa:fa-play Start")] --> CheckInputs{"/fas:fa-question-circle Check Inputs"} CheckInputs --"Geometry Provided"--> GetBBox[("/fas:fa-cogs Get Bounding Box")] GetBBox --"Calculate in World Space"--> GetMaxPoint[("/fas:fa-map-marker-alt Get Max Point")] GetMaxPoint --> End[("/fas:fa-stop End")] CheckInputs --"No Geometry Provided"--> Error[("fa:fa-times Error")] style Start fill:#00cc00,stroke:#000,stroke-width:3px style CheckInputs fill:#ffcc00,stroke:#000,stroke-width:2px style GetBBox fill:#99ff99,stroke:#000,stroke-width:2px style GetMaxPoint fill:#99ccff,stroke:#000,stroke-width:2px style Error fill:#ff6666,stroke:#000,stroke-width:3px style End fill:#ff6666,stroke:#000,stroke-width:3px- Flow Chart Description:
This flowchart illustrates the logic of the getBoundingBoxMax function:
The process begins by checking if the geometry is provided.
If the geometry is provided, the bounding box for the specified geometry is calculated.
The maximum point of the bounding box is then calculated based on whether world space is true.
If no geometry is provided, an error is raised.
The process concludes after calculating the maximum point or encountering an error.
- eRig.getBoundingBoxMin(self, geometry, worldSpace=True, **shArgs)#
[**shArgs : None]
Purpose:
:: Calculates the minimum point of the bounding box for specified geometry in Maya.
- Parameters:
geometry – (<str>) # The geometry for which the minimum point of the bounding box is calculated.
worldSpace – (<bool, Optional>) # If True, calculates the bounding box in world space.
- Returns:
(<list>) # Minimum point of the bounding box for the specified geometry as a list [x, y, z].
Example Usage:
>>> geometry = "myGeometry"
>>> getBoundingBoxMin(geometry, worldSpace=True)
# Calculate the minimum point of the bounding box for specified geometry in world space
graph TB Start[("fa:fa-play Start")] --> CheckGeometry{"/fas:fa-question-circle Check Geometry"} CheckGeometry --"Geometry Provided"--> CalculateBoundingBox[("/fas:fa-cube Calculate Bounding Box")] CheckGeometry --"No Geometry Provided"--> Error[("fa:fa-times Error")] CalculateBoundingBox --> GetMinPoint[("/fas:fa-compress-arrows-alt Get Min Point of Bounding Box")] GetMinPoint --> End[("/fas:fa-stop End")] style Start fill:#00cc00,stroke:#000,stroke-width:3px style CheckGeometry fill:#ffcc00,stroke:#000,stroke-width:2px style CalculateBoundingBox fill:#99ff99,stroke:#000,stroke-width:2px style GetMinPoint fill:#cc99ff,stroke:#000,stroke-width:2px style Error fill:#ff6666,stroke:#000,stroke-width:3px style End fill:#ff6666,stroke:#000,stroke-width:3px- Flow Chart Description:
This flowchart represents the getBoundingBoxMin function:
The process begins by checking if geometry is provided as an input.
If geometry is provided, it proceeds to calculate the bounding box for the specified geometry.
If no geometry is provided, an error is raised.
After calculating the bounding box, the function extracts the minimum point of the bounding box.
The function concludes after extracting the minimum point or encountering an error.
- eRig.getBoundingBoxScale(self, geometry, precision=None, worldSpace=True, **shArgs)#
[**shArgs : None]
Purpose:
:: Calculates the scale of the bounding box for specified geometry in Maya.
- Parameters:
geometry – (<str>) # The geometry for which the bounding box scale is calculated.
precision – (<int, Optional>) # Precision level for bounding box scale calculation.
worldSpace – (<bool, Optional>) # If True, calculates the bounding box scale in world space.
- Returns:
(<list>) # Scale of the bounding box for the specified geometry as a list [x, y, z].
Example Usage:
>>> geometry = "myGeometry"
>>> getBoundingBoxScale(geometry, precision=2, worldSpace=True)
# Calculate the scale of the bounding box for specified geometry in world space with precision of 2 decimal places
graph TB Start[("fa:fa-play Start")] --> CheckInputs{"/fas:fa-question-circle Check Inputs"} CheckInputs --"Geometry, Precision, and World Space Provided"--> GetBoundingBoxMin{"/fas:fa-cogs Get Bounding Box Min"} CheckInputs --"Geometry, Precision, and World Space Provided"--> GetBoundingBoxMax{"/fas:fa-cogs Get Bounding Box Max"} CheckInputs --"Geometry, Precision, and World Space Provided"--> CalculateScale["/fas:fa-calculator Calculate Scale"] CheckInputs --"Geometry, Precision, and World Space Provided"--> CheckPrecision{"/fas:fa-question-circle Check Precision"} CheckPrecision --"If Precision is Provided"--> RoundScale["/fas:fa-calculator Round Scale"] CheckPrecision --"If Precision is Not Provided"--> ReturnScale["/fas:fa-check Return Scale"] GetBoundingBoxMin --> GetBoundingBoxMax GetBoundingBoxMax --> CalculateScale CalculateScale --> ReturnScale RoundScale --> ReturnScale ReturnScale --> End["/fas:fa-stop End"] style Start fill:#00cc00,stroke:#000,stroke-width:3px style CheckInputs fill:#ffcc00,stroke:#000,stroke-width:2px style GetBoundingBoxMin fill:#ff9999,stroke:#000,stroke-width:2px style GetBoundingBoxMax fill:#99ccff,stroke:#000,stroke-width:2px style CalculateScale fill:#cc99ff,stroke:#000,stroke-width:2px style CheckPrecision fill:#ffcc00,stroke:#000,stroke-width:2px style RoundScale fill:#99ff99,stroke:#000,stroke-width:2px style ReturnScale fill:#ccffcc,stroke:#000,stroke-width:2px style End fill:#ff6666,stroke:#000,stroke-width:3px- Flow Chart Description:
This flowchart illustrates the getBoundingBoxScale function:
Checks if the required inputs, including geometry, precision, and worldSpace, are provided.
- If all inputs are provided:
Retrieves the minimum and maximum points of the bounding box using the getBoundingBoxMin and getBoundingBoxMax functions.
Calculates the scale of the bounding box by subtracting the minimum point from the maximum point along each axis.
Checks if the precision argument is provided.
If precision is provided, rounds the scale values to the specified precision.
Returns the calculated scale as a list [x, y, z].
If any of the required inputs is missing, the function terminates with an error.
- eRig.getCenter(self, componentList=[], **shArgs)#
[shArgs: cl=componentList]
Purpose:
Calculates the world center of specified components in Maya.
- Parameters:
componentList – (<list, default: []>) # List of components for which the center is to be calculated.
- Returns:
(<list>) # World center of the specified components as [x, y, z] coordinates.
Code Examples:
>>> component_center = getCenter(cl=['pCube1.vtx[0:7]'])
graph TB Start[("fa:fa-play Start")] --> CheckComponentList{"/fas:fa-mouse-pointer Check Component List"} CheckComponentList --"If componentList is empty" --> GetCurrentSelection["/fas:fa-object-group Get Current Selection"] GetCurrentSelection --> InitializePosition["/fas:fa-map-marker-alt Initialize Position"] CheckComponentList --"If componentList is provided" --> FlattenList["/fas:fa-layer-group Flatten List"] FlattenList --> InitializePosition InitializePosition --> AppendPositions["/fas:fa-plus Append Component Positions"] AppendPositions --> AveragePosition["/fas:fa-calculator Average Position"] AveragePosition --> End["/fas:fa-stop End"] style Start fill:#00cc00,stroke:#000,stroke-width:3px style CheckComponentList fill:#ffcc00,stroke:#000,stroke-width:2px style GetCurrentSelection fill:#ff9999,stroke:#000,stroke-width:2px style InitializePosition fill:#99ccff,stroke:#000,stroke-width:2px style FlattenList fill:#cc99ff,stroke:#000,stroke-width:2px style AppendPositions fill:#99ff99,stroke:#000,stroke-width:2px style AveragePosition fill:#ff6666,stroke:#000,stroke-width:3px style End fill:#ff6666,stroke:#000,stroke-width:3px- Flow Chart Description:
This flowchart illustrates the getCenter function:
Starts by checking if the componentList is provided.
If componentList is empty, the current selection is used.
Initializes the position to [0.0, 0.0, 0.0].
Appends the world position of each component to the initialized position.
Averages the position based on the number of components.
Returns the averaged world center of the specified components.
- eRig.getClust(self, trgtList, clustName='as_Clust', **shArgs)#
[shArgs: tl=targetList, cn=clusterName]
Purpose:
Creates a cluster for a specified list of target components in Maya.
- Parameters:
targetList – (cvList | vtxList | faceList) # List of components (e.g., CVs, vertices, faces) to be included in the cluster.
clusterName – (Optional) # Name for the created cluster.
- Returns:
([asClust, clustNode, vtxList]) # An array containing the cluster node (asNode), the cluster handle node, and the list of vertices in the cluster.
Code Examples:
>>> target_components = ["pSphere1.cv[0][0]", "pSphere1.cv[1][1]", "pSphere1.cv[2][2]"]
>>> cluster_data = getClust(tl=target_components, cn='MyCluster')
graph TB Start[("fa:fa-play Start")] --> CheckShArgs{"/fas:fa-question-circle Check shArgs"} CheckShArgs --"If shArgs Exist"--> InitializeParameters["/fas:fa-wrench Initialize Parameters"] CheckShArgs --"If shArgs Does Not Exist"--> SelectTargetComponents["/fas:fa-mouse-pointer Select Target Components"] InitializeParameters --> SelectTargetComponents SelectTargetComponents --"Select Target Components in Maya"--> ConvertSelection["/fas:fa-exchange Convert Selection"] ConvertSelection --"Convert Selection to Vertices (if applicable)"--> CreateCluster["/fas:fa-magic Create Cluster"] CreateCluster --"Create Cluster"--> RenameClusterNode["/fas:fa-font Rename Cluster Node"] RenameClusterNode --"Rename Cluster Node"--> End["/fas:fa-stop End"] style Start fill:#00cc00,stroke:#000,stroke-width:3px style CheckShArgs fill:#ffcc00,stroke:#000,stroke-width:2px style InitializeParameters fill:#99ccff,stroke:#000,stroke-width:2px style SelectTargetComponents fill:#cc99ff,stroke:#000,stroke-width:2px style ConvertSelection fill:#99ff99,stroke:#000,stroke-width:2px style CreateCluster fill:#ccffcc,stroke:#000,stroke-width:2px style RenameClusterNode fill:#99ccff,stroke:#000,stroke-width:2px style End fill:#ff6666,stroke:#000,stroke-width:3px- Flow Chart Description:
This flowchart illustrates the getClust function:
The function starts by checking if shArgs exist.
If shArgs exist, it initializes parameters like targetList and clusterName based on the values in shArgs.
If shArgs do not exist, it uses the provided arguments for these parameters.
The function then selects the target components in Maya based on the targetList.
If the components are faces, it converts the selection to vertices.
The function creates a cluster using the selected vertices.
It renames the cluster node to the specified clusterName.
Finally, the function returns an array containing the cluster node (asNode), the cluster handle node, and the list of vertices in the cluster.
- eRig.getCommonParent(self, objList, getParentIndex=True, **shArgs)#
Purpose:
:: Identifies the common parent of a list of objects in Maya.
Useful in complex scene hierarchies to determine the shared parent among multiple objects.
Facilitates scene organization and hierarchy management, especially in rigging and animation workflows.
- Parameters:
objList – <list> # List of objects for which the common parent is to be identified.
getParentIndex – <bool, optional> # If True, returns the index of the parent in the hierarchy. Default is True.
- Returns:
<list> # The common parent object of the given list of objects, and optionally the parent index.
Code Examples:
>>> objects = ["obj1", "obj2", "obj3"]
>>> common_parent = getCommonParent(objects, getParentIndex=True)
# Returns [common_parent, parent_index]

>>> common_parent = getCommonParent(objects, getParentIndex=False)
# Returns [common_parent]
graph TB style Start fill:#00cc00,stroke:#000,stroke-width:3px style DetermineParentList fill:#ff9999,stroke:#000,stroke-width:2px style IdentifyCommonParent fill:#99ff99,stroke:#000,stroke-width:2px style CheckParentOf fill:#ffcc00,stroke:#000,stroke-width:2px style CalculateParentIndex fill:#ff9999,stroke:#000,stroke-width:2px style ReturnResult fill:#99ff99,stroke:#000,stroke-width:2px style End fill:#ff6666,stroke:#000,stroke-width:3px Start[("fa:fa-play Start")] --> DetermineParentList["/fas:fa-sitemap Determine Parent List"] DetermineParentList --> IdentifyCommonParent["/fas:fa-users-cog Identify Common Parent"] IdentifyCommonParent --> CheckParentOf{"/fas:fa-question-circle Check if Common Parent of All Objects"} CheckParentOf --"Yes"--> CalculateParentIndex["/fas:fa-sort-numeric-up Calculate Parent Index"] CheckParentOf --"No"--> ReturnResult["/fas:fa-times Return None"] CalculateParentIndex --> ReturnResult["/fas:fa-check-circle Return Common Parent and Index"] ReturnResult --> End[("fas:fa-stop End")]- Flow Chart Description:
This flowchart illustrates the getCommonParent function:
The process starts by determining the parent list of the first object in the given list.
It identifies the common parent among all objects in the list.
The function checks if the identified common parent is actually a parent of all objects in the list.
If so, it calculates the parent index if getParentIndex is True.
The function concludes by returning the common parent, and optionally the parent index, or None if no common parent is found.
- eRig.getComponentCount(self, geometry, **shArgs)#
[shArgs : g=geometry]
Purpose:
:: Returns the count of individual components for specified geometry in Maya.
Useful in 3D modeling and scripting to analyze and manipulate geometric structures.
Assists in automation tasks that require knowledge of the number of components in a geometry.
- Parameters:
geometry – <str> # The geometry object whose component count is queried.
- Returns:
<int> # Integer representing the number of components in the specified geometry.
Code Examples:
>>> geometry_name = "pCube1"
>>> component_count = getComponentCount(geometry_name)
graph TB style Start fill:#00cc00,stroke:#000,stroke-width:3px style CheckShArgs fill:#ffcc00,stroke:#000,stroke-width:2px style CheckGeometry fill:#ff9999,stroke:#000,stroke-width:2px style InitializeIterator fill:#99ccff,stroke:#000,stroke-width:2px style ReturnCount fill:#99ff99,stroke:#000,stroke-width:2px style End fill:#ff6666,stroke:#000,stroke-width:3px Start[("fa:fa-play Start")] --> CheckShArgs{"/fas:fa-question-circle Check shArgs"} CheckShArgs --"If shArgs provided"--> CheckGeometry["/fas:fa-check-square-o Check Geometry"] CheckShArgs --"If shArgs not provided"--> CheckGeometry CheckGeometry --> InitializeIterator["/fas:fa-sync-alt Initialize Iterator"] InitializeIterator --> ReturnCount["/fas:fa-calculator Return Component Count"] ReturnCount --> End[("fas:fa-stop End")]- Flow Chart Description:
This flowchart illustrates the getComponentCount function:
The process begins by checking if shArgs are provided, updating the geometry parameter accordingly.
It checks if the specified geometry exists and is valid.
An iterator for the geometry’s components is initialized.
The function concludes by returning the count of components in the specified geometry.
- eRig.getConstrainedObjects(self, driverObj, constraintList=['parent'], **shArgs)#
[shArgs: do=driverObj, cl=constraintList]
Purpose:
Returns a dictionary of constrained objects that are driven by the given driver object and a list of constraint types.
- Parameters:
driverObj – (<str>) # The name of the driver object in the scene.
constraintList – (<list, default: [‘parent’, ‘point’, ‘orient’, ‘aim’, ‘scale’, ‘normal’, ‘tangent’, ‘geometry’, ‘poleVector’]>) # A list of constraint types to search for.
- Returns:
(<dict>) # A dictionary containing the types of constraints as keys and their corresponding driven objects as values.
Code Examples:
>>> constrained_objects = getConstrainedObjects(do='cube1', cl=['parent', 'point'])
graph TB Start[("fa:fa-play Start")] --> CheckShArgs{"/fas:fa-question-circle Check shArgs"} CheckShArgs --"If shArgs Exist"--> InitializeParameters["/fas:fa-wrench Initialize Parameters"] CheckShArgs --"If shArgs Does Not Exist"--> CheckDriverObject["/fas:fa-cogs Check Driver Object"] InitializeParameters --> CheckDriverObject CheckDriverObject --"Check if Driver Object Exists"--> CreateConstraintDictionary["/fas:fa-database Create Constraint Dictionary"] CreateConstraintDictionary --"Create an Empty Constraint Dictionary"--> FetchConstraintHistory["/fas:fa-history Fetch Constraint History"] FetchConstraintHistory --"Fetch Constraint History"--> IterateConstraintTypes["/fas:fa-list-ul Iterate Constraint Types"] IterateConstraintTypes --"Iterate Through Constraint Types"--> FetchKeyAttribute["/fas:fa-search Fetch Key Attribute"] FetchKeyAttribute --"Fetch Key Attribute for Constraint Type"--> CheckIfAttributeExists["/fas:fa-question-circle Check If Attribute Exists"] CheckIfAttributeExists --"Check If Attribute Exists"--> GetDrivenObjects["/fas:fa-code Get Driven Objects"] GetDrivenObjects --"Get Driven Objects"--> CheckIfDrivenObjectIsDriver["/fas:fa-arrows-h Check If Driven Object Is Driver"] CheckIfDrivenObjectIsDriver --"Check If Driven Object Is Driver"--> AppendDrivenObject["/fas:fa-plus Append Driven Object"] AppendDrivenObject --"Append Driven Object to Constraint Dictionary"--> End["/fas:fa-stop End"] style Start fill:#00cc00,stroke:#000,stroke-width:3px style CheckShArgs fill:#ffcc00,stroke:#000,stroke-width:2px style InitializeParameters fill:#99ccff,stroke:#000,stroke-width:2px style CheckDriverObject fill:#cc99ff,stroke:#000,stroke-width:2px style CreateConstraintDictionary fill:#99ff99,stroke:#000,stroke-width:2px style FetchConstraintHistory fill:#ccffcc,stroke:#000,stroke-width:2px style IterateConstraintTypes fill:#99ccff,stroke:#000,stroke-width:2px style FetchKeyAttribute fill:#ffcc99,stroke:#000,stroke-width:2px style CheckIfAttributeExists fill:#99ff99,stroke:#000,stroke-width:2px style GetDrivenObjects fill:#ccffcc,stroke:#000,stroke-width:2px style CheckIfDrivenObjectIsDriver fill:#99ccff,stroke:#000,stroke-width:2px style AppendDrivenObject fill:#ffcc99,stroke:#000,stroke-width:2px style End fill:#ff6666,stroke:#000,stroke-width:3px- Flow Chart Description:
This flowchart illustrates the getConstrainedObjects function:
The function starts by checking if shArgs exist.
If shArgs exist, it initializes parameters like driverObj and constraintList based on the values in shArgs.
If shArgs do not exist, it uses the provided default values for these parameters.
The function then checks if the driverObj exists in the scene.
If the driverObj exists, it creates an empty constraint dictionary.
The function fetches the history of the driverObj, filtered by constraint type.
It iterates through each constraint type and fetches the key attribute associated with that type.
For each constraint type, it checks if the attribute exists.
If the attribute exists, it retrieves the driven objects and checks if they are different from the driverObj.
If they are different, the driven objects are appended to the constraint dictionary.
Finally, the function returns the constraint dictionary.
- eRig.getDupeNode(self, srcNode, dupName, centerPiv=False, grpDupNode=False, grpLevel=1, **shArgs)#
[**shArgs : sn=srcNode, dn=dupName, cp=centerPiv, gdn=grpDupNode, gl=grpLevel]
Purpose:
:: Creates a duplicate of a given Maya node with optional center pivot and group duplication features.
Useful in scenarios where duplicates of nodes are required with specific configurations like pivot centering or grouping.
Allows customization of the duplication process, catering to various rigging and scene setup needs.
- Parameters:
srcNode – <str> # The source node that is to be duplicated.
dupName – <str> # The name for the duplicate node.
centerPiv – <bool, optional> # Specifies whether to center the pivot on the duplicate node. Defaults to False.
grpDupNode – <bool, optional> # Determines if the duplicated node should be grouped. Defaults to False.
grpLevel – <int, optional> # Defines the group level for the duplicated node. Defaults to 1.
- Returns:
<asNode or list> # The duplicated node with the specified configurations, optionally within a group.
Usage:
>>> getDupeNode("pCube1", "pCube1_dup", True, True, 2)
# Creates a duplicate of 'pCube1', centers its pivot, groups it, and names the duplicate 'pCube1_dup'.
graph TB style Start fill:#00cc00,stroke:#000,stroke-width:3px style SelectSourceNode fill:#ffcc00,stroke:#000,stroke-width:2px style DuplicateNode fill:#ff9999,stroke:#000,stroke-width:2px style CenterPivot fill:#99ccff,stroke:#000,stroke-width:2px style GroupDuplicateNode fill:#cc99ff,stroke:#000,stroke-width:2px style End fill:#ff6666,stroke:#000,stroke-width:3px Start[("fa:fa-play Start")] --> SelectSourceNode{"/fas:fa-mouse-pointer Select Source Node"} SelectSourceNode --> DuplicateNode["/fas:fa-copy Duplicate Node"] DuplicateNode --> CenterPivot{"/fas:fa-bullseye Center Pivot"} CenterPivot --> GroupDuplicateNode{"/fas:fa-object-group Group Duplicate Node"} GroupDuplicateNode --> End["/fas:fa-stop End"]- Flow Chart Description:
This flowchart illustrates the getDupeNode function:
Starts the process by selecting the source node specified in the arguments.
Duplicates the selected source node to create a new node with the specified name.
Checks if the centerPiv flag is set to True.
If centerPiv is True, centers the pivot on the duplicated node.
Checks if the grpDupNode flag is set to True.
If grpDupNode is True, groups the duplicated node and assigns a group level.
The function concludes successfully.
- eRig.getExpressions(self, keyWords=[], **shArgs)#
[**shArgs : kw=keyWords]
Purpose:
:: Generates a list of expressions in Maya, filtered by specified keywords.
Facilitates the management and identification of expressions.
Enhances the ability to work with expressions in complex scenes.
- Parameters:
keyWords – <list, optional> # A list of keywords to filter the expressions. Defaults to an empty list.
- Returns:
<list> # A list of expressions matching the given keywords.
Usage:
>>> filteredExpressions = getExpressions(['bounce', 'wave'])
# Retrieves expressions containing 'bounce' or 'wave' in their names.
graph TB style CheckShArgs fill:#ffcc00,stroke:#000,stroke-width:2px style GetAllExpressions fill:#cc99ff,stroke:#000,stroke-width:2px style LoopExpressions fill:#99ccff,stroke:#000,stroke-width:2px style CheckKeywords fill:#ff9999,stroke:#000,stroke-width:2px style AddToResult fill:#00cc00,stroke:#000,stroke-width:2px style End fill:#ff6666,stroke:#000,stroke-width:3px CheckShArgs --"If shArgs Exist"--> GetAllExpressions{"/fas:fa-cogs Check Arguments"} CheckShArgs --"If shArgs Does Not Exist"--> GetAllExpressions GetAllExpressions --"Get All Expressions in the Scene"--> LoopExpressions{"/fas:fa-database Get All Expressions"} LoopExpressions --"Loop Through Each Expression"--> CheckKeywords{"/fas:fa-filter Filter Keywords"} CheckKeywords --"If Keywords Provided"--> AddToResult{"/fas:fa-plus Add Expression to Result"} CheckKeywords --"If No Keywords Provided"--> AddToResult AddToResult --"Repeat for Each Expression"--> LoopExpressions LoopExpressions --"Repeat for Each Expression"--> End["/fas:fa-stop End"]- Flow Chart Description:
This flowchart illustrates the getExpressions function:
Starts the process by checking if shArgs exist.
If shArgs exist, it proceeds to get all expressions in the scene.
If shArgs do not exist, it defaults to getting all expressions in the scene.
Loops through each expression.
Checks if keywords were provided.
If keywords were provided, it checks if any keyword matches the expression name.
If a match is found, it adds the expression to the result list.
Repeats this process for each expression in the scene.
- eRig.getFaceList(self, objName, sidePos=None, mirrAxis='x', **shArgs)#
[shArgs: n=objectName, sp=sidePos, ma=mirrAxis]
Purpose:
Generates a list of face indices for a specified object, with options for side position and mirror axis.
- Parameters:
- Returns:
(<list>) # A list of face indices based on the specified criteria.
Code Examples:
>>> face_indices = getFaceList(objName='myObject', sidePos='L_', mirrAxis='x')
graph TB style Start fill:#00cc00,stroke:#000,stroke-width:3px style CheckShArgs fill:#ffcc00,stroke:#000,stroke-width:2px style RetrieveObject fill:#ff9999,stroke:#000,stroke-width:2px style CheckSidePos fill:#99ccff,stroke:#000,stroke-width:2px style IterateFaces fill:#cc99ff,stroke:#000,stroke-width:2px style CheckMirrorAxis fill:#99ff99,stroke:#000,stroke-width:2px style SelectSideFaces fill:#cc99ff,stroke:#000,stroke-width:2px style ReturnFaceList fill:#99ff99,stroke:#000,stroke-width:2px style ReturnSideFaces fill:#99ff99,stroke:#000,stroke-width:2px style End fill:#ff6666,stroke:#000,stroke-width:3px Start[("fa:fa-play Start")] --> CheckShArgs{"/fas:fa-question-circle Check shArgs"} CheckShArgs --"If shArgs provided"--> RetrieveObject["/fas:fa-search-plus Retrieve Object"] CheckShArgs --"If shArgs not provided"--> RetrieveObject RetrieveObject --> CheckSidePos{"/fas:fa-code-branch Check Side Position"} CheckSidePos --"If sidePos is provided"--> IterateFaces["/fas:fa-sync-alt Iterate Faces"] CheckSidePos --"If sidePos is not provided"--> IterateFaces IterateFaces --> CheckMirrorAxis{"/fas:fa-arrows-alt-h Check Mirror Axis"} CheckMirrorAxis --"Determine faces based on axis"--> SelectSideFaces["/fas:fa-filter Select Side Faces"] SelectSideFaces --> ReturnSideFaces["/fas:fa-check-circle Return Side Faces"] CheckMirrorAxis --"No mirroring, all faces"--> ReturnFaceList["/fas:fa-check-circle Return Face List"] ReturnFaceList --> End[("fas:fa-stop End")] ReturnSideFaces --> End- Flow Chart Description:
This flowchart illustrates the getFaceList function:
The process starts by checking if shArgs are provided to update parameters.
Retrieves the object based on the provided objName.
Checks if a side position is specified.
Iterates through the faces of the object.
Checks the mirror axis to determine face selection.
If side position is provided, selects faces based on the mirror axis.
Returns the list of faces based on side position or all faces if no side position is specified.
- eRig.getFollicle(self, trgtFace, follicName='as_Follicle_01', **shArgs)#
[**shArgs : tf=trgtFace, fn=follicName]
Purpose:
:: Creates a follicle on a specified target face and returns the follicle node.
Essential for rigging and dynamics in Maya, particularly for attaching objects to deforming surfaces.
Enables precise placement of a follicle on a mesh, allowing for dynamic attachment to a specific face.
- Parameters:
trgtFace – <str> # The target face for follicle creation.
follicName – <str, optional> # Name of the created follicle. Defaults to ‘as_Follicle_01’.
- Returns:
<asNode> # The created follicle node.
Usage:
>>> getFollicle("pCube1.f[0]", "newFollicle")
# Creates a follicle on the first face of 'pCube1' and names it 'newFollicle'.
graph TB style Start fill:#00cc00,stroke:#000,stroke-width:3px style SelectTargetFace fill:#ffcc00,stroke:#000,stroke-width:2px style GetMeshDetails fill:#ff9999,stroke:#000,stroke-width:2px style CreateFollicleNode fill:#99ccff,stroke:#000,stroke-width:2px style MakeConnections fill:#cc99ff,stroke:#000,stroke-width:2px style GetCenterUV fill:#ff6666,stroke:#000,stroke-width:2px style SetUVValues fill:#99ff99,stroke:#000,stroke-width:2px style End fill:#ff6666,stroke:#000,stroke-width:3px Start[("fa:fa-play Start")] --> SelectTargetFace{"/fas:fa-mouse-pointer Select Target Face"} SelectTargetFace --> GetMeshDetails["/fas:fa-question-circle Get Mesh Details"] GetMeshDetails --> CreateFollicleNode{"/fas:fa-magic Create Follicle Node"} CreateFollicleNode --> MakeConnections{"/fas:fa-link Make Connections"} MakeConnections --> GetCenterUV{"/fas:fa-search Get Center UV"} GetCenterUV --> SetUVValues{"/fas:fa-pencil-alt Set UV Values"} SetUVValues --> End["/fas:fa-stop End"]- Flow Chart Description:
This flowchart illustrates the getFollicle function:
Starts the process by selecting the target face specified in the arguments.
Retrieves mesh details, including the mesh name and its shape.
Creates a follicle node and assigns it a name.
Establishes connections between the mesh shape and the follicle node.
Retrieves the center UV values of the target face.
Sets the UV values to the follicle shape.
Returns the created follicle node.
- eRig.getInputs(self, nodeName, nType='skinCluster', **shArgs)#
[**shArgs : nn=nodeName, nt=nType]
Purpose:
:: Retrieves inputs for a specified node with an option to specify the node type.
Critical for retrieving node dependencies and connections within complex Maya scenes.
Offers flexibility to target specific node types, aiding in rigging, animation, and technical setup tasks.
- Parameters:
nodeName – <str> # Name of the node to get inputs from.
nType – <str, optional> # Type of the node for input retrieval. Defaults to ‘skinCluster’.
- Returns:
<list or None> # A list of input connections for the specified node, or None if no connections are found.
Usage:
>>> getInputs("pCube1", "skinCluster")
# Retrieves skinCluster inputs connected to 'pCube1', if any.
graph TB style CheckShArgs fill:#ffcc00,stroke:#000,stroke-width:2px style SelectSourceNode fill:#ff9999,stroke:#000,stroke-width:2px style GetHistoryNodes fill:#99ccff,stroke:#000,stroke-width:2px style CheckNodeCount fill:#cc99ff,stroke:#000,stroke-width:2px style ReturnSkinCluster fill:#ffcc99,stroke:#000,stroke-width:2px style ReturnHistoryNodes fill:#ff9999,stroke:#000,stroke-width:2px style ReturnNone fill:#ccffcc,stroke:#000,stroke-width:2px style End fill:#ff6666,stroke:#000,stroke-width:3px CheckShArgs --"If shArgs Exist"--> SelectSourceNode{"/fas:fa-mouse-pointer Select Source Node"} CheckShArgs --"If shArgs Does Not Exist"--> SelectSourceNode SelectSourceNode --"Select Source Node"--> GetHistoryNodes{"/fas:fa-list Get History Nodes"} GetHistoryNodes --"Get History Nodes"--> CheckNodeCount{"/fas:fa-question-circle Check Node Count"} CheckNodeCount --"If Only One Node"--> ReturnSkinCluster{"/fas:fa-link Return SkinCluster"} CheckNodeCount --"If More Than One Node"--> ReturnHistoryNodes{"/fas:fa-link Return History Nodes"} CheckNodeCount --"If No Nodes"--> ReturnNone{"/fas:fa-times Return None"} ReturnSkinCluster --"Return SkinCluster"--> End["/fas:fa-stop End"] ReturnHistoryNodes --"Return History Nodes"--> End ReturnNone --"Return None"--> End- Flow Chart Description:
This flowchart illustrates the getInputs function:
Starts the process by checking if shArgs exist.
If shArgs exist, it proceeds to select the source node.
If shArgs do not exist, it directly selects the source node.
Selects the source node specified in the arguments.
Gets a list of history nodes for the selected node.
Checks the count of history nodes.
If there is only one history node, it returns the SkinCluster node if it matches the specified type.
If there are more than one history nodes, it returns the list of history nodes.
If there are no history nodes, it returns None.
- eRig.getLongestObj(self, src, objList, objType='obj', **shArgs)#
[shArgs : s=src, ol=objList, ot=objType]
Purpose:
:: Identifies the longest object in a list based on a specified type.
Useful in scenarios where spatial relationships between objects are critical, such as in scene layout or rigging.
Helps in selecting the farthest object relative to a specified source, which can be crucial in various modeling and animation tasks.
- Parameters:
src – <str> # The source object for comparison.
objList – <list> # A list of objects to compare against the source.
objType – <str, optional> # The type of objects being compared (objects/components). Default is ‘obj’.
- Returns:
<str> # The name of the longest object from the provided list.
Code Examples:
>>> source_object = "central_obj"
>>> comparison_objects = ["obj1", "obj2", "obj3"]
>>> object_type = "obj"
>>> longest_object = getLongestObj(source_object, comparison_objects, object_type)
graph TB style CheckShArgs fill:#ffcc00,stroke:#000,stroke-width:2px style DistanceDict fill:#00ccff,stroke:#000,stroke-width:2px style Loop fill:#00cc00,stroke:#000,stroke-width:2px style CalculateDistance fill:#00cc00,stroke:#000,stroke-width:2px style SelectLongestObject fill:#00cc00,stroke:#000,stroke-width:2px style ReturnResult fill:#00cc00,stroke:#000,stroke-width:3px style End fill:#ff6666,stroke:#000,stroke-width:3px CheckShArgs --"If shArgs Exist"--> DistanceDict{"/fas:fa-cogs Check Arguments"} CheckShArgs --"If shArgs Does Not Exist"--> DistanceDict DistanceDict --"Initialize Distance Dictionary"--> Loop{"/fas:fa-loop Loop Over Object List"} Loop --"Iterate Over Object List"--> CalculateDistance{"/fas:fa-calculator Calculate Distance"} CalculateDistance --"Calculate Distance"--> SelectLongestObject{"/fas:fa-arrows-alt-h Select Longest Object"} SelectLongestObject --"Select Longest Object"--> ReturnResult{"/fas:fa-check Return Result"} ReturnResult --"Return Result"--> End- Flow Chart Description:
This flowchart illustrates the getLongestObj function:
Starts the process by checking if shArgs exist.
If shArgs exist, it proceeds to initialize the distance dictionary.
If shArgs do not exist, it defaults to initializing the distance dictionary.
It then loops over the object list, calculating distances.
During the loop, it selects the longest object(s) based on the specified objType.
The function returns the result.
- eRig.getMBoundingBox(self, geometry, worldSpace=True, **shArgs)#
[**shArgs : g=geometry, ws=worldSpace]
Purpose:
:: Computes the bounding box for specified geometry in Maya, with an option for world or local space.
Useful for spatial analysis, collision detection, and layout scripting.
Provides vital geometric data for complex scene operations.
- Parameters:
geometry – <str> # The geometry to calculate the bounding box for.
worldSpace – <bool, optional> # If True, computes bounding box in world space. Defaults to True.
- Returns:
<MBoundingBox> # The bounding box of the specified geometry.
Usage:
>>> bbox = getMBoundingBox('pCube1', worldSpace=True)
# Computes the world space bounding box for 'pCube1'.
graph TB style Start fill:#00cc00,stroke:#000,stroke-width:3px style CheckShArgs fill:#ffcc00,stroke:#000,stroke-width:2px style CheckGeometry fill:#ff9999,stroke:#000,stroke-width:2px style GetMDagPath fill:#99ccff,stroke:#000,stroke-width:2px style ComputeBoundingBox fill:#99ff99,stroke:#000,stroke-width:2px style TransformToWorldSpace fill:#99ff99,stroke:#000,stroke-width:2px style ReturnBBox fill:#ff6666,stroke:#000,stroke-width:3px style PrintLocalWarning fill:#ffcc00,stroke:#000,stroke-width:2px Start[("fa:fa-play Start")] --> CheckShArgs{"/fas:fa-question-circle Check shArgs"} CheckShArgs --"If shArgs provided"--> CheckGeometry["/fas:fa-search Check Geometry"] CheckShArgs --"If shArgs not provided"--> CheckGeometry CheckGeometry --"If geometry exists"--> GetMDagPath["/fas:fa-code-branch Get MDagPath"] CheckGeometry --"If geometry does not exist"--> ReturnBBox[("fas:fa-times-circle Return Error")] GetMDagPath --> ComputeBoundingBox["/fas:fa-cube Compute BoundingBox"] ComputeBoundingBox --"If worldSpace"--> TransformToWorldSpace["/fas:fa-globe Transform To World Space"] ComputeBoundingBox --"If localSpace"--> PrintLocalWarning["/fas:fa-exclamation-triangle Print Local Warning"] TransformToWorldSpace --> ReturnBBox[("fas:fa-stop End (BBox)")] PrintLocalWarning --> ReturnBBox- Flow Chart Description:
This flowchart illustrates the getMBoundingBox function:
The process starts by checking if shArgs are provided, updating geometry and worldSpace accordingly.
It verifies if the specified geometry exists.
The function then retrieves the MDagPath for the geometry.
The bounding box is computed for the geometry.
If worldSpace is True, the bounding box is transformed to world space.
If worldSpace is False, a warning about the reliability of local space bounding box is printed.
The function concludes by returning the computed bounding box.
- eRig.getMDagPath(self, obj, **shArgs)#
[**shArgs : o=obj]
Purpose:
:: Retrieves the MDagPath for a specified Maya object.
Essential for accessing the DAG hierarchy and node information.
Useful for advanced scripting and plugin development in Maya.
- Parameters:
obj – <str> # The object for which the MDagPath is requested.
- Returns:
<MDagPath> # The MDagPath of the specified object.
Usage:
>>> dagPath = getMDagPath('pCube1')
# Retrieves the MDagPath for 'pCube1'.
graph TB style CheckShArgs fill:#ffcc00,stroke:#000,stroke-width:2px style SelectObject fill:#99ccff,stroke:#000,stroke-width:2px style GetActiveSelectionList fill:#99ccff,stroke:#000,stroke-width:2px style GetMDagPath fill:#cc99ff,stroke:#000,stroke-width:2px style End fill:#ff6666,stroke:#000,stroke-width:3px CheckShArgs --"If shArgs Exist"--> SelectObject{"/fas:fa-cogs Select Object"} CheckShArgs --"If shArgs Does Not Exist"--> SelectObject SelectObject --"Select Object"--> GetActiveSelectionList{"/fas:fa-list Get Active Selection List"} GetActiveSelectionList --"Get Active Selection List"--> GetMDagPath{"/fas:fa-cogs Get MDagPath"} GetMDagPath --"Get MDagPath"--> End["/fas:fa-stop End"]- Flow Chart Description:
This flowchart illustrates the getMDagPath function:
Starts the process by checking if shArgs exist.
If shArgs exist, it proceeds to select the specified object in Maya.
If shArgs do not exist, it selects the specified object using the default argument.
Gets the active selection list to capture the selected object.
Retrieves the MDagPath for the selected object.
- eRig.getMFnDependencyNode(self, mObj=None, **shArgs)#
[**shArgs : mo=mObj]
Purpose:
:: Obtains the MFnDependencyNode instance for a given Maya object.
- Parameters:
mObj – (Type: object, Optional) # The Maya object for which the MFnDependencyNode is required.
- Returns:
(Type: MFnDependencyNode) # An instance of MFnDependencyNode for the specified object.
Example Usage:
>>> selected_node = cmds.ls(selection=True)[0]  # Get the currently selected Maya object
>>> mfn_dep_node = getMFnDependencyNode(mObj=selected_node)

# Sample output: <openMaya.MFnDependencyNode; proxy of <Swig Object of type 'MFnDependencyNode *' at 0x0000020934A4B0F0> >
- if shArgs:
mObj = shArgs[‘mObj’] if ‘mObj’ in shArgs else mObj
graph TD Start[("fa:fa-play Start")] --> CheckShArgs{"/fas:fa-question-circle Check shArgs"} CheckShArgs --"Arguments Provided"--> GetMFnDependencyNode{"/fas:fa-cogs Get MFnDependencyNode"} GetMFnDependencyNode --"Obtain MFnDependencyNode"--> End["/fas:fa-stop End"] style Start fill:#00cc00,stroke:#000,stroke-width:3px style CheckShArgs fill:#ffcc00,stroke:#000,stroke-width:2px style GetMFnDependencyNode fill:#99ff99,stroke:#000,stroke-width:2px style End fill:#ff6666,stroke:#000,stroke-width:3px- Flow Chart Description:
This flowchart illustrates the getMFnDependencyNode function:
The function starts with the provided arguments.
It checks if arguments are provided.
It obtains the MFnDependencyNode instance for a given Maya object.
The function ends after obtaining the MFnDependencyNode instance.
- eRig.getMObject(self, obj, **shArgs)#
[**shArgs : o=obj]
Purpose:
:: Retrieves the MObject for a given Maya object.
Essential for advanced Maya API operations and custom tools.
Provides a bridge between Maya’s interface and the underlying API objects.
- Parameters:
obj – <str> # The name of the Maya object to get the MObject for.
- Returns:
<MObject> # The MObject corresponding to the specified Maya object.
Usage:
>>> mObj = getMObject('pCube1')
# Retrieves the MObject for 'pCube1'.
graph TB style Start fill:#00cc00,stroke:#000,stroke-width:3px style CheckShArgs fill:#ffcc00,stroke:#000,stroke-width:2px style SelectObject fill:#ff9999,stroke:#000,stroke-width:2px style CreateMObject fill:#99ff99,stroke:#000,stroke-width:2px style End fill:#ff6666,stroke:#000,stroke-width:3px Start[("fa:fa-play Start")] --> CheckShArgs{"/fas:fa-question-circle Check shArgs"} CheckShArgs --"If shArgs provided"--> SelectObject["/fas:fa-mouse-pointer Select Object"] CheckShArgs --"If shArgs not provided"--> SelectObject SelectObject --> CreateMObject["/fas:fa-code Create MObject"] CreateMObject --> End[("fas:fa-stop End")]- Flow Chart Description:
This flowchart illustrates the getMObject function:
The process begins by checking if shArgs are provided, updating obj accordingly.
The function then selects the specified Maya object.
An MObject is created corresponding to the selected object.
The function concludes by returning the MObject.
- eRig.getMPoint(self, point, **shArgs)#
[**shArgs : p=point]
Purpose:
:: Converts the position of a point or transform into an MPoint object in Maya.
Useful for geometric calculations and manipulations.
Simplifies the process of converting standard point formats to MPoint.
- Parameters:
point – <str/list/tuple> # The point or transform whose position is to be converted into an MPoint.
- Returns:
<MPoint> # An MPoint object representing the position of the specified point.
Usage:
>>> mPoint = getMPoint([1.0, 2.0, 3.0])
# Converts the coordinates [1.0, 2.0, 3.0] into an MPoint object.
graph TB style Start fill:#00cc00,stroke:#000,stroke-width:3px style CheckShArgs fill:#ffcc00,stroke:#000,stroke-width:2px style CheckMPointType fill:#ff9999,stroke:#000,stroke-width:2px style GetPosition fill:#99ccff,stroke:#000,stroke-width:2px style CreateMPoint fill:#99ff99,stroke:#000,stroke-width:2px style End fill:#ff6666,stroke:#000,stroke-width:3px Start[("fa:fa-play Start")] --> CheckShArgs{"/fas:fa-question-circle Check shArgs"} CheckShArgs --"If shArgs provided"--> CheckMPointType["/fas:fa-object-ungroup Check MPoint Type"] CheckShArgs --"If shArgs not provided"--> CheckMPointType CheckMPointType --"If already MPoint"--> End[("fas:fa-stop End")] CheckMPointType --"Otherwise"--> GetPosition["/fas:fa-map-marker-alt Get Position"] GetPosition --> CreateMPoint["/fas:fa-pencil-alt Create MPoint"] CreateMPoint --> End- Flow Chart Description:
This flowchart illustrates the getMPoint function:
The process begins by checking if shArgs are provided, updating point accordingly.
It checks if the provided point is already an MPoint.
If not an MPoint, it retrieves the position of the point.
An MPoint object is then created using the position coordinates.
The function concludes by returning the MPoint object.
- eRig.getMVector(self, point1=[0.0, 0.0, 0.0], point2=[0.0, 0.0, 0.0], getList=False, **shArgs)#
[**shArgs : p1=point1, p2=point2, gl=getList]
Purpose:
:: Calculates the vector between two points in Maya, with an option to return as a list.
Enables precise vector calculations for scripting and algorithmic operations.
Offers flexibility in return format for diverse usage scenarios.
- Parameters:
point1 – <list> # The start point for the vector calculation. Defaults to [0.0, 0.0, 0.0].
point2 – <list> # The end point for the vector calculation. Defaults to [0.0, 0.0, 0.0].
getList – <bool, optional> # If True, returns the vector as a list of coordinates. Defaults to False.
- Returns:
<MVector/list> # The calculated vector, either as an MVector or a list of coordinates.
Usage:
>>> mVector = getMVector([1.0, 0.0, 0.0], [0.0, 1.0, 0.0])
# Calculates the vector between two points and returns it as an MVector.
graph TB style CheckShArgs fill:#ffcc00,stroke:#000,stroke-width:2px style CreateMPoint1 fill:#99ccff,stroke:#000,stroke-width:2px style CreateMPoint2 fill:#99ccff,stroke:#000,stroke-width:2px style CalculateMVector fill:#cc99ff,stroke:#000,stroke-width:2px style ReturnAsList fill:#ff9999,stroke:#000,stroke-width:2px style ReturnAsMVector fill:#ff9999,stroke:#000,stroke-width:2px style End fill:#ff6666,stroke:#000,stroke-width:3px CheckShArgs --"If shArgs Exist"--> CreateMPoint1{"/fas:fa-cogs Create MPoint1"} CheckShArgs --"If shArgs Does Not Exist"--> CreateMPoint1 CreateMPoint1 --"Create MPoint1"--> CreateMPoint2{"/fas:fa-cogs Create MPoint2"} CreateMPoint2 --"Create MPoint2"--> CalculateMVector{"/fas:fa-calculator Calculate MVector"} CalculateMVector --"Calculate MVector"--> ReturnAsList{"/fas:fa-list Return as List"} CalculateMVector --"Calculate MVector"--> ReturnAsMVector{"/fas:fa-object-ungroup Return as MVector"} ReturnAsList --"Return as List"--> End["/fas:fa-stop End"] ReturnAsMVector --"Return as MVector"--> End- Flow Chart Description:
This flowchart illustrates the getMVector function:
Starts the process by checking if shArgs exist.
If shArgs exist, it proceeds to create MPoint1 using the provided coordinates.
If shArgs do not exist, it creates MPoint1 with default coordinates.
Creates MPoint2 using the provided or default coordinates.
Calculates the vector between MPoint1 and MPoint2.
Checks if the getList flag is set to True.
If getList is True, returns the calculated vector as a list.
If getList is False, returns the calculated vector as an MVector.
- eRig.getMacAddress(self, **shArgs)#
[shArgs : not applicable]
Purpose:
:: Retrieves the MAC address of the current machine, offering a way to identify the network hardware interface.
Useful in scenarios where machine-specific identification is required.
Cross-platform compatibility for both Windows and Linux/Unix systems.
- Returns:
<str> # The MAC address of the current machine.
Usage:
>>> mac_address = getMacAddress()
# Retrieves the MAC address of the machine running the script.
graph TB style Start fill:#00cc00,stroke:#000,stroke-width:3px style CheckPlatform fill:#ffcc00,stroke:#000,stroke-width:2px style Win32Command fill:#ff9999,stroke:#000,stroke-width:2px style UnixCommand fill:#99ccff,stroke:#000,stroke-width:2px style ReturnMacId fill:#99ff99,stroke:#000,stroke-width:2px style End fill:#ff6666,stroke:#000,stroke-width:3px Start[("fa:fa-play Start")] --> CheckPlatform{"/fas:fa-desktop Check Platform"} CheckPlatform --"If Windows"--> Win32Command["/fas:fa-windows Win32 Command"] CheckPlatform --"If Linux/Unix"--> UnixCommand["/fas:fa-linux Unix Command"] Win32Command --> ReturnMacId["/fas:fa-address-card Return MacId"] UnixCommand --> ReturnMacId ReturnMacId --> End[("fas:fa-stop End")]- Flow Chart Description:
This flowchart illustrates the getMacAddress function:
The process starts by checking the operating system platform.
If the platform is Windows (win32), it executes the “ipconfig /all” command and retrieves the MAC address from the output.
If the platform is Linux or Unix, it executes the “/sbin/ifconfig” command and retrieves the MAC address from the output.
The function then returns the MAC address in a standardized format.
The function concludes after retrieving and returning the MAC address.
- eRig.getMeshEdgeIter(self, mesh, edgeId=None, **shArgs)#
[**shArgs : m=mesh, ei=edgeId]
Purpose:
:: Initializes an MItMeshEdge iterator for a specified mesh in Maya.
Facilitates traversal and manipulation of mesh edges.
Ideal for custom algorithms and scripts targeting edge components.
- Parameters:
mesh – <str> # The mesh to initialize the edge iterator for.
edgeId – <int, optional> # The edge ID to start the iterator. Defaults to None.
- Returns:
<MItMeshEdge> # An initialized MItMeshEdge iterator for the given mesh.
Usage:
>>> edgeIter = getMeshEdgeIter('pCubeShape1', edgeId=5)
# Initializes an edge iterator for 'pCubeShape1' starting at edge ID 5.
graph TB style Start fill:#00cc00,stroke:#000,stroke-width:3px style CheckShArgs fill:#ffcc00,stroke:#000,stroke-width:2px style CheckMesh fill:#ff9999,stroke:#000,stroke-width:2px style GetShape fill:#99ccff,stroke:#000,stroke-width:2px style InitializeEdgeIter fill:#cc99ff,stroke:#000,stroke-width:2px style ReturnEdgeIter fill:#99ff99,stroke:#000,stroke-width:2px style End fill:#ff6666,stroke:#000,stroke-width:3px Start[("fa:fa-play Start")] --> CheckShArgs{"/fas:fa-question-circle Check shArgs"} CheckShArgs --"If shArgs provided"--> CheckMesh["/fas:fa-search Check Mesh"] CheckShArgs --"If shArgs not provided"--> CheckMesh CheckMesh --"If Mesh"--> GetShape["/fas:fa-project-diagram Get Shape"] CheckMesh --"If Not Mesh"--> End[("fas:fa-times-circle End")] GetShape --> InitializeEdgeIter["/fas:fa-arrows-alt Initialize Edge Iterator"] InitializeEdgeIter --> ReturnEdgeIter["/fas:fa-share Return Edge Iterator"] ReturnEdgeIter --> End[("fas:fa-stop End")]- Flow Chart Description:
This flowchart illustrates the getMeshEdgeIter function:
The process starts by checking if shArgs are provided, updating parameters like mesh and edgeId.
It checks if the provided object is a polygon mesh.
If it is a mesh, the function retrieves the shape node.
The function then initializes the MItMeshEdge iterator for the mesh.
If an edgeId is provided, it sets the iterator to start from that edge.
The function concludes by returning the initialized edge iterator.
- eRig.getMeshFaceIter(self, mesh, faceId=None, **shArgs)#
[**shArgs : m=mesh, fi=faceId]
Purpose:
:: Creates an MItMeshPolygon iterator for navigating faces of a polygon mesh in Maya.
Enables detailed access and manipulation of individual mesh faces.
Useful for custom scripts and tools focused on face-level operations.
- Parameters:
mesh – <str> # The mesh for which to create the face iterator.
faceId – <int, optional> # The face ID to start the iterator. Defaults to None.
- Returns:
<MItMeshPolygon> # An MItMeshPolygon iterator for navigating the faces of the mesh.
Usage:
>>> faceIter = getMeshFaceIter('pCubeShape1', faceId=3)
# Creates a face iterator for 'pCubeShape1' starting at face ID 3.
graph TB style Start fill:#00cc00,stroke:#000,stroke-width:3px style CheckShArgs fill:#ffcc00,stroke:#000,stroke-width:2px style CheckMeshType fill:#ff9999,stroke:#000,stroke-width:2px style GetMeshPath fill:#99ccff,stroke:#000,stroke-width:2px style InitializeIterator fill:#99ff99,stroke:#000,stroke-width:2px style End fill:#ff6666,stroke:#000,stroke-width:3px Start[("fa:fa-play Start")] --> CheckShArgs{"/fas:fa-question-circle Check shArgs"} CheckShArgs --"If shArgs provided"--> CheckMeshType["/fas:fa-code-branch Check Mesh Type"] CheckShArgs --"If shArgs not provided"--> CheckMeshType CheckMeshType --"If Mesh"--> GetMeshPath["/fas:fa-share-alt Get Mesh Path"] GetMeshPath --> InitializeIterator["/fas:fa-sync-alt Initialize Iterator"] InitializeIterator --> End[("fas:fa-stop End")]- Flow Chart Description:
This flowchart illustrates the getMeshFaceIter function:
The process starts by checking if shArgs are provided, updating parameters like mesh and faceId.
It then checks if the given mesh is a valid polygon mesh.
The function gets the mesh path using Maya’s API.
It initializes an MItMeshPolygon iterator for the mesh, optionally setting the face ID.
The function concludes by returning the face iterator.
- eRig.getMeshFn(self, mesh, **shArgs)#
[**shArgs : m=mesh]
Purpose:
:: Generates an MFnMesh function set for a specified polygon mesh in Maya.
Essential for advanced manipulation and analysis of polygon mesh geometry.
Provides access to numerous mesh-related operations and attributes.
- Parameters:
mesh – <str> # The name of the mesh to generate the MFnMesh function set for.
- Returns:
<MFnMesh> # An MFnMesh function set corresponding to the specified mesh.
Usage:
>>> meshFn = getMeshFn('pCubeShape1')
# Creates an MFnMesh function set for 'pCubeShape1'.
graph TB style Start fill:#00cc00,stroke:#000,stroke-width:3px style CheckShArgs fill:#ffcc00,stroke:#000,stroke-width:2px style CheckMeshType fill:#ff9999,stroke:#000,stroke-width:2px style GetMeshPath fill:#99ccff,stroke:#000,stroke-width:2px style CreateMFnMesh fill:#99ff99,stroke:#000,stroke-width:2px style End fill:#ff6666,stroke:#000,stroke-width:3px Start[("fa:fa-play Start")] --> CheckShArgs{"/fas:fa-question-circle Check shArgs"} CheckShArgs --"If shArgs provided"--> CheckMeshType["/fas:fa-check-square Check Mesh Type"] CheckShArgs --"If shArgs not provided"--> CheckMeshType CheckMeshType --"If mesh is transform"--> GetMeshPath["/fas:fa-sitemap Get Mesh Path"] CheckMeshType --"If mesh is shape"--> CreateMFnMesh["/fas:fa-cogs Create MFnMesh"] GetMeshPath --> CreateMFnMesh CreateMFnMesh --> End[("fas:fa-stop End")]- Flow Chart Description:
This flowchart illustrates the getMeshFn function:
The process begins by checking if shArgs are provided, updating mesh accordingly.
It then checks if the provided mesh is a transform or a shape.
If mesh is a transform, it retrieves the shape node.
The function then gets the DAG path of the mesh.
Using the DAG path, it creates an MFnMesh function set.
The function concludes by returning the MFnMesh function set.
- eRig.getModelPanel(self, **shArgs)#
[shArgs : not applicable]
Purpose:
:: Retrieves the name of the currently active model panel in Autodesk Maya’s user interface.
Essential for scripts that interact with the 3D view or require context regarding the current viewport.
Enhances scripts’ capabilities to interact dynamically with Maya’s UI components.
- Returns:
<str> # The name of the currently active model panel in Maya.
Usage:
>>> current_model_panel = getModelPanel()
# Returns the name of the currently active model panel in Maya.
graph TB style Start fill:#00cc00,stroke:#000,stroke-width:3px style GetPanels fill:#ffcc00,stroke:#000,stroke-width:2px style LoopThroughPanels fill:#ff9999,stroke:#000,stroke-width:2px style CheckActivePanel fill:#99ccff,stroke:#000,stroke-width:2px style ReturnPanelName fill:#99ff99,stroke:#000,stroke-width:2px style End fill:#ff6666,stroke:#000,stroke-width:3px Start[("fa:fa-play Start")] --> GetPanels["/fas:fa-columns Get Panels"] GetPanels --> LoopThroughPanels["/fas:fa-repeat Loop Through Panels"] LoopThroughPanels --> CheckActivePanel{"/fas:fa-check-circle Check Active Panel"} CheckActivePanel --"If active panel found"--> ReturnPanelName["/fas:fa-tv Return Panel Name"] CheckActivePanel --"If no active panel"--> End[("fas:fa-stop End")] ReturnPanelName --> End- Flow Chart Description:
This flowchart illustrates the getModelPanel function:
The process begins by retrieving all panels in Maya’s user interface.
It then loops through each panel to find the currently active model panel.
Once the active panel is identified, the function returns its name.
If no active model panel is found, the function returns None.
- eRig.getNearestObj(self, srcObj, destList, srcType='obj', destType='obj', nearCount=1, excludeList=None, **shArgs)#
[shArgs : so=srcObj, dl=destList, st=srcType, dt=destType, nc=nearCount, el=excludeList]
Purpose:
:: Finds the nearest object from a source object within a specified list, with various filtering options.
Useful in scenarios where the closest object to a given source needs to be identified, such as in collision detection or scene optimization.
Provides flexibility with source and destination types, and allows exclusion of specific objects from consideration.
- Parameters:
srcObj – <str> # The source object for distance comparison.
destList – <list> # A list of destination objects to compare distances.
srcType – <str, optional> # The type of the source object. Default is ‘obj’.
destType – <str, optional> # The type of the destination objects. Default is ‘obj’.
nearCount – <int, optional> # Number of nearest objects to find. Default is 1.
excludeList – <list, optional> # List of objects to exclude from the search.
- Returns:
<list/str> # The nearest object(s) from the source object based on the specified criteria.
Code Examples:
>>> source_object = "light1"
>>> destination_objects = ["cube1", "sphere1", "cone1"]
>>> nearest_object = getNearestObj(source_object, destination_objects, nearCount=2)
graph TB style CheckShArgs fill:#ffcc00,stroke:#000,stroke-width:2px style DistanceDict fill:#00ccff,stroke:#000,stroke-width:2px style ExcludeList fill:#00ccff,stroke:#000,stroke-width:2px style Loop fill:#00cc00,stroke:#000,stroke-width:2px style CalculateDistance fill:#00cc00,stroke:#000,stroke-width:2px style SortByDict fill:#00cc00,stroke:#000,stroke-width:2px style SelectObjects fill:#00cc00,stroke:#000,stroke-width:2px style ReturnResult fill:#00cc00,stroke:#000,stroke-width:3px style End fill:#ff6666,stroke:#000,stroke-width:3px CheckShArgs --"If shArgs Exist"--> DistanceDict{"/fas:fa-cogs Check Arguments"} CheckShArgs --"If shArgs Does Not Exist"--> DistanceDict DistanceDict --"Initialize Distance Dictionary"--> Loop{"/fas:fa-loop Loop Over Destination List"} Loop --"Iterate Over Destination List"--> CalculateDistance{"/fas:fa-calculator Calculate Distance"} CalculateDistance --"Calculate Distance"--> ExcludeList{"/fas:fa-minus-square Exclude Objects"} ExcludeList --"Exclude Objects"--> Loop Loop --"Iterate Over Destination List"--> SortByDict{"/fas:fa-sort Sort by Distance"} SortByDict --"Sort by Distance"--> SelectObjects{"/fas:fa-mouse-pointer Select Nearest Object(s)"} SelectObjects --"Select Nearest Object(s)"--> ReturnResult{"/fas:fa-check Return Result"} ReturnResult --"Return Result"--> End- Flow Chart Description:
This flowchart illustrates the getNearestObj function:
Starts the process by checking if shArgs exist.
If shArgs exist, it proceeds to initialize the distance dictionary.
If shArgs do not exist, it defaults to initializing the distance dictionary.
It then loops over the destination list, calculating distances.
During the loop, it excludes objects specified in the excludeList.
After calculating distances, it sorts the dictionary by distance.
It selects the nearest object(s) based on the specified nearCount.
The function returns the result.
- eRig.getOptionMenuItems(self, menuName, **shArgs)#
[shArgs : mn=menuName]
Purpose:
:: Retrieves the list of items from a specified option menu in Maya.
This function can be used to dynamically access and manipulate UI elements in custom Maya scripts.
Useful for automating tasks that involve interaction with Maya’s UI, such as rigging tools or animation scripts.
- Parameters:
menuName – <str> # The name of the option menu from which to retrieve items.
- Returns:
<list> # A list of strings, each representing an item in the specified option menu.
Code Examples:
>>> menu_name = "optionMenuExample"
>>> menu_items = getOptionMenuItems(menu_name)
graph TB style Start fill:#00cc00,stroke:#000,stroke-width:3px style CheckShArgs fill:#ffcc00,stroke:#000,stroke-width:2px style GetItemsCount fill:#ff9999,stroke:#000,stroke-width:2px style LoopThroughItems fill:#99ccff,stroke:#000,stroke-width:2px style AppendItems fill:#99ff99,stroke:#000,stroke-width:2px style End fill:#ff6666,stroke:#000,stroke-width:3px Start[("fa:fa-play Start")] --> CheckShArgs{"/fas:fa-question-circle Check shArgs"} CheckShArgs --"If shArgs provided"--> GetItemsCount["/fas:fa-list-ol Get Items Count"] CheckShArgs --"If shArgs not provided"--> GetItemsCount GetItemsCount --> LoopThroughItems["/fas:fa-repeat Loop Through Items"] LoopThroughItems --> AppendItems["/fas:fa-plus Append Items"] AppendItems --> End[("fas:fa-stop End")]- Flow Chart Description:
This flowchart illustrates the getOptionMenuItems function:
The process starts by checking if shArgs are provided, updating menuName accordingly.
It gets the count of items in the specified option menu.
The function loops through each item in the menu.
Each item is appended to a list.
The function concludes by returning the list of menu items.
- eRig.getOutputs(self, nodeName, **shArgs)#
[**shArgs : nn=nodeName]
Purpose:
:: Gathers the output connections of a given Maya node.
Facilitates the exploration and modification of node networks in Maya.
Provides an easy way to access all output connections for a given node, supporting various technical tasks.
- Parameters:
nodeName – <str> # The name of the Maya node to evaluate for output connections.
- Returns:
<list> # A list of nodes that are output connections of the specified node.
Usage:
>>> getOutputs("pCube1")
# Returns a list of all nodes connected as outputs to pCube1.
graph TB Start[("fa:fa-play Start")] --> CheckArgs{{"/fas:fa-question Check Args"}} CheckArgs --"If shArgs is provided" --> UpdateNodeName["/fas:fa-edit Update Node Name"] CheckArgs --"If shArgs is not provided" --> ListHistory["/fas:fa-history List History"] UpdateNodeName --> ListHistory ListHistory --> CheckHistNodes{"/fas:fa-check-circle Check HistNodes Length"} CheckHistNodes --"Length is 1"--> TryBlock["/fas:fa-code Try Block"] TryBlock --"Attempt to find node"--> CheckSkin["/fas:fa-search-plus Check Skin"] CheckSkin --"Skin found"--> ReturnSkin[("/fas:fa-arrow-right Return Skin")] TryBlock --"Exception occurs"--> PassBlock["/fas:fa-forward Pass Block"] PassBlock --> End[("fas:fa-stop End")] CheckHistNodes --"Length > 1"--> ReturnHistNodes[("/fas:fa-arrow-right Return HistNodes")] CheckHistNodes --"Length is 0"--> ReturnNone[("fas:fa-ban Return None")] ReturnSkin --> End ReturnHistNodes --> End ReturnNone --> End style Start fill:#00cc00,stroke:#000,stroke-width:3px style CheckArgs fill:#ffcc00,stroke:#000,stroke-width:2px style UpdateNodeName fill:#ff9999,stroke:#000,stroke-width:2px style ListHistory fill:#99ccff,stroke:#000,stroke-width:2px style CheckHistNodes fill:#ffcc00,stroke:#000,stroke-width:2px style TryBlock fill:#cc99ff,stroke:#000,stroke-width:2px style CheckSkin fill:#99ff99,stroke:#000,stroke-width:2px style ReturnSkin fill:#99ccff,stroke:#000,stroke-width:2px style PassBlock fill:#ff9999,stroke:#000,stroke-width:2px style ReturnHistNodes fill:#99ccff,stroke:#000,stroke-width:2px style ReturnNone fill:#ff9999,stroke:#000,stroke-width:2px style End fill:#ff6666,stroke:#000,stroke-width:3px- Flow Chart Description:
This flowchart illustrates the getOutputs function:
The process begins by checking if shArgs are provided, and if so, updates the nodeName.
It lists the history nodes of the specified node using the listHistory function.
The function then checks the length of the history nodes list.
If there is only one node, it enters a try block to find and return the node of a specific type.
In case of multiple history nodes, it returns the entire list.
If there are no history nodes, it returns None.
- eRig.getParentIndex(self, obj, prnt, **shArgs)#
[shArgs : o=obj, p=prnt]
Purpose:
:: Retrieves the index of a specified parent for a given Maya object.
Important for understanding and manipulating object hierarchies in complex scenes, particularly in rigging and animation.
Provides essential information for scripts and tools that rely on the order of parent objects in a hierarchy.
- Parameters:
obj – <str> # The Maya object for which the parent index is being queried.
prnt – <str> # The specific parent object whose index is to be determined.
- Returns:
<int> # The index of the specified parent in the hierarchy of the given object.
Code Examples:
>>> object_name = "object_child"
>>> parent_name = "object_parent"
>>> parent_index = getParentIndex(object_name, parent_name)
graph TB style Start fill:#00cc00,stroke:#000,stroke-width:3px style CheckShArgs fill:#ffcc00,stroke:#000,stroke-width:2px style CheckParentage fill:#ff9999,stroke:#000,stroke-width:2px style RetrieveParentList fill:#99ccff,stroke:#000,stroke-width:2px style DetermineIndex fill:#99ff99,stroke:#000,stroke-width:2px style ReturnIndex fill:#99ff99,stroke:#000,stroke-width:2px style End fill:#ff6666,stroke:#000,stroke-width:3px Start[("fa:fa-play Start")] --> CheckShArgs{"/fas:fa-question-circle Check shArgs"} CheckShArgs --"If shArgs provided"--> CheckParentage["/fas:fa-users Check Parentage"] CheckShArgs --"If shArgs not provided"--> CheckParentage CheckParentage --"If Parent Exists"--> RetrieveParentList["/fas:fa-list-ol Retrieve Parent List"] CheckParentage --"If No Parent"--> ReturnIndex["/fas:fa-times-circle Return No Index"] RetrieveParentList --> DetermineIndex["/fas:fa-sort-numeric-up Determine Index"] DetermineIndex --> ReturnIndex["/fas:fa-list-numeric Return Parent Index"] ReturnIndex --> End[("fas:fa-stop End")]- Flow Chart Description:
This flowchart illustrates the getParentIndex function:
The process starts by checking if shArgs are provided, updating obj and prnt accordingly.
It checks if the specified parent exists for the given object.
If the parent exists, the parent list of the object is retrieved.
The index of the specified parent in the hierarchy is determined.
The function concludes by returning the index of the parent.
- eRig.getPos(self, objList, objType='obj', **shArgs)#
[**shArgs : ol=objList, ot=objType]
Purpose:
:: Obtains the position of one or more Maya objects, with an option for object type specification.
Ideal for scripts requiring positional data of objects.
Supports various object types, enhancing versatility in usage.
- Parameters:
objList – <list/str> # List or name of Maya objects to retrieve positions for.
objType – <str> # The type of objects for position retrieval, like ‘obj’, ‘vtx’, ‘edg’, etc. Defaults to ‘obj’.
- Returns:
<list of lists> # A list containing the position vectors of the specified objects. For Ex: [[0, 2, 1]] or [[0, 2, 1], [1, 0, 1], ..] etc >> get single pos with : eRig.getPos(obj)[0]
Usage:
>>> positions = getPos(['pCube1', 'pSphere1'])
# Retrieves the positions of 'pCube1' and 'pSphere1' as a list.
graph TB style CheckShArgs fill:#ffcc00,stroke:#000,stroke-width:2px style CheckObjType fill:#99ccff,stroke:#000,stroke-width:2px style LoopObjects fill:#cc99ff,stroke:#000,stroke-width:2px style GetPosition fill:#99ccff,stroke:#000,stroke-width:2px style End fill:#ff6666,stroke:#000,stroke-width:3px CheckShArgs --"If shArgs Exist"--> CheckObjType{"/fas:fa-cogs Check Object Type"} CheckShArgs --"If shArgs Does Not Exist"--> CheckObjType CheckObjType --"Determine Object Type"--> LoopObjects{"/fas:fa-list Loop Objects"} LoopObjects --"Loop Through Objects"--> GetPosition{"/fas:fa-cogs Get Position"} GetPosition --"Get Position"--> LoopObjects LoopObjects --"Repeat for Each Object"--> End["/fas:fa-stop End"]- Flow Chart Description:
This flowchart illustrates the getPos function:
Starts the process by checking if shArgs exist.
If shArgs exist, it proceeds to check the specified object type.
If shArgs do not exist, it defaults to ‘obj’ as the object type.
Loops through the provided list of objects.
Gets the position of each object based on the specified object type.
Repeats this process for each object in the list.
- eRig.getPosLoc(self, objOrPos=None, makeChild=False, snapRot=False, hideLoc=False, locName=None, oppAxis=None, grpLevel=0, offsetDist=None, getSpot=False, **shArgs)#
[**shArgs : tg=topGrp, po=parentOnly, ig=inputGraph, sn=sameNumbers, gn=grpLevel, od=offsetDist, gs=getSpot]
Purpose:
:: Creates locators at the position of the specified Maya object or at a given position, with additional options for configuration.
- Parameters:
objOrPos – (Optional, type str or list) # The Maya object or position to create the locator at.
makeChild – (type bool, default False) # If True, makes the created locator a child of the specified object.
snapRot – (type bool, default False) # If True, snaps the rotation of the locator to the object.
hideLoc – (type bool, default False) # If True, hides the locator upon creation.
locName – (Optional, type str) # Name of the locator to be created. If a list of names is provided, multiple locators are created.
oppAxis – (Optional, type str) # Specifies the opposite axis placement for the locator. Valid options are ‘x’, ‘X’, ‘y’, ‘Y’, ‘z’, ‘Z’.
grpLevel – (type int, range 0-10) # Determines the grouping level of the locator. 0 means no grouping. 0 | 1-10 [posLoc will be grouped with same pivot]
offsetDist – (Optional, type list) # Specifies the direction and distance for the offset of the locator. [‘x’, 1] | [[‘x’, ‘-y’, ‘z’], 1] # A list contains direction and distance
getSpot – (type bool, default False) # If True, returns the position where the locator is placed.
- Returns:
(type list) # A list of created locators as asNodes
Example Usage:
>>> target_object = 'myObject'  # Specify the Maya object or position to create the locator at
>>> make_locator_child = True  # Set to True to make the locator a child of the object
>>> snap_rotation = False  # Set to True to snap the rotation of the locator to the object
>>> hide_locator = False  # Set to True to hide the locator upon creation
>>> locator_name = 'myLocator'  # Specify the name of the locator
>>> opposite_axis = 'x'  # Specify the opposite axis placement for the locator
>>> grouping_level = 1  # Specify the grouping level of the locator
>>> offset_distance = ['x', 1]  # Specify the offset distance in the X direction
>>> get_locator_position = True  # Set to True to get the position where the locator is placed
>>> getPosLoc(objOrPos=target_object, makeChild=make_locator_child, snapRot=snap_rotation, hideLoc=hide_locator, locName=locator_name,
             oppAxis=opposite_axis, grpLevel=grouping_level, offsetDist=offset_distance, getSpot=get_locator_position)
graph TB style Start fill:#00cc00,stroke:#000,stroke-width:3px style CheckObjOrPos fill:#ffcc00,stroke:#000,stroke-width:2px style InitializeLocList fill:#ff9999,stroke:#000,stroke-width:2px style CreateLocators fill:#99ccff,stroke:#000,stroke-width:2px style SnapPosition fill:#cc99ff,stroke:#000,stroke-width:2px style SnapRotation fill:#99ff99,stroke:#000,stroke-width:2px style HideLocator fill:#cc99ff,stroke:#000,stroke-width:2px style MakeChild fill:#99ff99,stroke:#000,stroke-width:2px style OppAxisPlacement fill:#cc99ff,stroke:#000,stroke-width:2px style OffsetLocator fill:#99ff99,stroke:#000,stroke-width:2px style End fill:#ff6666,stroke:#000,stroke-width:3px Start[("fa:fa-play Start")] --> CheckObjOrPos{"/fas:fa-question-circle Check objOrPos"} CheckObjOrPos --"If objOrPos is valid"--> InitializeLocList["/fas:fa-list-ol Initialize LocList"] CheckObjOrPos --"If objOrPos is invalid"--> End[("fas:fa-stop End")] InitializeLocList --> CreateLocators["/fas:fa-map-pin Create Locators"] CreateLocators --> SnapPosition["/fas:fa-compress-alt Snap Position"] SnapPosition --> SnapRotation["/fas:fa-sync-alt Snap Rotation"] SnapRotation --> HideLocator["/fas:fa-eye-slash Hide Locator"] HideLocator --> MakeChild["/fas:fa-sitemap Make Child"] MakeChild --> OppAxisPlacement["/fas:fa-arrows-alt-h Opposite Axis Placement"] OppAxisPlacement --> OffsetLocator["/fas:fa-ruler-combined Offset Locator"] OffsetLocator --> End- Flow Chart Description:
This flowchart illustrates the getPosLoc function:
The process begins by validating the objOrPos parameter.
If valid, it initializes the locator list and creates locators at the specified positions or objects.
The function snaps the locators to the positions and optionally aligns their rotation.
The locators can be hidden, made a child of an object, placed on the opposite axis, and offset if specified.
The function returns a list of created locators.
- eRig.getRot(self, objList, **shArgs)#
[**shArgs : ol=objList]
Purpose:
:: Retrieves the rotation values of specified Maya objects.
Useful for scripts requiring rotational data of objects.
Provides rotation values in a convenient list format.
- Parameters:
objList – <list> # A list of Maya objects whose rotation values are to be obtained.
- Returns:
<list> # A list containing the rotation values of the specified objects.
Usage:
>>> rotations = getRot(['pCube1', 'pSphere1'])
# Retrieves the rotation values of 'pCube1' and 'pSphere1'.
graph TB style CheckShArgs fill:#ffcc00,stroke:#000,stroke-width:2px style LoopObjects fill:#cc99ff,stroke:#000,stroke-width:2px style GetRotation fill:#99ccff,stroke:#000,stroke-width:2px style End fill:#ff6666,stroke:#000,stroke-width:3px CheckShArgs --"If shArgs Exist"--> LoopObjects{"/fas:fa-cogs Check Arguments"} CheckShArgs --"If shArgs Does Not Exist"--> LoopObjects LoopObjects --"Loop Through Object List"--> GetRotation{"/fas:fa-sync-alt Get Rotation"} GetRotation --"Get Rotation Values for Each Object"--> LoopObjects LoopObjects --"Repeat for Each Object"--> End["/fas:fa-stop End"]- Flow Chart Description:
This flowchart illustrates the getRot function:
Starts the process by checking if shArgs exist.
If shArgs exist, it proceeds to loop through the object list.
If shArgs do not exist, it defaults to retrieving rotation values for each object.
Loops through the object list.
Gets the rotation values for each object using getAttr(obj + ‘.r’).
Repeats this process for each object in the list.
- eRig.getScriptNodes(self, keyWords=[], **shArgs)#
[**shArgs : kw=keyWords]
Purpose:
:: Searches and retrieves script nodes in Maya that match specified keywords.
Useful for identifying and managing custom scripts or automation nodes within a scene.
Simplifies the task of tracking and organizing script nodes based on specific criteria.
- Parameters:
keyWords – <list> # A list of keywords to filter the script nodes.
- Returns:
<list> # A list of script nodes that match the given keywords.
Usage:
>>> scriptNodes = getScriptNodes(['autoRig', 'cleanup'])
# Finds all script nodes that contain 'autoRig' or 'cleanup' in their names.
graph TB style CheckShArgs fill:#ffcc00,stroke:#000,stroke-width:2px style GetAllScriptNodes fill:#cc99ff,stroke:#000,stroke-width:2px style LoopScriptNodes fill:#99ccff,stroke:#000,stroke-width:2px style CheckKeywords fill:#ff9999,stroke:#000,stroke-width:2px style AddToResult fill:#00cc00,stroke:#000,stroke-width:2px style End fill:#ff6666,stroke:#000,stroke-width:3px CheckShArgs --"If shArgs Exist"--> GetAllScriptNodes{"/fas:fa-cogs Check Arguments"} CheckShArgs --"If shArgs Does Not Exist"--> GetAllScriptNodes GetAllScriptNodes --"Get All Script Nodes in the Scene"--> LoopScriptNodes{"/fas:fa-database Get All Script Nodes"} LoopScriptNodes --"Loop Through Each Script Node"--> CheckKeywords{"/fas:fa-filter Filter Keywords"} CheckKeywords --"If Keywords Provided"--> AddToResult{"/fas:fa-plus Add Script Node to Result"} CheckKeywords --"If No Keywords Provided"--> AddToResult AddToResult --"Repeat for Each Script Node"--> LoopScriptNodes LoopScriptNodes --"Repeat for Each Script Node"--> End["/fas:fa-stop End"]- Flow Chart Description:
This flowchart illustrates the getScriptNodes function:
Starts the process by checking if shArgs exist.
If shArgs exist, it proceeds to get all script nodes in the scene.
If shArgs do not exist, it defaults to getting all script nodes in the scene.
Loops through each script node.
Checks if keywords were provided.
If keywords were provided, it checks if any keyword matches the script node name.
If a match is found, it adds the script node to the result list.
Repeats this process for each script node in the scene.
- eRig.getShapes(self, geo, nonIntermediates=1, intermediates=0, **shArgs)#
[**shArgs : g=geo, ni=nonIntermediates, im=intermediates]
Purpose:
:: Extracts the shape nodes from a given transform node in Maya.
Essential for accessing and manipulating the geometry of objects in a scene.
Offers flexibility in including or excluding intermediate shapes.
- Parameters:
geo – <str> # The transform node to list shapes for.
nonIntermediates – <int> # If set to 1, only non-intermediate shapes are returned. Defaults to 1.
intermediates – <int> # If set to 1, includes intermediate shapes in the result. Defaults to 0.
- Returns:
<list> # A list of shape nodes under the specified transform node.
Usage:
>>> shapes = getShapes('pCube1')
# Lists all shape nodes under the transform node 'pCube1'.
graph TB style CheckShArgs fill:#ffcc00,stroke:#000,stroke-width:2px style CheckGeoExists fill:#cc99ff,stroke:#000,stroke-width:2px style GetShapes fill:#99ccff,stroke:#000,stroke-width:2px style CheckNonIntermediates fill:#ff9999,stroke:#000,stroke-width:2px style CheckIntermediates fill:#00cc00,stroke:#000,stroke-width:2px style ExtendList fill:#ffcc00,stroke:#000,stroke-width:2px style ReturnShapes fill:#00cc00,stroke:#000,stroke-width:2px style End fill:#ff6666,stroke:#000,stroke-width:3px CheckShArgs --"If shArgs Exist"--> CheckGeoExists{"/fas:fa-cogs Check Arguments"} CheckShArgs --"If shArgs Does Not Exist"--> CheckGeoExists CheckGeoExists --"Check if 'geo' Exists"--> GetShapes{"/fas:fa-search Search Shapes"} CheckGeoExists --"Object Does Not Exist"--> End["/fas:fa-stop End"] GetShapes --"Get Shapes"--> CheckNonIntermediates{"/fas:fa-filter Filter Non-Intermediates"} CheckNonIntermediates --"If nonIntermediates=1"--> ExtendList{"/fas:fa-plus Add Non-Intermediates"} CheckNonIntermediates --"If nonIntermediates=0"--> CheckIntermediates{"/fas:fa-filter Filter Intermediates"} CheckIntermediates --"If intermediates=1"--> ExtendList{"/fas:fa-plus Add Intermediates"} CheckIntermediates --"If intermediates=0"--> ExtendList ExtendList --"Extend List"--> ReturnShapes{"/fas:fa-list-ul Return Shapes"} ReturnShapes --"Return Shapes List"--> End- Flow Chart Description:
This flowchart illustrates the getShapes function:
Starts the process by checking if shArgs exist.
If shArgs exist, it proceeds to check if the ‘geo’ object exists.
If shArgs do not exist, it defaults to checking if the ‘geo’ object exists.
If the ‘geo’ object exists, it searches for shape nodes.
Checks if non-intermediates should be included.
If non-intermediates should be included, it filters and adds them to the list.
If non-intermediates should not be included, it checks if intermediates should be included.
If intermediates should be included, it filters and adds them to the list.
If intermediates should not be included, it extends the list with all found shapes.
The final list of shape nodes is returned.
- eRig.getSkinJnts(self, skinMesh, allInfluences=False, **shArgs)#
[**shArgs : sm=skinMesh, ai=allInfluences]
Purpose:
:: Retrieves the skin joints associated with a specified skin mesh in Maya.
Critical for skinning and rigging tasks, enabling precise control over joint influences.
Allows for a quick assessment of joint influences on a given skin mesh.
- Parameters:
skinMesh – <str> # The skin mesh for which to find the associated joints.
allInfluences – <bool> # If True, retrieves all influencing joints, not just those with current skin weighting. Defaults to False.
- Returns:
<list> # A list of joints influencing the specified skin mesh.
Usage:
>>> skinJoints = getSkinJnts('characterMesh')
# Lists all joints influencing the skin mesh 'characterMesh'.
graph TB style CheckShArgs fill:#ffcc00,stroke:#000,stroke-width:2px style GetSkinCluster fill:#99ccff,stroke:#000,stroke-width:2px style CheckAllInfluences fill:#ff9999,stroke:#000,stroke-width:2px style GetInfluences fill:#00cc00,stroke:#000,stroke-width:2px style ReturnInfluences fill:#00cc00,stroke:#000,stroke-width:3px style End fill:#ff6666,stroke:#000,stroke-width:3px CheckShArgs --"If shArgs Exist"--> GetSkinCluster{"/fas:fa-cogs Check Arguments"} CheckShArgs --"If shArgs Does Not Exist"--> GetSkinCluster GetSkinCluster --"Get Skin Cluster"--> CheckAllInfluences{"/fas:fa-search Find All Influences"} CheckAllInfluences --"If allInfluences=True"--> GetInfluences{"/fas:fa-filter Filter All Influences"} CheckAllInfluences --"If allInfluences=False"--> GetInfluences{"/fas:fa-filter Filter Weighted Influences"} GetInfluences --"Retrieve Influences"--> ReturnInfluences{"/fas:fa-list-ul Return Influences"} ReturnInfluences --"Return Influences List"--> End- Flow Chart Description:
This flowchart illustrates the getSkinJnts function:
Starts the process by checking if shArgs exist.
If shArgs exist, it proceeds to find the skin cluster associated with the ‘skinMesh’.
If shArgs do not exist, it defaults to finding the skin cluster associated with the ‘skinMesh’.
Once the skin cluster is identified, it checks if all influences should be retrieved.
If all influences should be retrieved, it filters and returns all influencing joints.
If only weighted influences should be retrieved, it filters and returns those joints.
The final list of influencing joints is returned.
- eRig.getVtxList(self, objName, **shArgs)#
[shArgs: n=objName]
Function:: getVtxList
Purpose:
:: Retrieves a list of vertices for the specified object, depending on its node type.
- Parameters:
objName – (<type str>) # The name of the object for which vertices are to be retrieved.
- Returns:
A list of vertices (cvList or vtxList), depending on the node type (nurbsCurve, mesh, or nurbsSurface).
Returns(asNodes):
if self.isNodeType('nurbsCurve'):
        return cvList
elif self.isNodeType('mesh'):
        return vtxList
elif self.isNodeType('nurbsSurface'):
        return cvList
graph TB style Start fill:#00cc00,stroke:#000,stroke-width:3px style CheckShArgs fill:#ffcc00,stroke:#000,stroke-width:2px style RetrieveObject fill:#ff9999,stroke:#000,stroke-width:2px style CheckNodeType fill:#99ccff,stroke:#000,stroke-width:2px style GetNurbsCurveCVs fill:#cc99ff,stroke:#000,stroke-width:2px style GetMeshVertices fill:#99ff99,stroke:#000,stroke-width:2px style GetNurbsSurfaceCVs fill:#cc99ff,stroke:#000,stroke-width:2px style ReturnCVList fill:#99ff99,stroke:#000,stroke-width:2px style ReturnVtxList fill:#99ff99,stroke:#000,stroke-width:2px style End fill:#ff6666,stroke:#000,stroke-width:3px Start[("fa:fa-play Start")] --> CheckShArgs{"/fas:fa-question-circle Check shArgs"} CheckShArgs --"If shArgs provided"--> RetrieveObject["/fas:fa-search-plus Retrieve Object"] CheckShArgs --"If shArgs not provided"--> RetrieveObject RetrieveObject --> CheckNodeType{"/fas:fa-code-branch Check Node Type"} CheckNodeType --"If NurbsCurve"--> GetNurbsCurveCVs["/fas:fa-bezier-curve Get NurbsCurve CVs"] CheckNodeType --"If Mesh"--> GetMeshVertices["/fas:fa-th Get Mesh Vertices"] CheckNodeType --"If NurbsSurface"--> GetNurbsSurfaceCVs["/fas:fa-vector-square Get NurbsSurface CVs"] GetNurbsCurveCVs --> ReturnCVList["/fas:fa-check-circle Return CV List"] GetMeshVertices --> ReturnVtxList["/fas:fa-check-circle Return Vertex List"] GetNurbsSurfaceCVs --> ReturnCVList ReturnCVList --> End[("fas:fa-stop End")] ReturnVtxList --> End- Flow Chart Description:
This flowchart illustrates the getVtxList function:
The process starts by checking if shArgs are provided to update the objName parameter.
The object is retrieved based on the provided objName.
The node type of the object is checked.
If the object is a NurbsCurve, it retrieves the Curve CVs.
If the object is a Mesh, it retrieves the Mesh vertices.
If the object is a NurbsSurface, it retrieves the Surface CVs.
Depending on the node type, the function returns either the CV list or the vertex list.
- eRig.get_2PosExtn(self, srcObj, destObj, extnRatio, locName='Extn_Loc', get_asLoc=True, getSpot=False, **shArgs)#
[shArgs : so=srcObj, do=destObj, er=extnRatio, n=locName, gl=get_asLoc, gs=getSpot]
Purpose:
:: Calculates an extended position between two objects based on a specified ratio, optionally creating and naming a locator at this position.
Ideal for determining intermediate points in space for animation pathing or rigging setups.
The ability to create a locator at the calculated position adds practicality for visual reference in 3D space.
- Parameters:
srcObj – The source object providing the starting point for the extension calculation.
destObj – The destination object which, along with the source object, defines the direction vector for the extension.
extnRatio –
A numeric value (integer or float) indicating the ratio of the extension. A value of 0 places the extension at the destination object, 1.0 extends it the same distance away from the destination object, and -1.0 places it at the source object.
-0.5 places it in the middle of srcObj and dirObj
locName – The name to assign to the locator if created. Defaults to ‘Extn_Loc’.
get_asLoc – A boolean value determining whether to return a locator (True) or just the position (False).
getSpot – Provides spherical shape control instead of locator
shArgs – Additional keyword arguments to further customize the function’s behavior.
- Returns:
A locator or a position tuple, depending on get_asLoc, representing the extended position between the source and destination objects.
Code Examples:
>>> source_object = "object_start"
>>> destination_object = "object_end"
>>> extension_ratio = 0.5
>>> locator_name = "Midpoint_Locator"
>>> extended_position = get_2PosExtn(source_object, destination_object, extension_ratio, locName=locator_name)
graph TB style Start fill:#00cc00,stroke:#000,stroke-width:3px style CheckShArgs fill:#ffcc00,stroke:#000,stroke-width:2px style CalculateDirectionVector fill:#ff9999,stroke:#000,stroke-width:2px style CalculateExtendedPosition fill:#99ccff,stroke:#000,stroke-width:2px style CreateLocator fill:#cc99ff,stroke:#000,stroke-width:2px style SnapToSource fill:#99ff99,stroke:#000,stroke-width:2px style ReturnLocator fill:#99ff99,stroke:#000,stroke-width:2px style ReturnPosition fill:#99ff99,stroke:#000,stroke-width:2px style End fill:#ff6666,stroke:#000,stroke-width:3px Start[("fa:fa-play Start")] --> CheckShArgs{"/fas:fa-question-circle Check shArgs"} CheckShArgs --"If shArgs provided"--> CalculateDirectionVector["/fas:fa-arrows-alt Calculate Direction Vector"] CheckShArgs --"If shArgs not provided"--> CalculateDirectionVector CalculateDirectionVector --> CalculateExtendedPosition["/fas:fa-expand-arrows-alt Calculate Extended Position"] CalculateExtendedPosition --> CreateLocator["/fas:fa-map-marker-alt Create Locator"] CreateLocator --> SnapToSource["/fas:fa-magnet Snap To Source"] SnapToSource --"If get_asLoc is True"--> ReturnLocator["/fas:fa-map-marker-alt Return Locator"] SnapToSource --"If get_asLoc is False"--> ReturnPosition["/fas:fa-location-arrow Return Position"] ReturnLocator --> End[("fas:fa-stop End")] ReturnPosition --> End- Flow Chart Description:
This flowchart illustrates the get_2PosExtn function:
The process begins by checking if shArgs are provided, updating parameters like srcObj, destObj, extnRatio, locName, get_asLoc, and getSpot.
It calculates the direction vector between the source and destination objects.
The function then calculates the extended position based on the specified ratio.
A locator is created at the extended position.
The locator is snapped to the source object’s position while maintaining the extended distance.
The function concludes by returning either the locator or the position, depending on the get_asLoc parameter.
- eRig.get_2PosVect(self, srcObj, destObj, **shArgs)#
[shArgs : so=srcObj, do=destObj]
Purpose:
:: Computes the directional vector from a source object to a destination object in 3D space.
This function is essential in rigging and animation for determining directional relationships between objects.
Useful in scripting complex animations or simulations where directional data between objects is required.
- Parameters:
srcObj – <str/list> # The source object from which the directional vector originates.
destObj – <str/list> # The destination object towards which the directional vector points.
- Returns:
MVector(distX, distY, distZ) # A vector representing the direction from the source object to the destination object in 3D space.
Code Examples:
>>> source_object = "obj_start"
>>> destination_object = "obj_end"
>>> directional_vector = get_2PosVect(source_object, destination_object)
graph TD style CheckShArgs fill:#ffcc00,stroke:#000,stroke-width:2px style GetDestinationPosition fill:#00ccff,stroke:#000,stroke-width:2px style GetSourcePosition fill:#00ccff,stroke:#000,stroke-width:2px style CalculateVector fill:#00cc00,stroke:#000,stroke-width:2px style ReturnVector fill:#00cc00,stroke:#000,stroke-width:3px style End fill:#ff6666,stroke:#000,stroke-width:3px CheckShArgs --"If shArgs Exist"--> GetDestinationPosition{"/fas:fa-cogs Check Arguments"} CheckShArgs --"If shArgs Does Not Exist"--> GetDestinationPosition GetDestinationPosition --"Get Destination Position"--> GetSourcePosition{"/fas:fa-map-marker-alt Get Source Position"} GetSourcePosition --"Get Source Position"--> CalculateVector{"/fas:fa-calculator Calculate Vector"} CalculateVector --"Calculate Directional Vector"--> ReturnVector{"/fas:fa-check Return Directional Vector"} ReturnVector --"Return Directional Vector"--> End- Flow Chart Description:
This flowchart illustrates the get_2PosVect function:
Starts the process by checking if shArgs exist.
If shArgs exist, it proceeds to get the destination position.
If shArgs do not exist, it defaults to getting the destination position.
It then retrieves the source position.
After obtaining both positions, it calculates the directional vector between them.
Finally, the function returns the directional vector.
- eRig.grpIt(self, objName, grpLevel=1, snapPiv=True, grpSufxList=None, **shArgs)#
[**shArgs : on=objName, gl=grpLevel, sp=snapPiv, gsl=grpSufxList]
Purpose:
:: Groups the given object at specified levels and optionally snaps the pivot, returning the group(s).
Utilized in organizing Maya scenes by grouping objects, which is essential in complex projects.
Supports various levels of grouping and pivot snapping, facilitating a cleaner and more manageable scene structure.
- Parameters:
objName – <str> # Name of the object to be grouped.
grpLevel – <int, optional> # The number of grouping levels. Defaults to 1.
snapPiv – <bool, optional> # Determines whether to snap the pivot to the object. Defaults to True.
grpSufxList – <list, optional> # List of suffixes for the group names.
- Returns:
<list or str> # Returns a list of group names or a single group name based on the number of groups created.
Usage:
    if len(grpList) > 1:
            return grpList  # grp1, grp2, ....grpTop
    else:
            return grpList[0]

>>> grpIt("pCube1", 2, True, ["_Main", "_Secondary"])
# Groups pCube1 into two levels with custom suffixes and snaps pivot to the original object.
graph TB style Start fill:#00cc00,stroke:#000,stroke-width:3px style CheckShArgs fill:#ffcc00,stroke:#000,stroke-width:2px style CheckGrpSufxList fill:#ff9999,stroke:#000,stroke-width:2px style SetObjName fill:#99ccff,stroke:#000,stroke-width:2px style CheckGrpLevel fill:#cc99ff,stroke:#000,stroke-width:2px style GroupItFunction fill:#cc99ff,stroke:#000,stroke-width:2px style ReturnGrpList fill:#99ff99,stroke:#000,stroke-width:2px style ReturnSingleGrp fill:#99ff99,stroke:#000,stroke-width:2px style End fill:#ff6666,stroke:#000,stroke-width:3px Start[("fa:fa-play Start")] --> CheckShArgs{"/fas:fa-question-circle Check shArgs"} CheckShArgs --"If shArgs provided"--> CheckGrpSufxList["/fas:fa-list Check grpSufxList"] CheckShArgs --"If shArgs not provided"--> CheckGrpSufxList CheckGrpSufxList --> SetObjName["/fas:fa-object-ungroup Set ObjName"] SetObjName --> CheckGrpLevel{"/fas:fa-sort-amount-up Check GrpLevel"} CheckGrpLevel --"If grpLevel is 0"--> ReturnSingleGrp["/fas:fa-check Return Single Group"] CheckGrpLevel --"If grpLevel > 0"--> GroupItFunction["/fas:fa-layer-group GroupIt Function"] GroupItFunction --"Loop for grpLevel times"--> ReturnGrpList{"/fas:fa-list-ul Return grpList"} ReturnGrpList --"If more than one group"--> End[("fas:fa-check-circle End (List)")] ReturnGrpList --"If only one group"--> End[("fas:fa-check-circle End (Single)")] ReturnSingleGrp --> End- Flow Chart Description:
This flowchart illustrates the grpIt function:
The process starts by checking if shArgs are provided, updating parameters like objName, grpLevel, snapPiv, and grpSufxList.
It then ensures that grpSufxList is a list, even if a single suffix is provided.
The object name is converted to a node, and the initial group object is set.
The function checks the grpLevel. If it’s 0, it returns the object name as a single group.
If grpLevel is greater than 0, it calls the groupIt function, which recursively groups the object at specified levels.
After grouping, it returns a list of group names if there are multiple groups, or a single group name if only one group is created.
- eRig.hide(self, objList, drawStyle=0, **shArgs)#
[**shArgs : ol=objList, ds=drawStyle]
Purpose:
:: Hides the specified objects in the Maya scene, with an option to change the draw style.
Essential for managing scene visibility, particularly in complex scenes or during specific rigging tasks.
Provides flexibility in hiding objects either completely or by altering their draw style.
- Parameters:
objList – <str/list> # The object or list of objects to hide.
drawStyle – <int, optional> # The draw style to apply when hiding the objects. Defaults to 0 (completely hidden).
- Returns:
None # No return value, but the specified objects are hidden in the scene.
Usage:
>>> hide(["cube1", "sphere2"], drawStyle=1)
# Hides 'cube1' and 'sphere2' with the specified draw style.
graph TB style Start fill:#00cc00,stroke:#000,stroke-width:3px style CheckShArgs fill:#ffcc00,stroke:#000,stroke-width:2px style SetObjList fill:#ff9999,stroke:#000,stroke-width:2px style LoopThroughObjList fill:#99ccff,stroke:#000,stroke-width:2px style CheckDrawStyle fill:#cc99ff,stroke:#000,stroke-width:2px style HideObject fill:#99ff99,stroke:#000,stroke-width:2px style End fill:#ff6666,stroke:#000,stroke-width:3px Start[("fa:fa-play Start")] --> CheckShArgs{"/fas:fa-question-circle Check shArgs"} CheckShArgs --"If shArgs provided"--> SetObjList["/fas:fa-list Set ObjList"] CheckShArgs --"If shArgs not provided"--> SetObjList SetObjList --> LoopThroughObjList["/fas:fa-repeat Loop Through ObjList"] LoopThroughObjList --> CheckDrawStyle{"/fas:fa-eye-slash Check DrawStyle"} CheckDrawStyle --"If drawStyle is set"--> HideObject["/fas:fa-low-vision Hide Object (DrawStyle)"] CheckDrawStyle --"If drawStyle not set"--> HideObject["/fas:fa-eye-slash Hide Object (Completely)"] HideObject --> End[("fas:fa-stop End")]- Flow Chart Description:
This flowchart illustrates the hide function:
The process begins by checking if shArgs are provided, updating parameters like objList and drawStyle.
It converts objList into a list format if it’s not already one.
The function then iterates over each object in the list.
For each object, it checks the drawStyle parameter.
If drawStyle is set, it applies a specific draw style to hide the object.
If drawStyle is not set, it hides the object completely.
The function concludes after processing all objects in the list.
- eRig.isLastJnt(self, jnt, numFromEnd=0, **shArgs)#
[**shArgs : j=jnt, nfe=numFromEnd]
Purpose:
:: Determines if a specified joint is the last joint in a chain, with an option to specify a position relative to the end of the chain.
Crucial in rigging workflows for identifying the end joints in a skeletal hierarchy.
Helps in automating rigging processes, where identifying terminal joints in a chain is necessary.
- Parameters:
jnt – <str> # The joint to check if it’s the last in the chain.
numFromEnd – <int, optional> # Position from the end of the joint chain to consider. Defaults to 0. 0 for the very last joint, 1 for the second to last, and so on.
- Returns:
<bool> # Returns True if the joint is at the specified position from the end of the chain, False otherwise.
Usage:
>>> isLastJnt("joint5", 1)
# Checks if joint5 is the second to last joint in its chain.
graph TB style Start fill:#00cc00,stroke:#000,stroke-width:3px style CheckShArgs fill:#ffcc00,stroke:#000,stroke-width:2px style CheckNodeType fill:#ff9999,stroke:#000,stroke-width:2px style CheckNumFromEnd fill:#99ccff,stroke:#000,stroke-width:2px style CheckChildren fill:#cc99ff,stroke:#000,stroke-width:2px style CheckJointChildren fill:#cc99ff,stroke:#000,stroke-width:2px style CheckHierarchy fill:#99ff99,stroke:#000,stroke-width:2px style EndTrue fill:#00cc00,stroke:#000,stroke-width:3px style EndFalse fill:#ff6666,stroke:#000,stroke-width:3px Start[("fa:fa-play Start")] --> CheckShArgs{"/fas:fa-question-circle Check shArgs"} CheckShArgs --"If shArgs provided"--> CheckNodeType["/fas:fa-code-branch Check Node Type"] CheckShArgs --"If shArgs not provided"--> CheckNodeType CheckNodeType --"If joint"--> CheckNumFromEnd{"/fas:fa-sort-amount-down Check numFromEnd"} CheckNodeType --"If not joint"--> EndFalse[("fas:fa-times-circle End (False)")] CheckNumFromEnd --"If numFromEnd is 0"--> CheckChildren{"/fas:fa-sitemap Check Children"} CheckNumFromEnd --"If numFromEnd > 0"--> CheckHierarchy["/fas:fa-stream Check Hierarchy"] CheckChildren --"If no children"--> EndTrue[("fas:fa-check-circle End (True)")] CheckChildren --"If children exist"--> CheckJointChildren["/fas:fa-project-diagram Check Joint Children"] CheckJointChildren --"If joint children"--> EndFalse CheckJointChildren --"If no joint children"--> EndTrue CheckHierarchy --"If hierarchy length equals numFromEnd"--> EndTrue CheckHierarchy --"If hierarchy length differs"--> EndFalse- Flow Chart Description:
This flowchart illustrates the isLastJnt function:
The process begins by checking if shArgs are provided, updating jnt and numFromEnd accordingly.
It verifies if the given node is of type ‘joint’. If not, the function raises an error.
The function then checks the value of numFromEnd.
If numFromEnd is 0, it checks if the joint has children. No children implies it’s the last joint.
If there are children, it verifies if any child is a joint. If not, it’s the last joint.
If numFromEnd is greater than 0, it checks the joint’s hierarchy to determine if it matches the specified position from the end.
The function returns True if the joint is at the specified position from the end of the chain, and False otherwise.
- eRig.listLockedAttrs(self, objNAttr, **shArgs)#
[**shArgs : ona=objNAttr]
Purpose:
:: Lists all unlocked or editable attributes for a given object, useful for identifying attributes available for modification.
Assists in rigging and scene management by identifying attributes that can be modified.
Ideal for planning animation or rigging processes where certain attribute adjustments are required.
- Parameters:
objNAttr – <str> # The object name whose unlocked attributes need to be listed. Can also include specific attributes to check.
- Returns:
<list> # A list of unlocked (editable) attributes for the specified object.
Usage:
>>> listOpenedAttrs("pCube1.rotate")
# Returns a list of unlocked rotation attributes of 'pCube1'.
graph TB style Start fill:#00cc00,stroke:#000,stroke-width:3px style CheckShArgs fill:#ffcc00,stroke:#000,stroke-width:2px style CheckIsAttr fill:#ff9999,stroke:#000,stroke-width:2px style CheckAttrType fill:#99ccff,stroke:#000,stroke-width:2px style ListChildAttrs fill:#cc99ff,stroke:#000,stroke-width:2px style CheckLockedAttrs fill:#99ff99,stroke:#000,stroke-width:2px style ReturnLockedAttrs fill:#99ff99,stroke:#000,stroke-width:2px style ReturnNone fill:#ff6666,stroke:#000,stroke-width:3px style End fill:#ff6666,stroke:#000,stroke-width:3px Start[("fa:fa-play Start")] --> CheckShArgs{"/fas:fa-question-circle Check shArgs"} CheckShArgs --"If shArgs provided"--> CheckIsAttr["/fas:fa-check-square Check IsAttr"] CheckShArgs --"If shArgs not provided"--> CheckIsAttr CheckIsAttr --"If valid attribute"--> CheckAttrType{"/fas:fa-stream Check Attr Type"} CheckIsAttr --"If not valid attribute"--> ReturnNone[("fas:fa-times-circle Return None")] CheckAttrType --"If type is 'double3'"--> ListChildAttrs["/fas:fa-child List Child Attrs"] CheckAttrType --"If not 'double3'"--> ReturnNone ListChildAttrs --> CheckLockedAttrs["/fas:fa-lock Check Locked Attrs"] CheckLockedAttrs --"Loop through child attributes"--> ReturnLockedAttrs["/fas:fa-list-ol Return Locked Attrs"] ReturnLockedAttrs --> End[("fas:fa-stop End")]- Flow Chart Description:
This flowchart illustrates the listLockedAttrs function:
The process starts by checking if shArgs are provided, updating objNAttr accordingly.
It checks if the provided objNAttr is a valid attribute.
If valid, the function determines the attribute type.
If the attribute type is ‘double3’, it lists the child attributes.
The function then checks each child attribute to determine if it is locked.
It returns a list of locked attributes.
If the attribute type is not ‘double3’ or objNAttr is invalid, the function returns None.
- eRig.listOpenedAttrs(self, objNAttr, **shArgs)#
[**shArgs : ona=objNAttr]
Purpose:
:: Lists all unlocked or editable attributes for a given object, useful for identifying attributes available for modification.
Assists in rigging and scene management by identifying attributes that can be modified.
Ideal for planning animation or rigging processes where certain attribute adjustments are required.
- Parameters:
objNAttr – <str> # The object name whose unlocked attributes need to be listed. Can also include specific attributes to check.
- Returns:
<list> # A list of unlocked (editable) attributes for the specified object.
Usage:
>>> listOpenedAttrs("pCube1.rotate")
# Returns a list of unlocked rotation attributes of 'pCube1'.
graph TB style Start fill:#00cc00,stroke:#000,stroke-width:3px style CheckShArgs fill:#ffcc00,stroke:#000,stroke-width:2px style CheckIsAttr fill:#ff9999,stroke:#000,stroke-width:2px style CheckAttrType fill:#99ccff,stroke:#000,stroke-width:2px style ListChildAttrs fill:#cc99ff,stroke:#000,stroke-width:2px style CheckUnlockedAttrs fill:#99ff99,stroke:#000,stroke-width:2px style ReturnUnlockedAttrs fill:#99ff99,stroke:#000,stroke-width:2px style ReturnNone fill:#ff6666,stroke:#000,stroke-width:3px style End fill:#ff6666,stroke:#000,stroke-width:3px Start[("fa:fa-play Start")] --> CheckShArgs{"/fas:fa-question-circle Check shArgs"} CheckShArgs --"If shArgs provided"--> CheckIsAttr["/fas:fa-check-square Check IsAttr"] CheckShArgs --"If shArgs not provided"--> CheckIsAttr CheckIsAttr --"If valid attribute"--> CheckAttrType{"/fas:fa-stream Check Attr Type"} CheckIsAttr --"If not valid attribute"--> ReturnNone[("fas:fa-times-circle Return None")] CheckAttrType --"If type is 'double3'"--> ListChildAttrs["/fas:fa-child List Child Attrs"] CheckAttrType --"If not 'double3'"--> ReturnNone ListChildAttrs --> CheckUnlockedAttrs["/fas:fa-unlock-alt Check Unlocked Attrs"] CheckUnlockedAttrs --"Loop through child attributes"--> ReturnUnlockedAttrs["/fas:fa-list-ol Return Unlocked Attrs"] ReturnUnlockedAttrs --> End[("fas:fa-stop End")]- Flow Chart Description:
This flowchart illustrates the listOpenedAttrs function:
The process starts by checking if shArgs are provided, updating objNAttr accordingly.
It checks if the provided objNAttr is a valid attribute.
If valid, the function determines the attribute type.
If the attribute type is ‘double3’, it lists the child attributes.
The function then checks each child attribute to determine if it is unlocked.
It returns a list of unlocked attributes.
If the attribute type is not ‘double3’ or objNAttr is invalid, the function returns None.
- eRig.listReferences(self, parentNS=None, **shArgs)#
[**shArgs : pns=parentNS]
Purpose:
:: Lists all reference nodes found in the current Maya scene, with an option to specify a parent namespace.
Essential for managing and identifying external references within a scene.
Facilitates the organization and update of referenced assets, particularly in complex scenes.
- Parameters:
parentNS – <str, optional> # The parent namespace for querying reference nodes. If None, all reference nodes in the scene are considered.
- Returns:
<list> # List of reference nodes in the current scene.
Usage:
>>> listReferences(parentNS="char")
# Returns a list of reference nodes that are part of the 'char' namespace.
graph TB style Start fill:#00cc00,stroke:#000,stroke-width:3px style CheckShArgs fill:#ffcc00,stroke:#000,stroke-width:2px style GetReferenceNodes fill:#ff9999,stroke:#000,stroke-width:2px style CheckParentNS fill:#99ccff,stroke:#000,stroke-width:2px style LoopRefs fill:#cc99ff,stroke:#000,stroke-width:2px style ReturnRefNodes fill:#99ff99,stroke:#000,stroke-width:2px style End fill:#ff6666,stroke:#000,stroke-width:3px Start[("fa:fa-play Start")] --> CheckShArgs{"/fas:fa-question-circle Check shArgs"} CheckShArgs --"If shArgs provided"--> GetReferenceNodes["/fas:fa-link Get Reference Nodes"] CheckShArgs --"If shArgs not provided"--> GetReferenceNodes GetReferenceNodes --> CheckParentNS{"/fas:fa-filter Check ParentNS"} CheckParentNS --"Loop through references"--> LoopRefs["/fas:fa-sync-alt Loop Refs"] LoopRefs --> ReturnRefNodes["/fas:fa-list-ol Return Ref Nodes"] ReturnRefNodes --> End[("fas:fa-stop End")]- Flow Chart Description:
This flowchart illustrates the listReferences function:
The process begins by checking if shArgs are provided, updating parentNS accordingly.
It retrieves a list of all reference nodes in the scene.
If a parentNS is specified, the function filters the reference nodes to include only those starting with the specified namespace.
The function loops through each reference node to apply the namespace filter.
It returns a list of reference nodes, filtered by the parent namespace if provided.
- eRig.lockAttrs(self, nodeList, attrList=None, keyed=False, **shArgs)#
[**shArgs : nl=nodeList, al=attrList, k=keyed]
Purpose:
:: Locks specific attributes on a list of nodes, with an option for keyed attributes only.
Essential for securing attributes from accidental modifications.
Offers targeted control over attribute lock-down in a scene.
- Parameters:
nodeList – <list/str> # Node or list of nodes to lock attributes on. E.g., ‘nodeName’, ‘nodeName.attr’, ‘nodeName.attrX’.
attrList – <list/str, optional> # Attribute or list of attributes to lock. E.g., ‘t’, ‘tx’, [‘t’, ‘r’], [‘tx’, ‘v’].
keyed – <bool, optional> # If True, locks only keyed attributes. Default is False.
- Returns:
No return value.
Usage:
>>> lockAttrs('pCube1', attrList=['tx', 'ty'], keyed=False)
# Locks 'tx' and 'ty' attributes on 'pCube1' without considering whether they are keyed or not.
graph TB style Start fill:#00cc00,stroke:#000,stroke-width:3px style CheckShArgs fill:#ffcc00,stroke:#000,stroke-width:2px style SetNodeList fill:#ff9999,stroke:#000,stroke-width:2px style LoopThroughNodeList fill:#99ccff,stroke:#000,stroke-width:2px style CheckIsAttr fill:#cc99ff,stroke:#000,stroke-width:2px style LockAttrDirect fill:#99ff99,stroke:#000,stroke-width:2px style CheckAttrList fill:#cc99ff,stroke:#000,stroke-width:2px style LockAttrList fill:#99ff99,stroke:#000,stroke-width:2px style End fill:#ff6666,stroke:#000,stroke-width:3px Start[("fa:fa-play Start")] --> CheckShArgs{"/fas:fa-question-circle Check shArgs"} CheckShArgs --"If shArgs provided"--> SetNodeList["/fas:fa-list-ol Set NodeList"] CheckShArgs --"If shArgs not provided"--> SetNodeList SetNodeList --> LoopThroughNodeList["/fas:fa-repeat Loop Through NodeList"] LoopThroughNodeList --> CheckIsAttr{"/fas:fa-check-square Check IsAttr"} CheckIsAttr --"If valid attribute"--> LockAttrDirect["/fas:fa-lock Lock Attr Direct"] CheckIsAttr --"If not valid attribute"--> CheckAttrList{"/fas:fa-list-alt Check AttrList"} CheckAttrList --"If attrList provided"--> LockAttrList["/fas:fa-lock-alt Lock Attr List"] CheckAttrList --"If attrList not provided"--> End[("fas:fa-stop End")]- Flow Chart Description:
This flowchart illustrates the lockAttrs function:
The process starts by checking if shArgs are provided, updating parameters like nodeList, attrList, and keyed.
It converts nodeList and attrList into list formats if they are not already lists.
The function iterates over each node in the nodeList.
For each node, it checks if the node string includes an attribute. If so, it locks the attribute directly.
If the node string does not include an attribute, the function checks if an attrList is provided.
If an attrList is provided, it locks each attribute in the list.
The function concludes after processing all nodes and attributes.
- eRig.lockRig(self, lockedState=1, **shArgs)#
[shArgs: ls=lockState]
Purpose:
Locks or unlocks the rigging of a character or object, providing control over its rig state.
- Parameters:
lockState – (int, default=1) # The state to set for the rig. Use 1 to lock the rig, making it non-editable, or 0 to unlock it, allowing edits.
- Returns:
No return value.
Code Examples:
>>> lockRig(ls=0)  # Unlock the rig for editing
>>> lockRig(ls=1)  # Lock the rig, making it non-editable
graph TB Start[("fa:fa-play Start")] --> CheckShArgs{"/fas:fa-question-circle Check shArgs"} CheckShArgs --"If shArgs Exist"--> ParseShArgs["/fas:fa-cogs Parse shArgs"] CheckShArgs --"If shArgs Does Not Exist"--> InitializeParameters["/fas:fa-wrench Initialize Parameters"] InitializeParameters --> LockRigNodes{"/fas:fa-lock Lock Rig Nodes"} LockRigNodes --"Lock Rig Nodes"--> SelectAllObjects{"/fas:fa-check-square Select All Objects"} SelectAllObjects --"Select All Objects"--> AsNodes{"/fas:fa-sitemap As Nodes"} AsNodes --"As Nodes"--> StartProgressWin["/fas:fa-play Start Progress Window"] StartProgressWin --"Start Progress Window"--> LockSelectedObjects{"/fas:fa-lock Lock Selected Objects"} LockSelectedObjects --"Lock Selected Objects"--> ProgressWin{"/fas:fa-spinner Progress Window"} ProgressWin --"Progress Window"--> End["/fas:fa-stop End"] style Start fill:#00cc00,stroke:#000,stroke-width:3px style CheckShArgs fill:#ffcc00,stroke:#000,stroke-width:2px style ParseShArgs fill:#ff9999,stroke:#000,stroke-width:2px style InitializeParameters fill:#99ccff,stroke:#000,stroke-width:2px style LockRigNodes fill:#cc99ff,stroke:#000,stroke-width:2px style SelectAllObjects fill:#ffcc99,stroke:#000,stroke-width:2px style AsNodes fill:#ccffcc,stroke:#000,stroke-width:2px style StartProgressWin fill:#99ff99,stroke:#000,stroke-width:2px style LockSelectedObjects fill:#cc99ff,stroke:#000,stroke-width:2px style ProgressWin fill:#99ccff,stroke:#000,stroke-width:2px style End fill:#ff6666,stroke:#000,stroke-width:3px- Flow Chart Description:
This flowchart illustrates the lockRig function:
Checks if shArgs exist, and if so, parses the lockState from it.
If shArgs do not exist, initializes parameters with default values.
Retrieves a list of containers in the scene.
- If containers are found:
Converts container nodes to the specified type.
Locks or unlocks these nodes based on the provided lockState.
Selects all objects in the scene.
Converts the selected objects to nodes.
Initiates a progress window.
- For each selected node:
Locks or unlocks the node based on the provided lockState.
Updates the progress window.
Closes the progress window.
- eRig.mConstrain(self, objList, conList=['parent'], offSet=True, wVal=1, usePosLoc=1, **kwargs)#
[shArgs : ol=objList, cl=conList, os=offSet, wv=wVal, upl=usePosLoc]
Purpose:
:: Applies various types of constraints to a list of objects with additional control over offset, weight, and position.
Facilitates complex rigging setups by allowing multiple constraint types to be applied to objects.
Enhances control over animation and rigging by providing additional parameters like offset and weight.
- Parameters:
objList – <list> List of objects to apply constraints to.
conList – <list, default=[‘parent’]> Types of constraints to apply <e.g., ‘parent’, ‘point’>. conList = ‘point’ | ‘orient’ | ‘parent’ | ‘scale’ | ‘geometry’ | ‘normal | ‘tangent’ | ‘aim’ | ‘poleVector’ |
offSet – <bool, default=True> Whether to apply an offset to the constraint.
wVal – <float, default=1> Weight value for the constraint.
usePosLoc – <int, default=1> Determines whether to use position locator.
- **kwargskwargs:
<dict> Additional keyword arguments for more control.
- Returns:
<list> Returns a list containing the constraint node(s) and, optionally, the weight alias list.
aimConstrain Example:
aimConstraint(worldUpType="none", aimVector=(0, 0, 1), upVector=(0, 1, 0), weight=1, offset=(0, 0, 0))
Returns:
if len(conList) == 1 and len(objList) > 2:
        return [conNode, conNode.getWeightAliasList()]
else:
        return [conNode]
Code Examples:
>>> object_list = ["obj1", "obj2", "obj3"]
>>> constraint_types = ['parent', 'point']
>>> offset = True
>>> weight_value = 1
>>> use_position_locator = 1
>>> mConstrain(object_list, constraint_types, offset, weight_value, use_position_locator)
graph TB style Start fill:#00cc00,stroke:#000,stroke-width:3px style CheckShArgs fill:#ffcc00,stroke:#000,stroke-width:2px style PrepareConstraints fill:#ff9999,stroke:#000,stroke-width:2px style ApplyConstraints fill:#99ccff,stroke:#000,stroke-width:2px style SetConstraintTypes fill:#99ff99,stroke:#000,stroke-width:2px style ReturnConstraintNodes fill:#99ff99,stroke:#000,stroke-width:2px style End fill:#ff6666,stroke:#000,stroke-width:3px Start[("fa:fa-play Start")] --> CheckShArgs{"/fas:fa-question-circle Check shArgs"} CheckShArgs --"If shArgs provided"--> PrepareConstraints["/fas:fa-cogs Prepare Constraints"] CheckShArgs --"If shArgs not provided"--> PrepareConstraints PrepareConstraints --> ApplyConstraints["/fas:fa-link Apply Constraints"] ApplyConstraints --> SetConstraintTypes["/fas:fa-sliders-h Set Constraint Types"] SetConstraintTypes --> ReturnConstraintNodes["/fas:fa-code Return Constraint Nodes"] ReturnConstraintNodes --> End[("fas:fa-stop End")]- Flow Chart Description:
This flowchart illustrates the mConstrain function:
The process starts by checking if kwargs are provided, updating parameters like objList, conList, offSet, wVal, and usePosLoc.
It prepares the objects and constraint types based on the provided parameters.
Constraints are applied to the objects with the specified types and settings.
The types of constraints are set, including any special handling for specific constraint types like ‘parent’ or ‘orient’.
The function concludes by returning a list containing the constraint node(s) and, if applicable, the weight alias list.
- eRig.mDistance(self, srcObj, destObj, srcType='obj', destType='obj', giveNode=False, **shArgs)#
[shArgs : so=srcObj, do=destObj, st=srcType, dt=destType, gn=giveNode]
Purpose:
:: Measures the distance between two objects or positions, with options for different source and destination types and returning various distance-related nodes.
Ideal for dynamic distance calculations in rigging, animation, and scripting within 3D environments.
Facilitates the creation of distance-based triggers or constraints in complex scenes or rigs.
- Parameters:
srcObj – <str> # The source object or position for distance measurement.
destObj – <str> # The destination object or position for distance measurement.
srcType – <str, optional> # The type of the source (‘obj’ for object, other values for position).
destType – <str, optional> # The type of the destination (‘obj’ for object, other values for position).
giveNode – <bool, optional> # Flag to return additional nodes related to the distance measurement.
- Returns:
<list> # If giveNode is True, returns a list containing the measured distance, locator list, | distance node, distance shape, and distance attribute. If False, returns only the measured distance. | return [mDist, locList, distNode, distShape, distAttr] #_ If giveNode is True | return [mDist] #_ If giveNode is False
Code Examples:
>>> source_object = "obj1"
>>> destination_object = "obj2"
>>> source_type = 'obj'
>>> destination_type = 'obj'
>>> return_nodes = True
>>> distance_data = mDistance(source_object, destination_object, source_type, destination_type, return_nodes)
graph TB style Start fill:#00cc00,stroke:#000,stroke-width:3px style CheckShArgs fill:#ffcc00,stroke:#000,stroke-width:2px style GetSourcePosition fill:#ff9999,stroke:#000,stroke-width:2px style GetDestinationPosition fill:#99ccff,stroke:#000,stroke-width:2px style CalculateDistance fill:#99ff99,stroke:#000,stroke-width:2px style ConditionalNode{{"/fas:fa-code-branch Give Node?"}} style CreateDistanceNode fill:#99ff99,stroke:#000,stroke-width:2px style ReturnDistanceNode fill:#99ff99,stroke:#000,stroke-width:2px style ReturnDistance fill:#99ff99,stroke:#000,stroke-width:2px style End fill:#ff6666,stroke:#000,stroke-width:3px Start[("fa:fa-play Start")] --> CheckShArgs{"/fas:fa-question-circle Check shArgs"} CheckShArgs --"If shArgs provided"--> GetSourcePosition["/fas:fa-map-marker Get Source Position"] CheckShArgs --"If shArgs not provided"--> GetSourcePosition GetSourcePosition --> GetDestinationPosition["/fas:fa-map-marker-alt Get Destination Position"] GetDestinationPosition --> CalculateDistance["/fas:fa-ruler Calculate Distance"] CalculateDistance --> ConditionalNode ConditionalNode --"If giveNode"--> CreateDistanceNode["/fas:fa-network-wired Create Distance Node"] CreateDistanceNode --> ReturnDistanceNode["/fas:fa-ruler-combined Return Distance Node"] ReturnDistanceNode --> End[("fas:fa-stop End")] ConditionalNode --"If not giveNode"--> ReturnDistance["/fas:fa-ruler-vertical Return Distance"] ReturnDistance --> End- Flow Chart Description:
This flowchart illustrates the mDistance function:
The process begins by checking if shArgs are provided, updating parameters like srcObj, destObj, srcType, destType, and giveNode.
It retrieves the positions of the source and destination objects or points.
The distance between the source and destination is calculated.
If giveNode is True, additional distance-related nodes are created and returned.
The function concludes by returning either the distance nodes or only the calculated distance, based on the giveNode parameter.
- eRig.mDistance_BB(self, sel01, sel02, **shArgs)#
[shArgs : s1=sel01, s2=sel02]
Purpose:
:: Calculates the distance between the bounding boxes of two selected objects.
Useful in determining spatial relationships between objects, particularly in scene layout and collision detection.
Provides an effective method for measuring distances accounting for the actual size and space occupied by objects.
- Parameters:
sel01 – <str> # The first selected object for bounding box distance calculation.
sel02 – <str> # The second selected object for bounding box distance calculation.
- Returns:
The calculated distance between the bounding boxes of the two selected objects.
Code Examples:
>>> selected_object_1 = "cube1"
>>> selected_object_2 = "sphere1"
>>> bounding_box_distance = mDistance_BB(selected_object_1, selected_object_2)
graph TB style Start fill:#00cc00,stroke:#000,stroke-width:3px style CheckShArgs fill:#ffcc00,stroke:#000,stroke-width:2px style GetBoundingBox fill:#ff9999,stroke:#000,stroke-width:2px style CalculateBBDistance fill:#99ff99,stroke:#000,stroke-width:2px style ReturnDistance fill:#99ff99,stroke:#000,stroke-width:2px style End fill:#ff6666,stroke:#000,stroke-width:3px Start[("fa:fa-play Start")] --> CheckShArgs{"/fas:fa-question-circle Check shArgs"} CheckShArgs --"If shArgs provided"--> GetBoundingBox["/fas:fa-cube Get Bounding Box"] CheckShArgs --"If shArgs not provided"--> GetBoundingBox GetBoundingBox --> CalculateBBDistance["/fas:fa-ruler Calculate Bounding Box Distance"] CalculateBBDistance --> ReturnDistance["/fas:fa-ruler-combined Return Distance"] ReturnDistance --> End[("fas:fa-stop End")]- Flow Chart Description:
This flowchart illustrates the mDistance_BB function:
The process begins by checking if shArgs are provided, updating sel01 and sel02 accordingly.
It retrieves the bounding boxes of the selected objects.
The distance between the two bounding boxes is calculated.
The function concludes by returning the calculated bounding box distance.
- eRig.mDistance_Obj(self, src, dest, **shArgs)#
[shArgs : s=src, d=dest]
Purpose:
:: Measures the distance between two objects in 3D space.
Useful for precision positioning and spatial analysis in 3D modeling, animation, and technical direction.
Provides essential data for scripts and tools that require accurate distance calculations between objects.
- Parameters:
src – <str> # The source object for distance measurement.
dest – <str> # The destination object for distance measurement.
- Returns:
The calculated distance between the two objects.
Code Examples:
>>> source_object = "obj1"
>>> destination_object = "obj2"
>>> measured_distance = mDistance_Obj(source_object, destination_object)
graph TB style Start fill:#00cc00,stroke:#000,stroke-width:3px style CheckShArgs fill:#ffcc00,stroke:#000,stroke-width:2px style GetObjectPositions fill:#ff9999,stroke:#000,stroke-width:2px style CalculateDistance fill:#99ccff,stroke:#000,stroke-width:2px style ReturnDistance fill:#99ff99,stroke:#000,stroke-width:2px style End fill:#ff6666,stroke:#000,stroke-width:3px Start[("fa:fa-play Start")] --> CheckShArgs{"/fas:fa-question-circle Check shArgs"} CheckShArgs --"If shArgs provided"--> GetObjectPositions["/fas:fa-map-marker-alt Get Object Positions"] CheckShArgs --"If shArgs not provided"--> GetObjectPositions GetObjectPositions --> CalculateDistance["/fas:fa-ruler-combined Calculate Distance"] CalculateDistance --> ReturnDistance["/fas:fa-tape Return Distance"] ReturnDistance --> End[("fas:fa-stop End")]- Flow Chart Description:
This flowchart illustrates the mDistance_Obj function:
The process starts by checking if shArgs are provided, updating src and dest accordingly.
It retrieves the positions of the source and destination objects.
The distance between the two objects is calculated.
The function concludes by returning the calculated distance.
- eRig.mDistance_Vtx(self, src, dest, **shArgs)#
[shArgs : s=src, d=dest]
Purpose:
:: Calculates the distance between two vertices in a 3D space.
Essential for precise modeling and vertex manipulation in 3D environments.
Allows for accurate measurements between vertices, which is crucial in tasks like retopology, modeling, and rigging.
- Parameters:
src – <str> # The source vertex for distance calculation.
dest – <str> # The destination vertex for distance calculation.
- Returns:
<float> # The calculated distance between the two vertices.
Code Examples:
>>> source_vertex = "pCube1.vtx[0]"
>>> destination_vertex = "pCube2.vtx[1]"
>>> vertex_distance = mDistance_Vtx(source_vertex, destination_vertex)
graph TB style Start fill:#00cc00,stroke:#000,stroke-width:3px style CheckShArgs fill:#ffcc00,stroke:#000,stroke-width:2px style GetVertexPositions fill:#ff9999,stroke:#000,stroke-width:2px style CalculateVertexDistance fill:#99ff99,stroke:#000,stroke-width:2px style ReturnDistance fill:#99ff99,stroke:#000,stroke-width:2px style End fill:#ff6666,stroke:#000,stroke-width:3px Start[("fa:fa-play Start")] --> CheckShArgs{"/fas:fa-question-circle Check shArgs"} CheckShArgs --"If shArgs provided"--> GetVertexPositions["/fas:fa-map-marker Get Vertex Positions"] CheckShArgs --"If shArgs not provided"--> GetVertexPositions GetVertexPositions --> CalculateVertexDistance["/fas:fa-ruler Calculate Vertex Distance"] CalculateVertexDistance --> ReturnDistance["/fas:fa-ruler-combined Return Distance"] ReturnDistance --> End[("fas:fa-stop End")]- Flow Chart Description:
This flowchart illustrates the mDistance_Vtx function:
The process begins by checking if shArgs are provided, updating src and dest accordingly.
It retrieves the positions of the specified vertices.
The distance between the two vertex positions is calculated.
The function concludes by returning the calculated distance.
- eRig.mFreeze(self, objName, t=1, r=1, s=1, **shArgs)#
[shArgs : on=objName, t=translate, r=rotate, s=scale]
Purpose:
:: Freezes transformations on an object, including translation, rotation, and scale.
Essential for cleaning up and standardizing object transformations in 3D modeling and animation.
Helps in resetting the transformation values to zero without changing the object’s position, rotation, or scale in the scene.
- Parameters:
objName – <str> # The name of the object to freeze transformations on.
t – <int, optional> # Flag to freeze translation, 1 for true, 0 for false.
r – <int, optional> # Flag to freeze rotation, 1 for true, 0 for false.
s – <int, optional> # Flag to freeze scale, 1 for true, 0 for false.
- Returns:
None # This function does not return any value.
Code Examples:
>>> object_name = "model_part"
>>> freeze_translation = 1
>>> freeze_rotation = 1
>>> freeze_scale = 1
>>> mFreeze(object_name, freeze_translation, freeze_rotation, freeze_scale)
graph TB style Start fill:#00cc00,stroke:#000,stroke-width:3px style CheckShArgs fill:#ffcc00,stroke:#000,stroke-width:2px style SelectObject fill:#ff9999,stroke:#000,stroke-width:2px style ApplyFreezeTransforms fill:#99ff99,stroke:#000,stroke-width:2px style End fill:#ff6666,stroke:#000,stroke-width:3px Start[("fa:fa-play Start")] --> CheckShArgs{"/fas:fa-question-circle Check shArgs"} CheckShArgs --"If shArgs provided"--> SelectObject["/fas:fa-mouse-pointer Select Object"] CheckShArgs --"If shArgs not provided"--> SelectObject SelectObject --> ApplyFreezeTransforms["/fas:fa-snowflake Apply Freeze Transforms"] ApplyFreezeTransforms --> End[("fas:fa-stop End")]- Flow Chart Description:
This flowchart illustrates the mFreeze function:
The process begins by checking if shArgs are provided, updating parameters like objName, t, r, and s.
The specified object is selected.
Transformations are frozen on the object based on the provided flags for translation, rotation, and scale.
The function concludes after applying the freeze transformations.
- eRig.mJntOrient(self, jntList, jntAxis='x', secAxisList=['y', 'y'], selectHI=True, endJnt=True, **shArgs)#
[shArgs : jl=jntList, ja=jntAxis, sal=secAxisList, si=selectHI, ej=endJnt]
Purpose:
:: Orients joints in a joint chain according to specified axes.
Crucial for rigging in 3D animation, ensuring joints align correctly for natural movement.
Offers control over joint orientation axes, improving the quality and realism of skeletal rigs.
- Parameters:
jntList – <list> # List of joints to be oriented.
jntAxis – <str, optional> # The primary axis for joint orientation (e.g., ‘x’).
secAxisList – <list, optional> # A list defining the secondary axis for orientation (e.g., [‘y’, ‘y’]).
selectHI – <bool, optional> # Flag to select hierarchy if true.
endJnt – <bool, optional> # Flag to include the end joint in orientation if true.
- Returns:
None # This function does not return any value.
Code Examples:
>>> joint_list = ["joint1", "joint2", "joint3"]
>>> joint_axis = 'x'
>>> secondary_axis_list = ['y', 'y']
>>> select_hierarchy = True
>>> include_end_joint = True
>>> mJntOrient(joint_list, joint_axis, secondary_axis_list, select_hierarchy, include_end_joint)
graph TB style Start fill:#00cc00,stroke:#000,stroke-width:3px style CheckShArgs fill:#ffcc00,stroke:#000,stroke-width:2px style ProcessJoints fill:#ff9999,stroke:#000,stroke-width:2px style OrientJoints fill:#99ff99,stroke:#000,stroke-width:2px style End fill:#ff6666,stroke:#000,stroke-width:3px Start[("fa:fa-play Start")] --> CheckShArgs{"/fas:fa-question-circle Check shArgs"} CheckShArgs --"If shArgs provided"--> ProcessJoints["/fas:fa-cogs Process Joints"] CheckShArgs --"If shArgs not provided"--> ProcessJoints ProcessJoints --> OrientJoints["/fas:fa-ruler-combined Orient Joints"] OrientJoints --> End[("fas:fa-stop End")]- Flow Chart Description:
This flowchart illustrates the mJntOrient function:
The process starts by checking if shArgs are provided, updating parameters like jntList, jntAxis, secAxisList, selectHI, and endJnt.
It processes the joints based on the provided parameters and the joint hierarchy.
Joints are oriented according to the specified axes and orientation rules.
The function concludes after orienting all joints in the list.
- eRig.matchBoundingBoxes(self, geometry, targetGeometry, worldSpace=True, **shArgs)#
[**shArgs : None]
Purpose:
:: Matches the position and scale of one geometry object to another based on their bounding boxes.
- Parameters:
geometry – (<str>) # The geometry object to be matched.
targetGeometry – (<str>) # The target geometry object for matching.
worldSpace – (<bool, Optional, Default=True>) # Whether to calculate bounding boxes in world or local space.
- Returns:
None
Example Usage:
>>> geometry = "myGeometry"
>>> targetGeometry = "targetGeometry"
>>> matchBoundingBoxes(geometry, targetGeometry, worldSpace=True)
# Match the position and scale of 'geometry' to 'targetGeometry' based on their bounding boxes in world space.
graph TB Start[("fa:fa-play Start")] --> CheckInputs{"/fas:fa-question-circle Check Inputs"} CheckInputs --"Geometry and Target Geometry Provided"--> CheckGeometryExistence{"/fas:fa-cogs Check Geometry Existence"} CheckGeometryExistence --"If Both Geometry Exist"--> GetSourceCenter{"/fas:fa-cogs Get Source Center"} CheckGeometryExistence --"If Both Geometry Exist"--> GetSourceScale{"/fas:fa-cogs Get Source Scale"} GetSourceCenter --> GetTargetCenter{"/fas:fa-cogs Get Target Center"} GetSourceScale --> GetTargetScale{"/fas:fa-cogs Get Target Scale"} GetTargetCenter --> CalculateNewPosition{"/fas:fa-calculator Calculate New Position"} GetTargetScale --> CalculateNewPosition CalculateNewPosition --> ScaleAndMove["/fas:fa-expand Scale and Move"] ScaleAndMove --> End["/fas:fa-stop End"] style Start fill:#00cc00,stroke:#000,stroke-width:3px style CheckInputs fill:#ffcc00,stroke:#000,stroke-width:2px style CheckGeometryExistence fill:#ff9999,stroke:#000,stroke-width:2px style GetSourceCenter fill:#99ccff,stroke:#000,stroke-width:2px style GetSourceScale fill:#cc99ff,stroke:#000,stroke-width:2px style GetTargetCenter fill:#ffcc99,stroke:#000,stroke-width:2px style GetTargetScale fill:#ccffcc,stroke:#000,stroke-width:2px style CalculateNewPosition fill:#99ff99,stroke:#000,stroke-width:2px style ScaleAndMove fill:#cc99ff,stroke:#000,stroke-width:2px style End fill:#ff6666,stroke:#000,stroke-width:3px- Flow Chart Description:
This flowchart illustrates the matchBoundingBoxes function:
Checks if the required inputs, including geometry and targetGeometry, are provided.
- If both geometry objects exist:
Retrieves the bounding box center and scale of the source geometry using getBoundingBoxCenter and getBoundingBoxScale.
Retrieves the bounding box center and scale of the target geometry using getBoundingBoxCenter and getBoundingBoxScale.
Calculates the new position and scale for the source geometry based on the target geometry’s bounding box.
Applies the calculated scale and position transformation to the source geometry to match it with the target geometry.
If any of the required inputs is missing or if the geometry objects do not exist, the function terminates with an error.
- eRig.message(self, messageTxt='Subbu Addanki', **shArgs)#
[shArgs : mt=messageTxt]
Purpose:
:: Sends a specified message through a confirmDialog window.
Argument | Description:
:param messageTxt: (<type str, optional>) # The message text to be sent.
:return: None
Code Examples:
>>> custom_message = "Hello, Subbu Addanki!"  # Example message text
>>> message(messageTxt=custom_message)
# Displays a confirmation dialog with the custom message.
This function allows you to send a specified message through a confirmDialog window in Maya.
graph TB Start_message[("fa:fa-play Start")] --> CheckShArgs_message{{"/fas:fa-question Check shArgs"}} CheckShArgs_message --"If shArgs provided" --> UpdateMessageText_message["/fas:fa-pencil-square-o Update Message Text"] CheckShArgs_message --"If shArgs not provided" --> DisplayMessage_message["/fas:fa-comment Display Message"] UpdateMessageText_message --> DisplayMessage_message DisplayMessage_message --> End_message[("fas:fa-stop End")] style Start_message fill:#00cc00,stroke:#000,stroke-width:3px style CheckShArgs_message fill:#ffcc00,stroke:#000,stroke-width:2px style UpdateMessageText_message fill:#99ccff,stroke:#000,stroke-width:2px style DisplayMessage_message fill:#99ccff,stroke:#000,stroke-width:2px style End_message fill:#ff6666,stroke:#000,stroke-width:3px- Flow Chart Description:
This flowchart illustrates the message function:
The function begins by checking for shArgs and updates the message text if provided.
It then displays the specified message in a confirmDialog window.
The process ends after displaying the message.
- eRig.moveAnim(self, src, dest, attr='r', remove=True, **shArgs)#
[shArgs : s=src, d=dest, a=attr, r=remove]
Purpose:
:: Transfers animation data from one object to another, with optional attribute control and removal of source animation.
Ideal for redistributing animation data in a production pipeline, such as transferring animations between characters or assets.
Enables efficient reuse and modification of existing animations, enhancing workflow flexibility.
- Parameters:
src – <str> # The source object from which to move the animation.
dest – <str> # The destination object to which the animation will be moved.
attr – <str, optional> # The attribute to transfer (e.g., ‘r’ for rotation).
remove – <bool, optional> # Flag to remove the animation from the source object after transfer.
- Returns:
None # This function does not return any value.
Code Examples:
>>> source = "obj1"
>>> destination = "obj2"
>>> attribute = 'r'
>>> remove_animation = True
>>> moveAnim(source, destination, attribute, remove_animation)
graph TB style Start fill:#00cc00,stroke:#000,stroke-width:3px style CheckShArgs fill:#ffcc00,stroke:#000,stroke-width:2px style TransferAnimation fill:#ff9999,stroke:#000,stroke-width:2px style End fill:#ff6666,stroke:#000,stroke-width:3px Start[("fa:fa-play Start")] --> CheckShArgs{"/fas:fa-question-circle Check shArgs"} CheckShArgs --"If shArgs provided"--> TransferAnimation["/fas:fa-exchange-alt Transfer Animation"] CheckShArgs --"If shArgs not provided"--> TransferAnimation TransferAnimation --> End[("fas:fa-stop End")]- Flow Chart Description:
This flowchart illustrates the moveAnim function:
The process begins by checking if shArgs are provided, updating parameters like src, dest, attr, and remove.
It then transfers the animation from the source object to the destination object, based on the specified attribute.
If the remove flag is True, the animation is removed from the source object after transfer.
The function concludes after transferring the animation.
- eRig.moveAnimToGrp(self, ctrlList=None, attrList='r', **shArgs)#
[shArgs : cl=ctrlList, al=attrList]
Purpose:
:: Moves animation data from a list of controls to a group, with optional attribute control.
Essential for restructuring animation data in complex rigs, especially when reparenting or reorganizing hierarchies.
Simplifies the process of transferring animation between different control groups without manual keyframe adjustment.
- Parameters:
ctrlList – <list, optional> # List of controls from which to move the animation.
attrList – <str, optional> # The attribute to transfer (e.g., ‘r’ for rotation).
- Returns:
None # This function does not return any value.
Code Examples:
>>> control_list = ["ctrl1", "ctrl2", "ctrl3"]
>>> attributes = 'r'
>>> moveAnimToGrp(control_list, attributes)
graph TB style Start fill:#00cc00,stroke:#000,stroke-width:3px style CheckShArgs fill:#ffcc00,stroke:#000,stroke-width:2px style CheckCtrlList fill:#ff9999,stroke:#000,stroke-width:2px style LoopThroughCtrl fill:#99ccff,stroke:#000,stroke-width:2px style LoopThroughAttr fill:#cc99ff,stroke:#000,stroke-width:2px style TransferAnim fill:#99ff99,stroke:#000,stroke-width:2px style End fill:#ff6666,stroke:#000,stroke-width:3px Start[("fa:fa-play Start")] --> CheckShArgs{"/fas:fa-question-circle Check shArgs"} CheckShArgs --"If shArgs provided"--> CheckCtrlList["/fas:fa-list-ol Check Ctrl List"] CheckShArgs --"If shArgs not provided"--> CheckCtrlList CheckCtrlList --> LoopThroughCtrl["/fas:fa-repeat Loop Through Ctrl"] LoopThroughCtrl --> LoopThroughAttr["/fas:fa-exchange-alt Loop Through Attr"] LoopThroughAttr --> TransferAnim["/fas:fa-arrows-alt Transfer Anim"] TransferAnim --> End[("fas:fa-stop End")]- Flow Chart Description:
This flowchart illustrates the moveAnimToGrp function:
The process starts by checking if shArgs are provided, updating parameters like ctrlList and attrList.
It ensures there is a control list to operate on.
The function loops through each control in the control list.
For each control, it loops through each specified attribute.
Animation data of these attributes are transferred to the respective group.
The function concludes after transferring animation for all specified attributes and controls.
- eRig.moveValuesFromGrps(self, srcList, attrList=['r'], grpLevel=2, **shArgs)#
[shArgs : sl=srcList, al=attrList, gl=grpLevel]
Purpose:
:: Transfers attribute values from source objects to a specified group level.
Facilitates the manipulation of hierarchical object attributes in complex rigs or scenes.
Useful for animators and technical directors in restructuring attribute dependencies without manual adjustments.
- Parameters:
srcList – <list> # List of source objects from which values are moved.
attrList – <list, optional> # List of attributes to transfer (e.g., [‘r’] for rotation).
grpLevel – <int> # The group level to which the values are moved.
- Returns:
None # This function does not return any value.
Code Examples:
>>> source_objects = ["obj1", "obj2", "obj3"]
>>> attributes_to_move = ['r']
>>> group_level = 2
>>> move_values_from_groups =moveValuesFromGrps(source_objects, attributes_to_move, group_level)
graph TB style Start fill:#00cc00,stroke:#000,stroke-width:3px style CheckShArgs fill:#ffcc00,stroke:#000,stroke-width:2px style LoopThroughSrc fill:#99ccff,stroke:#000,stroke-width:2px style TransferValues fill:#99ff99,stroke:#000,stroke-width:2px style End fill:#ff6666,stroke:#000,stroke-width:3px Start[("fa:fa-play Start")] --> CheckShArgs{"/fas:fa-question-circle Check shArgs"} CheckShArgs --"If shArgs provided"--> LoopThroughSrc["/fas:fa-repeat Loop Through Source"] CheckShArgs --"If shArgs not provided"--> LoopThroughSrc LoopThroughSrc --> TransferValues["/fas:fa-arrow-right Transfer Values"] TransferValues --> End[("fas:fa-stop End")]- Flow Chart Description:
This flowchart illustrates the moveValuesFromGrps function:
The process begins by checking if shArgs are provided, updating parameters like srcList, attrList, and grpLevel.
The function loops through each source object in the source list.
For each source object, it transfers the specified attribute values from the group level back to the object.
The function concludes after processing all source objects.
- eRig.moveValuesToGrp(self, srcList=None, attrList=['r'], grpLevel=2, skipLocked=True, **shArgs)#
[shArgs : sl=srcList, al=attrList, gl=grpLevel, slk=skipLocked]
Purpose:
:: Moves specified attribute values from source objects to a group, with control over skipping locked attributes.
This function is particularly useful in complex rigging scenarios where attribute values need to be consolidated or organized hierarchically.
The ability to skip locked attributes provides flexibility and ensures that critical or locked-down properties are not inadvertently altered.
- Parameters:
srcList – <list, optional> # List of source objects from which values are moved. Defaults to selected objects.
attrList – <list, optional> # List of attributes to be moved (e.g., [‘r’] for rotation). Defaults to [‘r’].
grpLevel – <int> # The group level to which the values are moved.
skipLocked – <bool, optional> # Flag to skip moving values of locked attributes. Default is True.
- Returns:
None # This function does not return any value.
Code Examples:
>>> source_objects = ["obj1", "obj2", "obj3"]
>>> attributes_to_move = ["r"]
>>> group_level = 2
>>> move_values_to_grp = moveValuesToGrp(source_objects, attributes_to_move, group_level, skipLocked=True)
graph TB style Start fill:#00cc00,stroke:#000,stroke-width:3px style CheckShArgs fill:#ffcc00,stroke:#000,stroke-width:2px style SetSourceList fill:#ff9999,stroke:#000,stroke-width:2px style LoopThroughSources fill:#99ccff,stroke:#000,stroke-width:2px style LoopThroughAttributes fill:#cc99ff,stroke:#000,stroke-width:2px style MoveValues fill:#99ff99,stroke:#000,stroke-width:2px style SkipLocked fill:#ff6666,stroke:#000,stroke-width:2px style End fill:#ff6666,stroke:#000,stroke-width:3px Start[("fa:fa-play Start")] --> CheckShArgs{"/fas:fa-question-circle Check shArgs"} CheckShArgs --"If shArgs provided"--> SetSourceList["/fas:fa-list-ol Set Source List"] CheckShArgs --"If shArgs not provided"--> SetSourceList SetSourceList --> LoopThroughSources["/fas:fa-repeat Loop Through Sources"] LoopThroughSources --> LoopThroughAttributes["/fas:fa-exchange-alt Loop Through Attributes"] LoopThroughAttributes --> MoveValues{"/fas:fa-arrows-alt Move Values"} MoveValues --"If skipLocked is True"--> SkipLocked["/fas:fa-ban Skip Locked"] MoveValues --"If skipLocked is False"--> End[("fas:fa-stop End")] SkipLocked --> End- Flow Chart Description:
This flowchart illustrates the moveValuesToGrp function:
The process starts by checking if shArgs are provided, updating parameters like srcList, attrList, grpLevel, and skipLocked.
It sets the source list, either from the provided arguments or from the selected objects in the scene.
The function iterates through each source object.
For each source, it loops through the specified attributes.
Values of these attributes are moved to the specified group level.
If skipLocked is True, locked attributes are skipped during this process.
The function concludes after moving the values for all specified attributes and sources.
- eRig.name(self, mNode, **shArgs)#
[shArgs : mn=mNode]
Purpose:
:: Retrieves the short name of an object, excluding its full path.
Argument | Description:
:param mNode: (<type str>) # The object from which to retrieve the name.
:return: (<type str>) # The short name of the object, excluding the full path.
Code Examples:
>>> object_name = "|group1|mesh1"  # Example full path
>>> short_name = name(object_name)
# Returns 'mesh1'
h TB Start[("fa:fa-play Start")] --> CheckShArgs{"/fas:fa-question-circle Check shArgs"} CheckShArgs --"If shArgs Exist"--> ParseShArgs["/fas:fa-cogs Parse shArgs"] CheckShArgs --"If shArgs Does Not Exist"--> InitializeParameters["/fas:fa-wrench Initialize Parameters"] InitializeParameters --> RetrieveShortName{"/fas:fa-file Retrieve Short Name"} RetrieveShortName --"Retrieve Short Name"--> End["/fas:fa-stop End"] style Start fill:#00cc00,stroke:#000,stroke-width:3px style CheckShArgs fill:#ffcc00,stroke:#000,stroke-width:2px style ParseShArgs fill:#ff9999,stroke:#000,stroke-width:2px style InitializeParameters fill:#99ccff,stroke:#000,stroke-width:2px style RetrieveShortName fill:#00cc00,stroke:#000,stroke-width:3px style End fill:#ff6666,stroke:#000,stroke-width:3px- Flow Chart Description:
This flowchart illustrates the name function:
Checks if shArgs exist, and if so, parses the mn from it.
If shArgs do not exist, initializes parameters with default values.
Retrieves the short name of the object, excluding its full path.
- eRig.nearestEdg_OnMesh(self, srcObj, trgtMesh, excludeList=None, **shArgs)#
[shArgs : so=srcObj, tm=trgtMesh, el=excludeList]
Purpose:
:: Identifies the nearest edge on a target mesh relative to a given source object or position.
Ideal for 3D modeling and scripting tasks where proximity-based edge selection on a mesh is necessary.
Enhances precision in selecting mesh components based on spatial relationships, useful in rigging and geometry adjustments.
- Parameters:
srcObj – <str> # Source object or position for locating the nearest edge.
trgtMesh – <str> # Target mesh to find the nearest edge on.
excludeList – <list, optional> # List of edges to exclude from the search.
- Returns:
<str> # The name or position of the nearest edge on the target mesh.
Code Examples:
>>> source_object = "locator1"
>>> target_mesh = "mesh1"
>>> exclude_edges = [1, 3, 5]
>>> nearest_edge = nearestEdg_OnMesh(source_object, target_mesh, exclude_edges)
graph TD Start[("fa:fa-play Start")] --> CheckInputs{"/fas:fa-question-circle Check Inputs"} CheckInputs --"Source Object and Target Mesh Provided"--> FindNearestEdge[("/fas:fa-cogs Find Nearest Edge")] CheckInputs --"No Source Object or Target Mesh Provided"--> Error[("fa:fa-times Error")] FindNearestEdge --> End[("/fas:fa-stop End")] style Start fill:#00cc00,stroke:#000,stroke-width:3px style CheckInputs fill:#ffcc00,stroke:#000,stroke-width:2px style FindNearestEdge fill:#99ff99,stroke:#000,stroke-width:2px style Error fill:#ff6666,stroke:#000,stroke-width:3px style End fill:#ff6666,stroke:#000,stroke-width:3px- Flow Chart Description:
This flowchart illustrates the logic of the nearestEdg_OnMesh function:
The function starts by checking if both the source object and the target mesh are provided as inputs.
If both the source object and target mesh are provided, it proceeds to find the nearest edge on the target mesh.
If either the source object or target mesh is missing, it raises an error.
The function ends after finding the nearest edge or encountering an error.
- eRig.nearestVtx_OnMesh(self, srcObjOrPos, trgtMesh, excludeList=None, skipDir=None, **shArgs)#
[shArgs : so=srcObjOrPos, tm=trgtMesh, el=excludeList, sd=skipDir]
Purpose:
:: Identifies the nearest vertex on a target mesh relative to a given source object or position.
Ideal for use in 3D modeling, animation, and scripting where precise vertex selection relative to an object or position is needed.
Enhances accuracy and efficiency in tasks involving spatial relationships between objects and mesh vertices.
- Parameters:
srcObjOrPos – <str/list> # Source object or position for locating the nearest vertex.
trgtMesh – <str> # Target mesh to find the nearest vertex on.
excludeList – <list, optional> # List of vertices to exclude from the search.
skipDir – <str/list, optional> # Direction or list of directions to skip in the search.
- Returns:
<list> # The nearest vertex and its index on the target mesh.
Code Examples:
>>> source_object = "locator1"
>>> target_mesh = "mesh1"
>>> exclude_vertices = [1, 3, 5]
>>> skip_direction = "+x"
>>> nearest_vertex = nearestVtx_OnMesh(source_object, target_mesh, exclude_vertices, skip_direction)
graph TB Start[("fa:fa-play Start")] --> InputSrcObjPos{"/fas:fa-keyboard Input Source Object/Position"} InputSrcObjPos --> ExtractTrgtMesh["/fas:fa-cogs Extract Target Mesh"] ExtractTrgtMesh --> CheckExcludeList{"/fas:fa-tasks Check Exclude List"} CheckExcludeList --"If Exclude List is provided" --> ExcludeVertices["/fas:fa-minus-circle Exclude Vertices"] CheckExcludeList --"If No Exclude List" --> FindNearestVtx{"/fas:fa-search-location Find Nearest Vertex"} ExcludeVertices --> FindNearestVtx FindNearestVtx --> CheckSkipDir{"/fas:fa-arrow-right-arrow-left Check Skip Direction"} CheckSkipDir --"If Skip Direction is provided" --> ApplySkipDir["/fas:fa-filter Apply Skip Direction"] ApplySkipDir --> IdentifyNearestVtx["/fas:fa-crosshairs Identify Nearest Vertex"] CheckSkipDir --"If No Skip Direction" --> IdentifyNearestVtx IdentifyNearestVtx --> ReturnNearestVtx[("/fas:fa-arrow-right Return Nearest Vertex")] ReturnNearestVtx --> End[("fas:fa-stop End")] style Start fill:#00cc00,stroke:#000,stroke-width:3px style InputSrcObjPos fill:#ffcc00,stroke:#000,stroke-width:2px style ExtractTrgtMesh fill:#ff9999,stroke:#000,stroke-width:2px style CheckExcludeList fill:#99ccff,stroke:#000,stroke-width:2px style ExcludeVertices fill:#cc99ff,stroke:#000,stroke-width:2px style FindNearestVtx fill:#99ff99,stroke:#000,stroke-width:2px style CheckSkipDir fill:#ff6666,stroke:#000,stroke-width:3px style ApplySkipDir fill:#00cc00,stroke:#000,stroke-width:3px style IdentifyNearestVtx fill:#ffcc00,stroke:#000,stroke-width:2px style ReturnNearestVtx fill:#ff9999,stroke:#000,stroke-width:2px style End fill:#ff6666,stroke:#000,stroke-width:3px- Flow Chart Description:
This flowchart illustrates the nearestVtx_OnMesh function:
Begins by obtaining the source object or position.
Extracts the target mesh information.
Checks if there’s an exclude list provided to skip certain vertices.
If an exclude list is provided, the corresponding vertices are excluded from the search.
Searches for the nearest vertex on the target mesh.
Checks if there is a direction to be skipped in the search.
If a skip direction is provided, applies the direction filter.
Identifies the nearest vertex based on the provided criteria.
Returns the nearest vertex and its index on the target mesh.
- eRig.nextVar(self, varName, **shArgs)#
[shArgs : vn=varName]
Purpose:
:: Retrieves the next value in a sequence or structure based on a given variable name in Maya.
Useful for auto-generating names or identifiers in sequences, particularly in scripting and automation tasks.
Enhances efficiency in processes that require systematic naming conventions or iteration over a set of names.
- Parameters:
varName – <str> # The name of the variable to iterate over.
- Returns:
<str> # The next value in the sequence or structure.
Code Examples:
>>> variable_name = "object_03"
>>> next_variable = nextVar(variable_name)
# Returns "object_04" as the next variable name in the sequence.
graph TD Start[("fa:fa-play Start")] --> CheckInputs{"/fas:fa-question-circle Check Inputs"} CheckInputs --"Variable Name Provided"--> CheckNumericSuffix{"/fas:fa-question-circle Check Numeric Suffix"} CheckInputs --"Variable Name Not Provided"--> Error[("fa:fa-times Error")] CheckNumericSuffix --"Numeric Suffix Exists"--> GenerateNextNumericSuffix[("/fas:fa-cogs Generate Next Numeric Suffix")] CheckNumericSuffix --"Numeric Suffix Does Not Exist"--> GenerateNumericSuffix[("/fas:fa-cogs Generate Numeric Suffix")] GenerateNextNumericSuffix --"Variable Name Updated"--> End[("/fas:fa-stop End")] GenerateNextNumericSuffix --"Variable Name Not Updated"--> End GenerateNumericSuffix --"Variable Name Updated"--> End GenerateNumericSuffix --"Variable Name Not Updated"--> End style Start fill:#00cc00,stroke:#000,stroke-width:3px style CheckInputs fill:#ffcc00,stroke:#000,stroke-width:2px style CheckNumericSuffix fill:#ffcc00,stroke:#000,stroke-width:2px style GenerateNextNumericSuffix fill:#99ff99,stroke:#000,stroke-width:2px style GenerateNumericSuffix fill:#99ff99,stroke:#000,stroke-width:2px style Error fill:#ff6666,stroke:#000,stroke-width:3px style End fill:#ff6666,stroke:#000,stroke-width:3px- Flow Chart Description:
This flowchart illustrates the logic of the nextVar function:
The function starts by checking if a variable name is provided as an input.
If a variable name is provided, it proceeds to check if the variable name has a numeric suffix.
If a numeric suffix exists in the variable name, it generates the next numeric suffix and updates the variable name.
If no numeric suffix exists, it generates a numeric suffix and updates the variable name.
The function ends after either updating the variable name with the next value or encountering an error if no variable name is provided.
- eRig.old_confirmAction(self, action, raiseErr=False)#
Requests User to confirm an action shown in confirmDialog window
- eRig.old_extractNum(self, objName)#
Returns:#
the extracted number from end of the object name
Usage:#
obj.vtx[105] # Returns 105 obj.e[206] # Returns 206
- eRig.old_generateCurv(self, curvName, deg=3, step=1)#
- eRig.old_getCurveCVsAll(self, curveName)#
- eRig.old_getMObject(self, obj)#
- eRig.old_getNearestObj(self, srcObj, destList, destType='obj')#
- eRig.old_getVtxList(self, objName, vtxType='cv')#
- eRig.old_get_2PosExtn(self, sel01, sel02, extnRatio, locName='Extn_Loc', giveLoc=True)#
- eRig.old_get_2PosVect(self, srcObj, destObj)#
- eRig.old_grpIt(self, obj, grpLevel=1, snapPiv=True)#
Return:#
Returns only extreme top group at given grpLevl
- eRig.old_isLastJnt(self, jnt)#
- eRig.old_lockAttrs(self, nodeList, attrList=None)#
Args:#
attrList = ‘t’ | ‘tx’ | [‘t’, ‘r’] | [‘tx’, ‘ry’] etc
- eRig.old_progressWin(self, currentItem=None, endProgress=0, showProgressTime=1, infiniteLoop=False)#
- eRig.old_selectSiblings(self)#
- eRig.old_snapPivot_Obj(self, srcObj, destObj=[0, 0, 0])#
- eRig.old_snapTo_Obj(self, src, dest)#
- eRig.old_startProgressWin(self, numObjs, winTitle='Please Wait ..!', progressNote='Progress : 0%', doInterrupt=True)#
- eRig.old_unfreezeTransform(self)#
- eRig.openAttrs(self, nodeList, attrList=None, keyed=True, **shArgs)#
[**shArgs : nl=nodeList, al=attrList, k=keyed]
Purpose:
:: Unlocks specific attributes on a list of nodes, optionally focusing on only keyed attributes.
Useful for making batch attribute modifications on multiple nodes.
Provides flexibility in attribute management, especially in animation and rigging contexts.
- Parameters:
nodeList – <list/str> # Node or list of nodes to unlock attributes on. E.g., ‘nodeName’, ‘nodeName.attr’, ‘nodeName.attrX’.
attrList – <list/str, optional> # Attribute or list of attributes to unlock. E.g., ‘t’, ‘tx’, [‘t’, ‘r’], [‘tx’, ‘v’].
keyed – <bool, optional> # If True, unlocks only keyed attributes. Default is True.
- Returns:
No return value.
Usage:
>>> openAttrs('pCube1', attrList=['tx', 'ty'], keyed=True)
# Unlocks 'tx' and 'ty' attributes on 'pCube1' if they are keyed.
graph TB style Start fill:#00cc00,stroke:#000,stroke-width:3px style CheckShArgs fill:#ffcc00,stroke:#000,stroke-width:2px style SetNodeList fill:#ff9999,stroke:#000,stroke-width:2px style LoopThroughNodeList fill:#99ccff,stroke:#000,stroke-width:2px style CheckIsAttr fill:#cc99ff,stroke:#000,stroke-width:2px style UnlockAttrDirect fill:#99ff99,stroke:#000,stroke-width:2px style CheckAttrList fill:#cc99ff,stroke:#000,stroke-width:2px style UnlockAttrList fill:#99ff99,stroke:#000,stroke-width:2px style End fill:#ff6666,stroke:#000,stroke-width:3px Start[("fa:fa-play Start")] --> CheckShArgs{"/fas:fa-question-circle Check shArgs"} CheckShArgs --"If shArgs provided"--> SetNodeList["/fas:fa-list-ol Set NodeList"] CheckShArgs --"If shArgs not provided"--> SetNodeList SetNodeList --> LoopThroughNodeList["/fas:fa-repeat Loop Through NodeList"] LoopThroughNodeList --> CheckIsAttr{"/fas:fa-check-square Check IsAttr"} CheckIsAttr --"If valid attribute"--> UnlockAttrDirect["/fas:fa-unlock Unlock Attr Direct"] CheckIsAttr --"If not valid attribute"--> CheckAttrList{"/fas:fa-list-alt Check AttrList"} CheckAttrList --"If attrList provided"--> UnlockAttrList["/fas:fa-unlock-alt Unlock Attr List"] CheckAttrList --"If attrList not provided"--> End[("fas:fa-stop End")]- Flow Chart Description:
This flowchart illustrates the openAttrs function:
The process starts by checking if shArgs are provided, updating parameters like nodeList, attrList, and keyed.
It converts nodeList and attrList into list formats if they are not already lists.
The function iterates over each node in the nodeList.
For each node, it checks if the node string includes an attribute. If so, it unlocks the attribute directly.
If the node string does not include an attribute, the function checks if an attrList is provided.
If an attrList is provided, it unlocks each attribute in the list.
The function concludes after processing all nodes and attributes.
- eRig.overrideParentChild(self, chd=None, prnt=None, removeAttrs=False, dscChd=False, confirmMsg=False, **shArgs)#
[shArgs : c=chd, p=prnt, ra=removeAttrs, dc=dscChd, cm=confirmMsg]
Purpose:
:: Overrides the parent-child relationship between two objects in Maya, with additional options like removing attributes or including descending children.
Useful in rigging and scene organization to customize parent-child relationships beyond the default Maya hierarchy.
Provides flexibility in managing connections and attributes between objects.
- Parameters:
chd – <str, optional> # The child object in the relationship.
prnt – <str, optional> # The parent object in the relationship.
removeAttrs – <bool, optional> # Flag to remove attributes from the child object.
dscChd – <bool, optional> # Flag to include descending children.
confirmMsg – <bool, optional> # Flag to display a confirmation message.
- Returns:
None # This function does not return any value.
Code Examples:
>>> child_object = "pCube1"
>>> parent_object = "pSphere1"
>>> remove_attributes = True
>>> include_descendants = False
>>> show_confirmation = True
>>> overrideParentChild(child_object, parent_object, remove_attributes, include_descendants, show_confirmation)
graph TD Start[("fa:fa-play Start")] --> CheckInputs{"/fas:fa-question-circle Check Inputs"} CheckInputs --"Child and Parent Objects Provided"--> OverrideParentChild[("/fas:fa-cogs Override Parent-Child")] CheckInputs --"No Child and Parent Objects Provided"--> SelectJoints{"/fas:fa-hand-pointer Select Joints"} SelectJoints --"At Least 2 Joints Selected"--> OverrideMultipleParentChild[("/fas:fa-cogs Override Multiple Parent-Child")] SelectJoints --"Less Than 2 Joints Selected"--> Error[("fa:fa-times Error")] SelectJoints --"Cancel Joint Selection"--> Error OverrideMultipleParentChild --> End[("/fas:fa-stop End")] OverrideParentChild --"Remove Attributes Flag Enabled"--> RemoveAttributes[("/fas:fa-trash-alt Remove Attributes")] OverrideParentChild --"Remove Attributes Flag Disabled"--> UpdateAttributes[("/fas:fa-cogs Update Attributes")] RemoveAttributes --> End UpdateAttributes --"Descending Children Flag Enabled"--> AddDescendingChildren[("/fas:fa-cogs Add Descending Children")] UpdateAttributes --"Descending Children Flag Disabled"--> End style Start fill:#00cc00,stroke:#000,stroke-width:3px style CheckInputs fill:#ffcc00,stroke:#000,stroke-width:2px style OverrideParentChild fill:#99ff99,stroke:#000,stroke-width:2px style SelectJoints fill:#ffcc00,stroke:#000,stroke-width:2px style OverrideMultipleParentChild fill:#99ff99,stroke:#000,stroke-width:2px style RemoveAttributes fill:#ffcc00,stroke:#000,stroke-width:2px style UpdateAttributes fill:#99ff99,stroke:#000,stroke-width:2px style AddDescendingChildren fill:#99ff99,stroke:#000,stroke-width:2px style Error fill:#ff6666,stroke:#000,stroke-width:3px style End fill:#ff6666,stroke:#000,stroke-width:3px- Flow Chart Description:
This flowchart illustrates the logic of the overrideParentChild function:
The function starts by checking if child and parent objects are provided as inputs.
If both child and parent objects are provided, it proceeds to override the parent-child relationship.
If no child and parent objects are provided, it checks if at least 2 joints are selected.
If at least 2 joints are selected, it allows the user to override the relationships between multiple joints.
If less than 2 joints are selected, it raises an error.
If the “Remove Attributes” flag is enabled, it removes attributes from the child object.
If the “Remove Attributes” flag is disabled, it updates the attributes based on the other flags.
If the “Descending Children” flag is enabled, it adds descending children to the relationship.
The function ends after performing the specified actions or encountering an error.
- eRig.prefixAll(self, objList, prefix, topSelect=True, selectHI=True, **shArgs)#
[**shArgs: ol=objList, p=prefix, ts=topSelect, shi=selectHI]
Purpose:
:: Adds a specified prefix to all objects in the given list, with options for selection hierarchy.
- Parameters:
objList – (<type list>) # List of objects to prefix.
prefix – (<type str>) # Prefix to be added to each object’s name.
topSelect – (<type bool, optional>) # If True, selects top-level objects after prefixing.
selectHI – (<type bool, optional>) # If True, selects the entire hierarchy of each object after prefixing.
- Returns:
None. Objects in the list are modified in place.
Code Examples:
>>> objList = ["object1", "object2", "object3"]
>>> prefix = "prefix_"
>>> topSelect = True
>>> selectHI = True
>>> prefixAll(objList, prefix, topSelect, selectHI)
# Adds the prefix "prefix_" to each object's name, selects top-level objects, and selects the entire hierarchy of each object.
graph TD Start[("fa:fa-play Start")] --> CheckShArgs{"/fas:fa-question-circle Check shArgs"} CheckShArgs --"Arguments Provided"--> PrepareObjList{"/fas:fa-archive Prepare Object List"} PrepareObjList --"Prepare Object List"--> CheckTopSelect{"/fas:fa-question-circle Check topSelect"} CheckTopSelect --"TopSelect is True"--> CheckSelectHI{"/fas:fa-question-circle Check selectHI"} CheckTopSelect --"TopSelect is False"--> CheckSelectHI CheckSelectHI --"SelectHI is True"--> PrefixObjects{"/fas:fa-terminal Prefix Objects"} CheckSelectHI --"SelectHI is False"--> PrefixObjects PrefixObjects --"Prefix Objects"--> SelectFinalList{"/fas:fa-arrows-alt-h Select Final List"} SelectFinalList --"Select Final List"--> End["/fas:fa-stop End"] style Start fill:#00cc00,stroke:#000,stroke-width:3px style CheckShArgs fill:#ffcc00,stroke:#000,stroke-width:2px style PrepareObjList fill:#ff9999,stroke:#000,stroke-width:2px style CheckTopSelect fill:#99ccff,stroke:#000,stroke-width:2px style CheckSelectHI fill:#ffcc99,stroke:#000,stroke-width:2px style PrefixObjects fill:#99ff99,stroke:#000,stroke-width:2px style SelectFinalList fill:#ccffcc,stroke:#000,stroke-width:2px style End fill:#ff6666,stroke:#000,stroke-width:3px- Flow Chart Description:
This flowchart illustrates the prefixAll function:
The function starts with the provided arguments.
Prepares the object list for prefixing.
Checks if top-level objects should be selected (topSelect=True) or not.
Checks if the entire hierarchy of objects should be selected (selectHI=True) or not.
Prefixes the objects in the list based on the options.
Selects the final list of objects if needed.
Ends the function without returning any value.
- eRig.prevVar(self, varName, **shArgs)#
Purpose:
:: Retrieves the name with the previous sequential number of a given variable in the script.
Useful for scripting scenarios where sequential naming is important, such as in iteration loops or naming conventions.
Facilitates easy navigation through sequences or lists by providing a simple way to access the previous item’s name.
- Parameters:
varName – <str> # The name of the variable.
- Returns:
<str> # The name with the previous sequential number.
Code Examples:
>>> variable_name = "object_03"
>>> previous_variable = prevVar(variable_name)
# Returns 'object_02'
graph TB Start[("fa:fa-play Start")] --> InputVarName{"/fas:fa-keyboard Input VarName"} InputVarName --"If shArgs is provided" --> ExtractVarName["/fas:fa-cogs Extract VarName"] ExtractVarName --> CheckNumberInVar{"/fas:fa-sort-numeric-up Check Number in Var"} CheckNumberInVar --"If Number exists" --> DecrementNumber["/fas:fa-minus-circle Decrement Number"] DecrementNumber --> ReturnPrevVar[("/fas:fa-arrow-left Return Prev Var")] CheckNumberInVar --"If No Number" --> AppendNumber["/fas:fa-minus Append '01'"] AppendNumber --> ReturnPrevVar ReturnPrevVar --> End[("fas:fa-stop End")] style Start fill:#00cc00,stroke:#000,stroke-width:3px style InputVarName fill:#ffcc00,stroke:#000,stroke-width:2px style ExtractVarName fill:#ff9999,stroke:#000,stroke-width:2px style CheckNumberInVar fill:#99ccff,stroke:#000,stroke-width:2px style DecrementNumber fill:#cc99ff,stroke:#000,stroke-width:2px style AppendNumber fill:#99ff99,stroke:#000,stroke-width:2px style ReturnPrevVar fill:#ff6666,stroke:#000,stroke-width:3px style End fill:#ff6666,stroke:#000,stroke-width:3px- Flow Chart Description:
This flowchart illustrates the prevVar function:
The process begins with inputting the variable name (varName).
If shArgs is provided, the variable name is extracted from these arguments.
The function checks if there is a number within the variable name.
If a number is present, it is decremented to generate the previous variable name.
If no number is found, ‘01’ is subtracted from the variable name.
Finally, the function returns the variable name with the previous sequential number.
- eRig.progressBar(self, progBar, progTxt=None, stopProgress=False, escCommand=None, **shArgs)#
[shArgs : pb=progBar, pt=progTxt, sp=stopProgress, ec=escCommand]
Purpose:
:: Updates a progress bar with optional text and stop functionality in Maya.
Ideal for providing visual feedback during lengthy operations or scripts in Maya.
Enhances user experience by offering a way to track progress and optionally stop the operation if needed.
- Parameters:
progBar – <str> # The name of the progress bar to be updated.
progTxt – <str, optional> # Text to display on the progress bar. Default is None.
stopProgress – <bool, optional> # If True, stops the progress. Default is False.
escCommand – <str, optional> # Command to execute when the progress is stopped. Default is None.
- Returns:
None # This function does not return any value.
Code Examples:
>>> progress_bar_name = "myProgressBar"
>>> progress_text = "Processing"
>>> stop_progress = False
>>> escape_command = "print('Stopped')"
>>> progressBar(progress_bar_name, progress_text, stop_progress, escape_command)
graph TD Start[("fa:fa-play Start")] --> CheckShArgs{"/fas:fa-question-circle Check shArgs"} CheckShArgs --"Arguments Provided"--> UpdateProgressBar{"/fas:fa-cogs Update Progress Bar"} UpdateProgressBar --"Update Progress Bar"--> CheckStopProgress{"/fas:fa-question-circle Check stopProgress"} CheckStopProgress --"stopProgress True"--> StopProgress{"/fas:fa-stop Stop Progress"} CheckStopProgress --"stopProgress False"--> ContinueProgressBar{"/fas:fa-arrow-right Continue Progress"} ContinueProgressBar --"Update Progress"--> End["/fas:fa-stop End"] style Start fill:#00cc00,stroke:#000,stroke-width:3px style CheckShArgs fill:#ffcc00,stroke:#000,stroke-width:2px style UpdateProgressBar fill:#99ff99,stroke:#000,stroke-width:2px style CheckStopProgress fill:#ffcc00,stroke:#000,stroke-width:2px style StopProgress fill:#ff6666,stroke:#000,stroke-width:3px style ContinueProgressBar fill:#99ff99,stroke:#000,stroke-width:2px style End fill:#ff6666,stroke:#000,stroke-width:3px- Flow Chart Description:
This flowchart illustrates the progressBar function:
The function starts with the provided arguments.
It checks if arguments are provided.
It updates the progress bar with optional text.
It checks if the stopProgress flag is True.
If stopProgress is True, it stops the progress and executes the escCommand if provided.
If stopProgress is False, it continues updating the progress.
The function ends after updating the progress bar.
- eRig.progressWin(self, currentItem=None, endProgress=0, showProgressTime=1, innerObjs=False, innerList=None, refreshView=1, useProgress=1, **shArgs)#
[shArgs : ci=currentItem, ep=endProgress, spt=showProgressTime, io=innerObjs, il=innerList, rv=refreshView, up=useProgress]
Purpose:
:: Manages a progress window for various operations, with customization options in Maya.
Provides a dynamic way to track and display progress for scripts and processes within Maya.
Enhances user experience by offering customizable progress tracking, including inner object processing and time display.
- Parameters:
currentItem – <str, optional> # Current item being processed. Default is None.
endProgress – <int, optional> # Indicates the end of progress. Default is 0.
showProgressTime – <int, optional> # If 1, shows the progress time. Default is 1.
innerObjs – <bool, optional> # If True, processes inner objects. Default is False.
innerList – <list, optional> # List of inner objects to be processed. Default is None.
refreshView – <int, optional> # If 1, refreshes the view. Default is 1.
useProgress – <int, optional> # If 1, uses a progress indicator. Default is 1.
- Returns:
None # This function does not return any value.
Code Examples:
>>> current_item = "Object 1"
>>> end_progress = 0
>>> show_time = 1
>>> process_inner_objects = False
>>> inner_object_list = ["Inner Object 1", "Inner Object 2"]
>>> refresh_view = 1
>>> use_progress_indicator = 1
>>> progressWin(current_item, end_progress, show_time, process_inner_objects, inner_object_list, refresh_view, use_progress_indicator)
graph TB Start[("fa:fa-play Start")] --> CheckUseProgress{"/fas:fa-tasks Check Use Progress"} CheckUseProgress --"If useProgress is False" --> End[("/fas:fa-stop End")] CheckUseProgress --"If useProgress is True" --> CheckInnerList{"/fas:fa-list-ul Check Inner List"} CheckInnerList --"If innerList provided" --> UpdateTopProgress["/fas:fa-sync Update Top Progress"] UpdateTopProgress --> CheckShowTimeTop["/fas:fa-clock Check Show Time for Top Progress"] CheckShowTimeTop --"If showProgressTime is True" --> ShowTimeTop["/fas:fa-hourglass-half Show Time for Top Progress"] CheckShowTimeTop --"If showProgressTime is False" --> UpdateTopProgressText["/fas:fa-text-height Update Top Progress Text"] ShowTimeTop --> UpdateTopProgressText UpdateTopProgressText --> End CheckInnerList --"If innerList not provided" --> UpdateProgress["/fas:fa-sync-alt Update Progress"] UpdateProgress --> CheckShowTime["/fas:fa-clock-o Check Show Time"] CheckShowTime --"If showProgressTime is True" --> ShowTime["/fas:fa-hourglass-end Show Time"] CheckShowTime --"If showProgressTime is False" --> UpdateProgressText["/fas:fa-text-width Update Progress Text"] ShowTime --> UpdateProgressText UpdateProgressText --> End style Start fill:#00cc00,stroke:#000,stroke-width:3px style CheckUseProgress fill:#ffcc00,stroke:#000,stroke-width:2px style CheckInnerList fill:#ff9999,stroke:#000,stroke-width:2px style UpdateTopProgress fill:#99ccff,stroke:#000,stroke-width:2px style CheckShowTimeTop fill:#cc99ff,stroke:#000,stroke-width:2px style ShowTimeTop fill:#99ff99,stroke:#000,stroke-width:2px style UpdateTopProgressText fill:#ff6666,stroke:#000,stroke-width:3px style UpdateProgress fill:#00cc00,stroke:#000,stroke-width:2px style CheckShowTime fill:#ffcc00,stroke:#000,stroke-width:2px style ShowTime fill:#99ff99,stroke:#000,stroke-width:2px style UpdateProgressText fill:#ff6666,stroke:#000,stroke-width:3px style End fill:#ff6666,stroke:#000,stroke-width:3px- Flow Chart Description:
This flowchart illustrates the progressWin function:
Starts by checking if the progress window is to be used.
If useProgress is False, the process ends.
If useProgress is True, checks if an innerList is provided.
If innerList is provided, updates the top progress bar and checks if progress time display is enabled.
Updates the top progress text based on the time display setting.
If no innerList, updates the main progress bar and checks for progress time display.
Updates the progress text based on the time display setting.
The function concludes by updating the progress window.
- eRig.refreshView(self, num=1, **shArgs)#
[**shArgs : n=num]
Purpose:
:: Refreshes the view a specified number of times in Maya.
Helps in ensuring that the Maya viewport updates correctly, particularly useful in scripting and automation tasks.
Can be used to refresh the view after changes are made via scripts to reflect the updates in the viewport.
- Parameters:
num – <int, optional> # Number of times to refresh the view. Defaults to 1.
- Returns:
None
Usage:
>>> refreshView(3)
# Refreshes the Maya viewport three times.
graph TB style Start fill:#00cc00,stroke:#000,stroke-width:3px style CheckShArgs fill:#ffcc00,stroke:#000,stroke-width:2px style CheckNum fill:#ff9999,stroke:#000,stroke-width:2px style RefreshView fill:#99ccff,stroke:#000,stroke-width:2px style End fill:#ff6666,stroke:#000,stroke-width:3px Start[("fa:fa-play Start")] --> CheckShArgs{"/fas:fa-question-circle Check shArgs"} CheckShArgs --"If shArgs provided"--> CheckNum{"/fas:fa-sort-numeric-up Check num"} CheckShArgs --"If shArgs not provided"--> CheckNum CheckNum --"If num > 0"--> RefreshView["/fas:fa-sync Refresh View"] CheckNum --"If num <= 0"--> End[("fas:fa-stop End")] RefreshView --> End- Flow Chart Description:
This flowchart illustrates the refreshView function:
The process starts by checking if shArgs are provided and updates num as necessary.
It checks if num is greater than zero.
If yes, it refreshes the Maya view the specified number of times.
If no, the function does nothing and ends.
- eRig.renameParents(self, objList=None, numParents=False, **shArgs)#
[shArgs : ol=objList, np=numParents]
Purpose:
:: Renames the parents of specified objects in a hierarchical structure in Maya.
Useful in organizing and structuring complex scenes, especially in rigging and large-scale modeling.
Facilitates easier navigation and identification of parent-child relationships in hierarchies.
- Parameters:
objList – <list, optional> # List of objects whose parents are to be renamed. Default is None.
numParents – <bool, optional> # If True, includes the number of parents in renaming. Default is False.
- Returns:
None # This function does not return any value.
Code Examples:
>>> objects_to_rename_parents = ["obj1", "obj2", "obj3"]
>>> include_parent_count = True
>>> renameParents(objects_to_rename_parents, include_parent_count)
graph TB style Start fill:#00cc00,stroke:#000,stroke-width:3px style CheckShArgs fill:#ffcc00,stroke:#000,stroke-width:2px style GetCommonParent fill:#ff9999,stroke:#000,stroke-width:2px style RenameBasedOnParentIndex fill:#99ff99,stroke:#000,stroke-width:2px style End fill:#ff6666,stroke:#000,stroke-width:3px Start[("fa:fa-play Start")] --> CheckShArgs{"/fas:fa-question-circle Check shArgs"} CheckShArgs --"If shArgs provided"--> GetCommonParent["/fas:fa-users Get Common Parent"] CheckShArgs --"If shArgs not provided"--> GetCommonParent GetCommonParent --> RenameBasedOnParentIndex["/fas:fa-i-cursor Rename Based on Parent Index"] RenameBasedOnParentIndex --> End[("fas:fa-stop End")]- Flow Chart Description:
This flowchart illustrates the renameParents function:
The process starts by checking if shArgs are provided, updating objList and numParents accordingly.
It retrieves the common parent of the objects in the list.
The objects are renamed based on the index of their common parent.
The function concludes after renaming the parent objects.
- eRig.searchByRE(self, pattern, string, *args, **shArgs)#
[**shArgs: pt=pattern, st=string]
Purpose:
:: Searches within a string using a regular expression pattern.
- Parameters:
pattern – (<type str>) # Regular expression pattern to search for.
string – (<type str>) # The string to search within.
- Returns:
<type Match object> # Match object if the pattern is found, None otherwise.
Code Examples:
>>> pattern = r'\d{3}-\d{2}-\d{4}'
>>> string = '123-45-6789'
>>> searchByRE(pattern, string)
# Searches for the pattern in the string and returns a Match object.
graph TD Start[("fa:fa-play Start")] --> CheckShArgs{"/fas:fa-question-circle Check shArgs"} CheckShArgs --"Arguments Provided"--> SearchByRE{"/fas:fa-terminal Search By Regular Expression"} SearchByRE --"Search By Regular Expression"--> End["/fas:fa-stop End"] style Start fill:#00cc00,stroke:#000,stroke-width:3px style CheckShArgs fill:#ffcc00,stroke:#000,stroke-width:2px style SearchByRE fill:#99ff99,stroke:#000,stroke-width:2px style End fill:#ff6666,stroke:#000,stroke-width:3px- Flow Chart Description:
This flowchart illustrates the searchByRE function:
The function starts with the provided arguments.
Searches within the string using the regular expression pattern.
Returns a Match object if the pattern is found, otherwise, returns None.
Ends the function and returns the Match object or None.
- eRig.searchReplaceAll(self, objList, searchWord, replaceWord, topSelect=True, selectHI=True, **shArgs)#
[**shArgs: ol=objList, sw=searchWord, rw=replaceWord, ts=topSelect, sh=selectHI]
Purpose:
:: Searches and replaces words within objects in a specified list.
- Parameters:
objList – (<type list>) # List of objects to perform search and replace.
searchWord – (<type str>) # Word to search for.
replaceWord – (<type str>) # Word to replace the search word with.
topSelect – (<type bool, optional>) # If True, selects the top node. Default is True.
selectHI – (<type bool, optional>) # If True, selects hierarchy. Default is True.
- Returns:
<type list> # List of nodes with replaced words.
Code Examples:
>>> objList = ["object1", "object2", "object3"]
>>> searchWord = "search"
>>> replaceWord = "replace"
>>> topSelect = True
>>> selectHI = True
>>> searchReplaceAll(objList, searchWord, replaceWord, topSelect, selectHI)
# Searches for "search" and replaces it with "replace" in the names of objects in the list, selects the top node, and selects the hierarchy.
graph TD Start[("fa:fa-play Start")] --> CheckShArgs{"/fas:fa-question-circle Check shArgs"} CheckShArgs --"Arguments Provided"--> PrepareObjList{"/fas:fa-archive Prepare Object List"} PrepareObjList --"Prepare Object List"--> CheckTopSelect{"/fas:fa-question-circle Check topSelect"} CheckTopSelect --"TopSelect is True"--> CheckSelectHI{"/fas:fa-question-circle Check selectHI"} CheckTopSelect --"TopSelect is False"--> CheckSelectHI CheckSelectHI --"SelectHI is True"--> SearchReplaceObjects{"/fas:fa-terminal Search & Replace Objects"} CheckSelectHI --"SelectHI is False"--> SearchReplaceObjects SearchReplaceObjects --"Search & Replace Objects"--> SelectFinalList{"/fas:fa-arrows-alt-h Select Final List"} SelectFinalList --"Select Final List"--> End["/fas:fa-stop End"] style Start fill:#00cc00,stroke:#000,stroke-width:3px style CheckShArgs fill:#ffcc00,stroke:#000,stroke-width:2px style PrepareObjList fill:#ff9999,stroke:#000,stroke-width:2px style CheckTopSelect fill:#99ccff,stroke:#000,stroke-width:2px style CheckSelectHI fill:#ffcc99,stroke:#000,stroke-width:2px style SearchReplaceObjects fill:#99ff99,stroke:#000,stroke-width:2px style SelectFinalList fill:#ccffcc,stroke:#000,stroke-width:2px style End fill:#ff6666,stroke:#000,stroke-width:3px- Flow Chart Description:
This flowchart illustrates the searchReplaceAll function:
The function starts with the provided arguments.
Prepares the object list for search and replace.
Checks if top-level objects should be selected (topSelect=True) or not.
Checks if the entire hierarchy of objects should be selected (selectHI=True) or not.
Searches and replaces words within the object names based on the options.
Selects the final list of objects if needed.
Ends the function and returns the list of modified objects.
- eRig.selectAlternateEdgeLoops(self, **shArgs)#
[**shArgs: None]
Purpose:
Selects alternate edge loops in a mesh.
- Returns:
None
Code Examples:
>>> selectAlternateEdgeLoops()
# Selects alternate edge loops in the currently selected mesh.
graph TB Start[("fa:fa-play Start")] --> CheckShArgs{"/fas:fa-question-circle Check shArgs"} CheckShArgs --"No Additional Arguments"--> GetSelectedEdges{"/fas:fa-check-square Get Selected Edges"} GetSelectedEdges --"Get Selected Edges"--> GetFirstEdge{"/fas:fa-arrow-right Get First Edge"} GetFirstEdge --"Get First Edge"--> GetNearEdges{"/fas:fa-search Get Near Edges"} GetNearEdges --"Get Near Edges"--> FilterAlternateEdges{"/fas:fa-filter Filter Alternate Edges"} FilterAlternateEdges --"Filter Alternate Edges"--> SelectAlternateEdges{"/fas:fa-arrows Select Alternate Edges"} SelectAlternateEdges --"Select Alternate Edges"--> PerformEdgeLoopSelection{"/fas:fa-search Select Edge Loops"} PerformEdgeLoopSelection --"Perform Edge Loop Selection"--> DeletePolyElements{"/fas:fa-trash-alt Delete Poly Elements"} DeletePolyElements --"Delete Poly Elements"--> End["/fas:fa-stop End"] style Start fill:#00cc00,stroke:#000,stroke-width:3px style CheckShArgs fill:#ffcc00,stroke:#000,stroke-width:2px style GetSelectedEdges fill:#ff9999,stroke:#000,stroke-width:2px style GetFirstEdge fill:#cc99ff,stroke:#000,stroke-width:2px style GetNearEdges fill:#99ccff,stroke:#000,stroke-width:2px style FilterAlternateEdges fill:#ffcc99,stroke:#000,stroke-width:2px style SelectAlternateEdges fill:#99ff99,stroke:#000,stroke-width:2px style PerformEdgeLoopSelection fill:#ccffcc,stroke:#000,stroke-width:2px style DeletePolyElements fill:#99ccff,stroke:#000,stroke-width:2px style End fill:#ff6666,stroke:#000,stroke-width:3px- Flow Chart Description:
This flowchart illustrates the selectAlternateEdgeLoops function:
The function starts without any additional arguments.
Retrieves the currently selected edges.
Gets the first edge from the selected edges.
Finds the nearest edges to the first edge.
Filters the nearest edges to select alternate edges.
Selects the alternate edges.
Performs edge loop selection.
Deletes the selected poly elements (alternate edge loops).
Ends the function without returning any value.
- eRig.selectFromTF(self, textFld, addSelection=1, useSuffix='', **shArgs)#
[shArgs : tf=textFld, as=addSelection, us=useSuffix]
Purpose:
:: Adds selected object’s name as input in a window for <== button. :param textFld (str): The name of the text field to use. :param addSelection (int, optional): If 1, adds the selection. Default is 1. :param useSuffix (str, optional): Suffix to use for the object name. Default is ‘’. :return: None
Usage:
obj10 # Adds ‘obj10’ While pressing Enter.. <== button box25 # Adds ‘box25’ While pressing Enter.. <== button
Code Examples:
>>> text_field_name = "textField_name"  # Example text field name
>>> add_selection = 1  # Example addSelection value
>>> suffix = "_suffix"  # Example useSuffix value
>>> selectFromTF(textFld=text_field_name, addSelection=add_selection, useSuffix=suffix)
# Adds selected object's name as input in the specified text field.
This function allows you to add the selected object’s name as input in a window, with the option to add the selection and use a suffix.
graph TD Start[("fa:fa-play Start")] --> CheckShArgs{"/fas:fa-question-circle Check shArgs"} CheckShArgs --"If shArgs Exist"--> ParseShArgs["/fas:fa-cogs Parse shArgs"] CheckShArgs --"If shArgs Does Not Exist"--> InitializeParameters["/fas:fa-wrench Initialize Parameters"] InitializeParameters --> GetTextFromTextField{"/fas:fa-edit Get Text from Text Field"} GetTextFromTextField --> ProcessText{"/fas:fa-cog Process Text"} ProcessText --"If Text Contains Suffix"--> CheckObjectExistence{"/fas:fa-check-square Check Object Existence"} ProcessText --"If Text Does Not Contain Suffix"--> CheckObjectExistence{"/fas:fa-check-square Check Object Existence"} CheckObjectExistence --"If Object Exists"--> AddSelection["/fas:fa-plus-circle Add Selection"] CheckObjectExistence --"If Object Does Not Exist"--> End["/fas:fa-stop End"] AddSelection --> End["/fas:fa-stop End"] style Start fill:#00cc00,stroke:#000,stroke-width:3px style CheckShArgs fill:#ffcc00,stroke:#000,stroke-width:2px style ParseShArgs fill:#ff9999,stroke:#000,stroke-width:2px style InitializeParameters fill:#99ccff,stroke:#000,stroke-width:2px style GetTextFromTextField fill:#ccffcc,stroke:#000,stroke-width:2px style ProcessText fill:#99ccff,stroke:#000,stroke-width:2px style CheckObjectExistence fill:#cc99ff,stroke:#000,stroke-width:2px style AddSelection fill:#00cc00,stroke:#000,stroke-width:3px style End fill:#ff6666,stroke:#000,stroke-width:3px- Flow Chart Description:
This flowchart illustrates the selectFromTF function:
Checks if shArgs exist, and if so, parses the tf, as, and us from it.
If shArgs do not exist, initializes parameters with default values.
Gets the text from the specified text field.
Processes the text to check if it contains a suffix.
Checks if the object specified in the text exists.
If the object exists, it adds the selection.
If the object does not exist, the flowchart ends.
- eRig.selectHI(self, objName, objType='jnt', topSelect=True, includeShapes=False, endsWith=None, **shArgs)#
[**shArgs: on=objName, ot=objType, ts=topSelect, is=includeShapes, ew=endsWith]
Purpose:
:: Selects all objects of a given type under a specified object.
- Parameters:
objName – (<type str>) # Name of the object to start selection from.
objType – (<type str, optional>) # Type of object to select. Default is ‘jnt’.
topSelect – (<type bool, optional>) # If True, selects the top node. Default is True.
includeShapes – (<type bool, optional>) # If True, includes shapes in the selection. Default is False.
endsWith – (<type str, optional>) # Select only objects ending with this suffix. Default is None.
- Returns:
(<type list>) # List of selected objects. #_ As per the objType
Code Examples:
>>> objName = "pCube1"
>>> objType = 'jnt'
>>> topSelect = True
>>> includeShapes = False
>>> endsWith = None
>>> selectHI(objName, objType, topSelect, includeShapes, endsWith)
# Selects all objects of type 'jnt' under the specified object 'pCube1'.

>>> objName = "pSphere1"
>>> objType = '^mesh'
>>> topSelect = False
>>> includeShapes = True
>>> endsWith = "_geo"
>>> selectHI(objName, objType, topSelect, includeShapes, endsWith)
# Selects all objects of type 'mesh' (excluding shapes) under the specified object 'pSphere1' that end with '_geo'.
graph TD Start[("fa:fa-play Start")] --> CheckShArgs{"/fas:fa-question-circle Check shArgs"} CheckShArgs --"Arguments Provided"--> SelectHI{"/fas:fa-mouse-pointer Select HI"} SelectHI --"Select Objects"--> End["/fas:fa-stop End"] style Start fill:#00cc00,stroke:#000,stroke-width:3px style CheckShArgs fill:#ffcc00,stroke:#000,stroke-width:2px style SelectHI fill:#99ff99,stroke:#000,stroke-width:2px style End fill:#ff6666,stroke:#000,stroke-width:3px- Flow Chart Description:
This flowchart illustrates the selectHI function:
The function starts with the provided arguments.
It selects all objects of the specified type under the specified object.
The function ends after selecting the objects.
- eRig.selectOppNodes(self, **shArgs)#
[**shArgs: None]
Purpose:
Selects nodes opposite to the current selection.
- Returns:
None
Code Examples:
>>> selectOppNodes()
# Selects nodes that are opposite to the currently selected nodes.
graph TB Start[("fa:fa-play Start")] --> CheckShArgs{"/fas:fa-question-circle Check shArgs"} CheckShArgs --"No Additional Arguments"--> GetSelectedNodes{"/fas:fa-check-square Get Selected Nodes"} GetSelectedNodes --"Get Selected Nodes"--> SelectOppositeNodes{"/fas:fa-arrows Select Opposite Nodes"} SelectOppositeNodes --"Select Opposite Nodes"--> End["/fas:fa-stop End"] style Start fill:#00cc00,stroke:#000,stroke-width:3px style CheckShArgs fill:#ffcc00,stroke:#000,stroke-width:2px style GetSelectedNodes fill:#ff9999,stroke:#000,stroke-width:2px style SelectOppositeNodes fill:#ccffcc,stroke:#000,stroke-width:2px style End fill:#ff6666,stroke:#000,stroke-width:3px- Flow Chart Description:
This flowchart illustrates the selectOppNodes function:
The function starts without any additional arguments.
Retrieves the currently selected nodes.
Selects the opposite nodes to the currently selected nodes.
Ends the function without returning any value.
- eRig.selectSeries(self, nodeList, seriesRange, fromEnd=True, selectNodes=False, **shArgs)#
[**shArgs: nl=nodeList, sr=seriesRange, fe=fromEnd, sn=selectNodes]
Purpose:
:: Selects a series of nodes based on the provided range and options. Available selection types are: ‘fromEnd’, ‘fromStart’.
- Parameters:
nodeList – (<type list>) # List of nodes to select from.
seriesRange – (<type int/list>) # Range or list of indices for selection.
fromEnd – (<type bool, optional>) # If True, selection starts from the end. Default is True.
selectNodes – (<type bool, optional>) # If True, selects the nodes. Default is False.
- Returns:
None
Code Examples:
>>> nodeList = ["node_01", "node_02", "node_03"]
>>> seriesRange = [1, 5]
>>> fromEnd = True
>>> selectNodes = True
>>> selectSeries(nodeList, seriesRange, fromEnd, selectNodes)
# Selects a series of nodes from "node_01" to "node_05" starting from the end and selects them.
graph TB Start[("fa:fa-play Start")] --> CheckShArgs{"/fas:fa-question-circle Check shArgs"} CheckShArgs --"Arguments Provided"--> ExtractNodeList{"/fas:fa-check-square Extract Node List"} ExtractNodeList --"Extract Node List"--> ExtractSeriesRange{"/fas:fa-arrow-right Extract Series Range"} ExtractSeriesRange --"Extract Series Range"--> CheckFromEnd{"/fas:fa-question-circle Check fromEnd"} CheckFromEnd --"FromEnd is True"--> CheckSelectNodes{"/fas:fa-question-circle Check selectNodes"} CheckFromEnd --"FromEnd is False"--> CheckSelectNodes CheckSelectNodes --"SelectNodes is True"--> CalculateSeries{"/fas:fa-calculator Calculate Series"} CheckSelectNodes --"SelectNodes is False"--> CalculateSeries CalculateSeries --"Calculate Series"--> SelectNodes{"/fas:fa-arrows Select Nodes"} SelectNodes --"Select Nodes"--> End["/fas:fa-stop End"] style Start fill:#00cc00,stroke:#000,stroke-width:3px style CheckShArgs fill:#ffcc00,stroke:#000,stroke-width:2px style ExtractNodeList fill:#ff9999,stroke:#000,stroke-width:2px style ExtractSeriesRange fill:#cc99ff,stroke:#000,stroke-width:2px style CheckFromEnd fill:#99ccff,stroke:#000,stroke-width:2px style CheckSelectNodes fill:#ffcc99,stroke:#000,stroke-width:2px style CalculateSeries fill:#99ff99,stroke:#000,stroke-width:2px style SelectNodes fill:#ccffcc,stroke:#000,stroke-width:2px style End fill:#ff6666,stroke:#000,stroke-width:3px- Flow Chart Description:
This flowchart illustrates the selectSeries function:
The function starts with the provided arguments.
Extracts the node list and series range from the arguments.
Checks if the selection should start from the end (fromEnd=True) or not.
Checks if the nodes should be selected (selectNodes=True) or not.
Calculates the series of nodes based on the range and options.
Selects the nodes if selectNodes is True.
Ends the function without returning any value.
- eRig.selectSiblings(self, nodeList, byNum=False, **shArgs)#
[shArgs: nl=nodeList, bn=byNum]
Purpose:
Selects sibling nodes of a given list, based on numerical order or adjacency.
- Parameters:
(list) (nodeList) – # List of nodes to base sibling selection on.
optional) (byNum (bool,) – # If True, selects siblings based on numerical order. Default is False.
- Returns:
None
Code Examples:
>>> selectSiblings(nodeList=['Snake1_01_Ctrl', 'Snake1_02_Ctrl'], bn=True)
# Selects siblings based on numerical order for the given node list.

>>> selectSiblings(nodeList=['Snake1_01_Ctrl', 'Snake1_02_Ctrl'], bn=False)
# Selects siblings based on adjacency for the given node list.
graph TB Start[("fa:fa-play Start")] --> CheckShArgs{"/fas:fa-question-circle Check shArgs"} CheckShArgs --"If shArgs Exist"--> ParseShArgs["/fas:fa-cogs Parse shArgs"] CheckShArgs --"If shArgs Does Not Exist"--> SkipParseShArgs{"/fas:fa-arrow-right Skip Parse shArgs"} SkipParseShArgs --> GetNodeList{"/fas:fa-arrow-right Get Node List"} GetNodeList --"Get Node List"--> SelectClear{"/fas:fa-mouse-pointer Select & Clear"} SelectClear --"Select & Clear"--> LoopOverNodes{"/fas:fa-cogs Loop Over Nodes"} LoopOverNodes --"Loop Over Nodes"--> SelectSiblings{"/fas:fa-arrows Select Siblings"} SelectSiblings --"Select Siblings"--> End["/fas:fa-stop End"] style Start fill:#00cc00,stroke:#000,stroke-width:3px style CheckShArgs fill:#ffcc00,stroke:#000,stroke-width:2px style ParseShArgs fill:#ff9999,stroke:#000,stroke-width:2px style SkipParseShArgs fill:#ccffcc,stroke:#000,stroke-width:2px style GetNodeList fill:#99ff99,stroke:#000,stroke-width:2px style SelectClear fill:#cc99ff,stroke:#000,stroke-width:2px style LoopOverNodes fill:#ffcc99,stroke:#000,stroke-width:2px style SelectSiblings fill:#ccffcc,stroke:#000,stroke-width:2px style End fill:#ff6666,stroke:#000,stroke-width:3px- Flow Chart Description:
This flowchart illustrates the selectSiblings function:
Checks if shArgs exist and if so, parses various arguments from it.
If shArgs do not exist, skips parsing and proceeds.
Gets the list of nodes based on nodeList or the provided arguments.
Selects and clears the current selection.
Loops over the nodes in the list.
Selects siblings based on the specified criteria.
Ends the function without returning any value.
- eRig.setAttr(self, node, attr, *args, **kwargs)#
[shArgs : nd=node, at=attr]
Purpose:
:: Sets one or more attributes on a specified node. List of attributes can be provided at a time.
Arguments | Descriptions:
:param node: (<type str>) # Name of the node to set attributes on.
:param attr: (<type str, tuple, or list>) # Attribute(s) to set. Can be a single attribute, a tuple, or a list of attributes.
:return: None
Code Examples:
>>> node_name = "pSphere1"  # Example node name
>>> setAttr(node=node_name, attr="translateX", value=2.0)
# Sets the "translateX" attribute of the node to 2.0.

>>> setAttr(node=node_name, attr=("translateX", "translateY"), value=(2.0, 3.0))
# Sets multiple attributes, "translateX" and "translateY", of the node to 2.0 and 3.0, respectively.
This function allows you to set one or more attributes on a specified node. You can provide the attribute(s) to set as a single attribute name, a tuple, or a list of attribute names.
graph TD Start[("fa:fa-play Start")] --> CheckShArgs{"/fas:fa-question-circle Check shArgs"} CheckShArgs --"If shArgs Exist"--> ParseShArgs["/fas:fa-cogs Parse shArgs"] CheckShArgs --"If shArgs Does Not Exist"--> InitializeParameters["/fas:fa-wrench Initialize Parameters"] InitializeParameters --> LoopThroughAttributes{"/fas:fa-list-ul Loop Through Attributes"} LoopThroughAttributes --> CheckDataType{"/fas:fa-question-circle Check Data Type"} CheckDataType --"If Data Type Provided"--> SetAttributeWithType{"/fas:fa-plus Set Attribute with Data Type"} CheckDataType --"If Data Type Not Provided"--> SetAttribute{"/fas:fa-plus Set Attribute"} SetAttribute --> End["/fas:fa-stop End"] style Start fill:#00cc00,stroke:#000,stroke-width:3px style CheckShArgs fill:#ffcc00,stroke:#000,stroke-width:2px style ParseShArgs fill:#ff9999,stroke:#000,stroke-width:2px style InitializeParameters fill:#99ccff,stroke:#000,stroke-width:2px style LoopThroughAttributes fill:#ccffcc,stroke:#000,stroke-width:2px style CheckDataType fill:#ffcc99,stroke:#000,stroke-width:2px style SetAttributeWithType fill:#cc99ff,stroke:#000,stroke-width:2px style SetAttribute fill:#cc99ff,stroke:#000,stroke-width:2px style End fill:#ff6666,stroke:#000,stroke-width:3px- Flow Chart Description:
This flowchart illustrates the setAttr function:
Checks if shArgs exist, and if so, parses the nd and at from it.
If shArgs do not exist, initializes parameters with default values.
Loops through the provided attribute(s).
Checks if a data type is provided, and if not, sets the attribute without data type.
If a data type is provided, sets the attribute with the specified data type.
The flowchart ends after processing all attributes.
- eRig.setDisplayType(self, objList, valOrAttr=0, addAttrDivider=1, refreshView=True, **shArgs)#
[shArgs : ol=objList, voa=valOrAttr, aad=addAttrDivider, rv=refreshView]
Purpose:
:: Sets the display type for a list of objects, with optional attribute addition.
Useful in 3D modeling and animation for managing how objects are displayed in the viewport.
Enhances scene organization and workflow efficiency by allowing quick changes to object display properties.
- param objList:
<list> # List of objects to set the display type for.
- param valOrAttr:
<int/str> # Value or attribute defining the display type. Accepts 0 (Normal), 1 (Template), 2 (Reference), or an attribute name. Accepts 0 (Normal), 1 (Template), 2 (Reference), or an attribute name | srcAttr | srcObj
- param addAttrDivider:
<int, optional> # If 1, adds an attribute divider to the driver object. Default is 1.
- param refreshView:
<bool, optional> # If True, refreshes the view. Default is True.
- return:
None # This function does not return any value.
Code Examples:
>>> objects = ["obj1", "obj2", "obj3"]
>>> display_type = 1  # Template
>>> add_attribute_divider = 1
>>> refresh_view = True
>>> setDisplayType(objects, display_type, add_attribute_divider, refresh_view)
graph TB style Start fill:#00cc00,stroke:#000,stroke-width:3px style CheckShArgs fill:#ffcc00,stroke:#000,stroke-width:2px style ConvertToList fill:#ff9999,stroke:#000,stroke-width:2px style LoopThroughObjects fill:#99ccff,stroke:#000,stroke-width:2px style SetDisplayType fill:#99ff99,stroke:#000,stroke-width:2px style RefreshView fill:#99ff99,stroke:#000,stroke-width:2px style End fill:#ff6666,stroke:#000,stroke-width:3px Start[("fa:fa-play Start")] --> CheckShArgs{"/fas:fa-question-circle Check shArgs"} CheckShArgs --"If shArgs provided"--> ConvertToList["/fas:fa-list-ol Convert to List"] CheckShArgs --"If shArgs not provided"--> ConvertToList ConvertToList --> LoopThroughObjects["/fas:fa-repeat Loop Through Objects"] LoopThroughObjects --> SetDisplayType["/fas:fa-tv Set Display Type"] SetDisplayType --> RefreshView["/fas:fa-sync-alt Refresh View"] RefreshView --> End[("fas:fa-stop End")]- Flow Chart Description:
This flowchart illustrates the setDisplayType function:
The process begins by checking if shArgs are provided, updating parameters like objList, valOrAttr, addAttrDivider, and refreshView.
It converts objList into a list if it’s not already one.
The function loops through each object in the list.
Display type is set for each object based on the provided value or attribute.
If refreshView is True, the view is refreshed to reflect the changes.
The function concludes after processing all objects in the list.
- eRig.setNextSibling(self, pos=None, **shArgs)#
[**shArgs : p=pos]
Purpose:
:: Sets the position of the next sibling node for the selected objects in Maya.
Useful for reorganizing node hierarchy and sibling order.
Simplifies the process of adjusting node order within a parent node.
- Parameters:
pos – <int, optional> # Position for the next sibling. Use None for next position, 0 for first position, -1 for end position. Defaults to None. None =Next Pos, 0=First Pos, -1 =End Pos
- Returns:
None
Usage:
>>> setNextSibling(0)
# Sets the selected object(s) as the first sibling.
graph TB style CheckShArgs fill:#ffcc00,stroke:#000,stroke-width:2px style CheckSelection fill:#99ccff,stroke:#000,stroke-width:2px style LoopObjects fill:#cc99ff,stroke:#000,stroke-width:2px style SetSibling fill:#99ccff,stroke:#000,stroke-width:2px style End fill:#ff6666,stroke:#000,stroke-width:3px CheckShArgs --"If shArgs Exist"--> CheckSelection{"/fas:fa-cogs Check Selection"} CheckShArgs --"If shArgs Does Not Exist"--> CheckSelection CheckSelection --"Check Selected Objects"--> LoopObjects{"/fas:fa-list Loop Objects"} LoopObjects --"Loop Through Selected Objects"--> SetSibling{"/fas:fa-link Set Sibling"} SetSibling --"Set Sibling Position"--> LoopObjects LoopObjects --"Repeat for Each Object"--> End["/fas:fa-stop End"]- Flow Chart Description:
This flowchart illustrates the setNextSibling function:
Starts the process by checking if shArgs exist.
If shArgs exist, it proceeds to check the selected objects.
If shArgs do not exist, it defaults to setting the next sibling position.
Loops through the selected objects.
Sets the sibling position based on the specified input (pos).
Repeats this process for each selected object.
- eRig.setPos(self, objList, posList=[0, 0, 0], **shArgs)#
[**shArgs : ol=objList, pl=posList]
Purpose:
:: Sets the position of a list of objects to a specified value in Maya.
Ideal for aligning or repositioning multiple objects simultaneously.
Supports specifying unique positions for each object or a single position for all objects.
- Parameters:
objList – <list> # List of objects to set the position for.
posList – <list, optional> # Position to set the objects to. Defaults to [0, 0, 0].
- Returns:
None
Usage:
>>> setPos(['pCube1', 'pSphere1'], [[1, 2, 3], [4, 5, 6]])
# Sets 'pCube1' to [1, 2, 3] and 'pSphere1' to [4, 5, 6].
graph TB style CheckShArgs fill:#ffcc00,stroke:#000,stroke-width:2px style LoopObjects fill:#cc99ff,stroke:#000,stroke-width:2px style SetPosition fill:#99ccff,stroke:#000,stroke-width:2px style End fill:#ff6666,stroke:#000,stroke-width:3px CheckShArgs --"If shArgs Exist"--> LoopObjects{"/fas:fa-cogs Check Arguments"} CheckShArgs --"If shArgs Does Not Exist"--> LoopObjects LoopObjects --"Loop Through Object List"--> SetPosition{"/fas:fa-arrows-alt Set Position"} SetPosition --"Set Position for Each Object"--> LoopObjects LoopObjects --"Repeat for Each Object"--> End["/fas:fa-stop End"]- Flow Chart Description:
This flowchart illustrates the setPos function:
Starts the process by checking if shArgs exist.
If shArgs exist, it proceeds to loop through the object list.
If shArgs do not exist, it defaults to setting the position for each object.
Loops through the object list.
Sets the position for each object based on the specified positions in posList.
Repeats this process for each object in the list.
- eRig.setRot(self, objList, rotList=[0, 0, 0], **shArgs)#
[**shArgs : ol=objList, rl=rotList]
Purpose:
:: Sets the rotation of a list of objects to a specified value in Maya.
Useful for aligning or orienting multiple objects simultaneously.
Simplifies the process of uniformly rotating a series of objects.
- Parameters:
objList – <list> # List of objects to set the rotation for.
rotList – <list> # Rotation to set the objects to, specified as [x, y, z]. Default is [0, 0, 0].
- Returns:
None
Usage:
>>> setRot(['pCube1', 'pSphere1'], [45, 90, 180])
# Sets the rotation of 'pCube1' and 'pSphere1' to [45, 90, 180] degrees.
graph TB style CheckShArgs fill:#ffcc00,stroke:#000,stroke-width:2px style SetRotation fill:#99ccff,stroke:#000,stroke-width:2px style CheckRotationList fill:#ff9999,stroke:#000,stroke-width:2px style SetIndividualRotation fill:#00cc00,stroke:#000,stroke-width:2px style ReturnInfluences fill:#00cc00,stroke:#000,stroke-width:3px style End fill:#ff6666,stroke:#000,stroke-width:3px CheckShArgs --"If shArgs Exist"--> SetRotation{"/fas:fa-cogs Check Arguments"} CheckShArgs --"If shArgs Does Not Exist"--> SetRotation SetRotation --"Set Rotation"--> CheckRotationList{"/fas:fa-search Check Rotation List"} CheckRotationList --"If rotList is [x, y, z]"--> SetIndividualRotation{"/fas:fa-sliders Set Individual Rotation"} CheckRotationList --"If rotList is a list of [x, y, z]"--> SetIndividualRotation{"/fas:fa-sliders Set Individual Rotation"} SetIndividualRotation --"Set Individual Rotation Values"--> ReturnInfluences{"/fas:fa-check Return Success"} ReturnInfluences --"Return Success"--> End- Flow Chart Description:
This flowchart illustrates the setRot function:
Starts the process by checking if shArgs exist.
If shArgs exist, it proceeds to set the rotation of the specified objects.
If shArgs do not exist, it defaults to setting the rotation of the specified objects.
It checks whether rotList is a single [x, y, z] rotation or a list of [x, y, z] rotations.
If rotList is a single [x, y, z] rotation, it sets the rotation of all objects to that value.
If rotList is a list of [x, y, z] rotations, it sets individual rotation values for each object.
The function returns success.
- eRig.shapeCtrl(self, shapeObj, trgtList, deleteTrgtShape=True, renameToShapeObj=False, **shArgs)#
[**shArgs: so=shapeObj, tl=trgtList, dts=deleteTrgtShape, rtso=renameToShapeObj]
Purpose:
:: Controls the shape of an object by targeting a list of objects.
- Parameters:
shapeObj – (<type str>) # The object whose shape is to be controlled.
trgtList – (<type list>) # List of target objects to control the shape.
deleteTrgtShape – (<type bool, optional>) # If True, deletes the target shape after control. Default is True.
renameToShapeObj – (<type bool, optional>) # If True, renames targets to match the shape object. Default is False.
- Returns:
None
Code Example:
>>> shapeObj = 'pCube1'
>>> trgtList = ['pSphere1', 'pCylinder1']
>>> deleteTrgtShape = True
>>> renameToShapeObj = False
>>> shapeCtrl(shapeObj, trgtList, deleteTrgtShape, renameToShapeObj)
# The function will control the shape of 'pCube1' using the shapes of 'pSphere1' and 'pCylinder1'.

>>> shapeObj = 'pSphere1'
>>> trgtList = ['pCube1', 'pCylinder1']
>>> deleteTrgtShape = False
>>> renameToShapeObj = True
>>> shapeCtrl(shapeObj, trgtList, deleteTrgtShape, renameToShapeObj)
# The function will control the shape of 'pSphere1' using the shapes of 'pCube1' and 'pCylinder1', renaming the targets to match 'pSphere1'.
graph TD Start[("fa:fa-play Start")] --> CheckShArgs{"/fas:fa-question-circle Check shArgs"} CheckShArgs --"Arguments Provided"--> ShapeCtrl{"/fas:fa-cogs Shape Ctrl"} ShapeCtrl --"Control Shape"--> End["/fas:fa-stop End"] style Start fill:#00cc00,stroke:#000,stroke-width:3px style CheckShArgs fill:#ffcc00,stroke:#000,stroke-width:2px style ShapeCtrl fill:#99ff99,stroke:#000,stroke-width:2px style End fill:#ff6666,stroke:#000,stroke-width:3px- Flow Chart Description:
This flowchart illustrates the shapeCtrl function:
The function starts with the provided arguments.
It checks if arguments are provided.
It controls the shape of the object using a list of target objects.
The function ends after controlling the shape.
- eRig.shortName(self, objName, **shArgs)#
[**shArgs : on=objectName]
Purpose:
:: Retrieves the short name of an asNode, excluding its hierarchy path.
- Parameters:
objName – (str) # Full name of the asNode.
- Returns:
(str) # Short name of the asNode. MFnDependencyNode.name() #_ shortName | Exact Name | Only Name of the asNode.
Example Usage:
>>> full_node_name = 'group1|subgroup1|mesh1'  # Full name of a Maya node
>>> short_name = shortName(objName=full_node_name)

# Sample output: 'mesh1'
graph TD Start[("fa:fa-play Start")] --> CheckShArgs{"/fas:fa-question-circle Check shArgs"} CheckShArgs --"Arguments Provided"--> GetShortName{"/fas:fa-cogs Get Short Name"} GetShortName --"Retrieve Short Name"--> End["/fas:fa-stop End"] style Start fill:#00cc00,stroke:#000,stroke-width:3px style CheckShArgs fill:#ffcc00,stroke:#000,stroke-width:2px style GetShortName fill:#99ff99,stroke:#000,stroke-width:2px style End fill:#ff6666,stroke:#000,stroke-width:3px- Flow Chart Description:
This flowchart illustrates the shortName function:
The function starts with the provided arguments.
It checks if arguments are provided.
It retrieves the short name of an asNode, excluding its hierarchy path.
The function ends after obtaining the short name.
- eRig.snapDynParent(self, control, enum, **shArgs)#
[shArgs : ct=control, en=enum]
Purpose:
:: Dynamically parents a control to a specified enum value or name.
This function is essential in rigging for switching control hierarchies dynamically.
It allows for flexible control setups, enabling animators to easily change parent-child relationships in the rig.
- Parameters:
control – <str> # The control to be parented.
enum – <int/str> # The enum value or name to parent the control to.
- Returns:
None # This function does not return any value.
Code Examples:
>>> control_name = "arm_ctrl"
>>> enum_value = 2
>>> snap_dyn_parent = snapDynParent(control_name, enum_value)
graph TB style CheckShArgs fill:#ffcc00,stroke:#000,stroke-width:2px style GetControl fill:#00ccff,stroke:#000,stroke-width:2px style GetEnum fill:#00ccff,stroke:#000,stroke-width:2px style CheckAutoStretch fill:#00cc00,stroke:#000,stroke-width:2px style CheckSpaceSwitch fill:#00cc00,stroke:#000,stroke-width:2px style MoveObject fill:#00cc00,stroke:#000,stroke-width:2px style RotateObject fill:#00cc00,stroke:#000,stroke-width:2px style ReturnSuccess fill:#00cc00,stroke:#000,stroke-width:3px style End fill:#ff6666,stroke:#000,stroke-width:3px CheckShArgs --"If shArgs Exist"--> GetControl{"/fas:fa-cogs Check Arguments"} CheckShArgs --"If shArgs Does Not Exist"--> GetControl GetControl --"Get Control"--> GetEnum{"/fas:fa-search Get Enum"} GetEnum --"Get Enum"--> CheckAutoStretch{"/fas:fa-toggle-on Check AutoStretch"} CheckAutoStretch --"Check AutoStretch"--> CheckSpaceSwitch{"/fas:fa-check Check SpaceSwitch"} CheckSpaceSwitch --"Check SpaceSwitch"--> MoveObject{"/fas:fa-arrows-alt-h Move Object"} MoveObject --"Move Object"--> RotateObject{"/fas:fa-undo Rotate Object"} RotateObject --"Rotate Object"--> ReturnSuccess{"/fas:fa-check Return Success"} ReturnSuccess --"Return Success"--> End- Flow Chart Description:
This flowchart illustrates the snapDynParent function:
Starts the process by checking if shArgs exist.
If shArgs exist, it proceeds to get the control and enum value.
If shArgs do not exist, it defaults to getting the control and enum value.
It checks if the control has the “autoStretch” attribute and temporarily turns it off.
It checks if the control has the “spaceSwitch” attribute.
If the “spaceSwitch” attribute exists, it sets the enum value.
It moves the control to the new position.
It rotates the control to the new orientation.
It checks if the “autoStretch” attribute was turned off and restores its original state.
The function returns success.
- eRig.snapPiv_Obj(self, srcObj, destObj=[0, 0, 0], **shArgs)#
[shArgs : so=srcObj, do=destObj]
Purpose:
:: Snaps the pivot of a source object to a destination object or position.
This function is useful for accurately positioning the pivot points of objects in 3D space.
It enhances precision in animation and modeling workflows by allowing for exact pivot placement.
- Parameters:
srcObj – <str> # Source object whose pivot is to be snapped.
destObj – <list/str, optional> # Destination object or position. Defaults to [0, 0, 0].
- Returns:
None # This function does not return any value.
Code Examples:
>>> source_object = "cube1"
>>> destination_position = [1, 2, 3]
>>> snap_pivot_obj = snapPiv_Obj(source_object, destination_position)
graph TB style CheckShArgs fill:#ffcc00,stroke:#000,stroke-width:2px style GetSrcObject fill:#00ccff,stroke:#000,stroke-width:2px style GetDestObject fill:#00ccff,stroke:#000,stroke-width:2px style GetDestinationPosition fill:#00cc00,stroke:#000,stroke-width:2px style MovePivot fill:#00cc00,stroke:#000,stroke-width:2px style ReturnSuccess fill:#00cc00,stroke:#000,stroke-width:3px style End fill:#ff6666,stroke:#000,stroke-width:3px CheckShArgs --"If shArgs Exist"--> GetSrcObject{"/fas:fa-cogs Check Arguments"} CheckShArgs --"If shArgs Does Not Exist"--> GetSrcObject GetSrcObject --"Get Source Object"--> GetDestObject{"/fas:fa-search Get Destination Object"} GetDestObject --"Get Destination Object"--> GetDestinationPosition{"/fas:fa-search Get Destination Position"} GetDestinationPosition --"Get Destination Position"--> MovePivot{"/fas:fa-arrows-alt-h Move Pivot"} MovePivot --"Move Pivot"--> ReturnSuccess{"/fas:fa-check Return Success"} ReturnSuccess --"Return Success"--> End- Flow Chart Description:
This flowchart illustrates the snapPiv_Obj function:
Starts the process by checking if shArgs exist.
If shArgs exist, it proceeds to get the source object and destination object.
If shArgs do not exist, it defaults to getting the source object and destination object.
It then retrieves the destination position.
It moves the pivot of the source object to the destination position.
The function returns success.
- eRig.snapPivot_Edg(self, src, edg, **shArgs)#
[shArgs : sr=src, eg=edg]
Purpose:
:: Snaps the pivot of an object to a specific edge.
Ideal for precise modeling and animation tasks, where the pivot point’s location on an edge is critical.
This function enhances the control over the pivot placement on complex geometries.
- Parameters:
src – <str> # Source object whose pivot is to be snapped.
edg – <str/int> # Edge to snap the pivot to.
- Returns:
None # This function does not return any value.
Code Examples:
>>> source_object = "polyCube1"
>>> edge_id = 5
>>> snapPivot_Edg(source_object, edge_id)
graph TB style CheckShArgs fill:#ffcc00,stroke:#000,stroke-width:2px style GetSourceObject fill:#00ccff,stroke:#000,stroke-width:2px style GetEdge fill:#00ccff,stroke:#000,stroke-width:2px style CalculateMidPoint fill:#00cc00,stroke:#000,stroke-width:2px style MovePivot fill:#00cc00,stroke:#000,stroke-width:2px style ReturnSuccess fill:#00cc00,stroke:#000,stroke-width:3px style End fill:#ff6666,stroke:#000,stroke-width:3px CheckShArgs --"If shArgs Exist"--> GetSourceObject{"/fas:fa-cogs Check Arguments"} CheckShArgs --"If shArgs Does Not Exist"--> GetSourceObject GetSourceObject --"Get Source Object"--> GetEdge{"/fas:fa-search Get Edge"} GetEdge --"Get Edge"--> CalculateMidPoint{"/fas:fa-calculator Calculate Midpoint"} CalculateMidPoint --"Calculate Midpoint"--> MovePivot{"/fas:fa-arrows-alt-h Move Pivot"} MovePivot --"Move Pivot"--> ReturnSuccess{"/fas:fa-check Return Success"} ReturnSuccess --"Return Success"--> End- Flow Chart Description:
This flowchart illustrates the snapPivot_Edg function:
Starts the process by checking if shArgs exist.
If shArgs exist, it proceeds to get the source object and edge.
If shArgs do not exist, it defaults to getting the source object and edge.
It then calculates the midpoint of the specified edge.
It moves the pivot of the source object to the calculated midpoint.
The function returns success.
- eRig.snapPivot_Obj(self, srcObj, destObj=[0, 0, 0], **shArgs)#
[shArgs : so=srcObj, do=destObj]
Purpose:
:: Snaps the pivot of a source object to a destination object or position.
Similar to snapPiv_Obj, this function is crucial for precision in setting up pivot points.
It aids in rigging and modeling processes, ensuring the pivot points are exactly where needed.
- Parameters:
srcObj – <str> # Source object whose pivot is to be snapped.
destObj – <list/str, optional> # Destination object or position. Defaults to [0, 0, 0]. destObj = destObj | destPos[0, 1, 0]
- Returns:
None # This function does not return any value.
Code Examples:
>>> source_object = "sphere1"
>>> destination_position = [4, 5, 6]
>>> snap_pivot_obj = snapPivot_Obj(source_object, destination_position)
graph TB style CheckShArgs fill:#ffcc00,stroke:#000,stroke-width:2px style GetSrcObject fill:#00ccff,stroke:#000,stroke-width:2px style GetDestObject fill:#00ccff,stroke:#000,stroke-width:2px style GetDestinationPosition fill:#00cc00,stroke:#000,stroke-width:2px style MovePivot fill:#00cc00,stroke:#000,stroke-width:2px style ReturnSuccess fill:#00cc00,stroke:#000,stroke-width:3px style End fill:#ff6666,stroke:#000,stroke-width:3px CheckShArgs --"If shArgs Exist"--> GetSrcObject{"/fas:fa-cogs Check Arguments"} CheckShArgs --"If shArgs Does Not Exist"--> GetSrcObject GetSrcObject --"Get Source Object"--> GetDestObject{"/fas:fa-search Get Destination Object"} GetDestObject --"Get Destination Object"--> GetDestinationPosition{"/fas:fa-search Get Destination Position"} GetDestinationPosition --"Get Destination Position"--> MovePivot{"/fas:fa-arrows-alt-h Move Pivot"} MovePivot --"Move Pivot"--> ReturnSuccess{"/fas:fa-check Return Success"} ReturnSuccess --"Return Success"--> End- Flow Chart Description:
This flowchart illustrates the snapPivot_Obj function:
Starts the process by checking if shArgs exist.
If shArgs exist, it proceeds to get the source object and destination object.
If shArgs do not exist, it defaults to getting the source object and destination object.
It then retrieves the destination position.
It moves the pivot of the source object to the destination position.
The function returns success.
- eRig.snapPivot_Vtx(self, src, vtxOrPos=[0, 0, 0], **shArgs)#
[shArgs : s=src, vop=vtxOrPos]
Purpose:
:: Snaps the pivot of an object to a specified vertex or position.
This function is designed to provide high precision in placing an object’s pivot point, crucial for animation and modeling.
It allows the pivot to be positioned accurately at a vertex or any specified 3D coordinate.
- Parameters:
src – <str> # Source object whose pivot is to be snapped.
vtxOrPos – <list, optional> # Vertex or position to snap the pivot to. Default is [0, 0, 0].
- Returns:
None # This function does not return any value.
Code Examples:
>>> source_object = "sphere1"
>>> vertex_position = [1, 1, 1]
>>> snapPivot_Vtx(source_object, vertex_position)
graph TB style CheckShArgs fill:#ffcc00,stroke:#000,stroke-width:2px style GetSourceObject fill:#00ccff,stroke:#000,stroke-width:2px style GetVertexOrPosition fill:#00ccff,stroke:#000,stroke-width:2px style GetDestinationPosition fill:#00cc00,stroke:#000,stroke-width:2px style MovePivot fill:#00cc00,stroke:#000,stroke-width:2px style ReturnSuccess fill:#00cc00,stroke:#000,stroke-width:3px style End fill:#ff6666,stroke:#000,stroke-width:3px CheckShArgs --"If shArgs Exist"--> GetSourceObject{"/fas:fa-cogs Check Arguments"} CheckShArgs --"If shArgs Does Not Exist"--> GetSourceObject GetSourceObject --"Get Source Object"--> GetVertexOrPosition{"/fas:fa-search Get Vertex/Position"} GetVertexOrPosition --"Get Vertex/Position"--> GetDestinationPosition{"/fas:fa-search Get Destination Position"} GetDestinationPosition --"Get Destination Position"--> MovePivot{"/fas:fa-arrows-alt-h Move Pivot"} MovePivot --"Move Pivot"--> ReturnSuccess{"/fas:fa-check Return Success"} ReturnSuccess --"Return Success"--> End- Flow Chart Description:
This flowchart illustrates the snapPivot_Vtx function:
Starts the process by checking if shArgs exist.
If shArgs exist, it proceeds to get the source object and vertex/position.
If shArgs do not exist, it defaults to getting the source object and vertex/position.
It then retrieves the destination position.
It moves the pivot of the source object to the destination position.
The function returns success.
- eRig.snapRot(self, src, destObj, dirUpObj=None, aimAxis=None, upAxis=None, **shArgs)#
[shArgs : s=src, do=destObj, duo=dirUpObj, aa=aimAxis, ua=upAxis]
Purpose:
:: Snaps the rotation of a source object to a destination object, with optional directional constraints.
This function is crucial for aligning objects precisely in 3D space, particularly in animation and rigging.
The optional directional constraints offer more control over the rotation alignment, making it versatile for various scenarios.
- Parameters:
src – <str/list> # Source object or list of objects.
destObj – <str> # Destination object to snap to.
dirUpObj – <str, optional> # Object to define the ‘up’ direction. Default is None.
aimAxis – <list, optional> # Axis to aim during snapping. Default is [1, 0, 0].
upAxis – <list, optional> # ‘Up’ axis direction. Default is [0, 1, 0].
- Returns:
None # This function does not return any value.
Code Examples:
>>> source_object = "obj1"
>>> destination_object = "target_obj"
>>> up_direction_object = "up_obj"
>>> aim_axis = [1, 0, 0]
>>> up_axis = [0, 1, 0]
>>> snap_rot = snapRot(source_object, destination_object, up_direction_object, aim_axis, up_axis)
graph TB style Start fill:#00cc00,stroke:#000,stroke-width:3px style CheckShArgs fill:#ffcc00,stroke:#000,stroke-width:2px style ConvertSrcToList fill:#ff9999,stroke:#000,stroke-width:2px style CheckConstraints fill:#99ccff,stroke:#000,stroke-width:2px style ApplyConstraints fill:#99ff99,stroke:#000,stroke-width:2px style End fill:#ff6666,stroke:#000,stroke-width:3px Start[("fa:fa-play Start")] --> CheckShArgs{"/fas:fa-question-circle Check shArgs"} CheckShArgs --"If shArgs provided"--> ConvertSrcToList["/fas:fa-list-ol Convert Src to List"] CheckShArgs --"If shArgs not provided"--> ConvertSrcToList ConvertSrcToList --> CheckConstraints{"/fas:fa-sliders-h Check Constraints"} CheckConstraints --"If dirUpObj and aimAxis and upAxis"--> ApplyConstraints["/fas:fa-compress-arrows-alt Apply Aim Constraint"] CheckConstraints --"If only aimAxis and upAxis"--> ApplyConstraints["/fas:fa-expand-arrows-alt Apply Orient Constraint"] CheckConstraints --"No constraints"--> ApplyConstraints["/fas:fa-sync-alt Snap Rotation Directly"] ApplyConstraints --> End[("fas:fa-stop End")]- Flow Chart Description:
This flowchart illustrates the snapRot function:
The process begins by checking if shArgs are provided, updating parameters like src, destObj, dirUpObj, aimAxis, and upAxis.
It converts src into a list if it’s not already one.
The function checks for the presence of directional constraints.
Based on the constraints, it applies either an aim constraint, orient constraint, or snaps the rotation directly.
The function concludes after applying the necessary rotation snapping to the source objects.
- eRig.snapTo_Edg(self, srcList, edg, **shArgs)#
[shArgs : sl=srcList, e=edge]
Purpose:
:: Snaps a list of source objects to a specified edge.
- Parameters:
srcList – (<list>) # List of source objects.
edg – (<str/int>) # Edge to snap the objects to.
- Returns:
None
Usage:
source_objects = ["obj1", "obj2", "obj3"]
target_edge = "edge_01"
snapTo_Edg(source_objects, target_edge)
graph TB style CheckShArgs fill:#ffcc00,stroke:#000,stroke-width:2px style IterateObjects fill:#99ccff,stroke:#000,stroke-width:2px style GetEdgePosition fill:#00ccff,stroke:#000,stroke-width:2px style SnapToEdge fill:#00cc00,stroke:#000,stroke-width:2px style ReturnSuccess fill:#00cc00,stroke:#000,stroke-width:3px style End fill:#ff6666,stroke:#000,stroke-width:3px CheckShArgs --"If shArgs Exist"--> IterateObjects{"/fas:fa-cogs Check Arguments"} CheckShArgs --"If shArgs Does Not Exist"--> IterateObjects IterateObjects --"Iterate Through Source Objects"--> GetEdgePosition{"/fas:fa-search Get Edge Position"} GetEdgePosition --"Get Edge Position"--> SnapToEdge{"/fas:fa-map-marker Snap To Edge"} SnapToEdge --"Snap To Edge"--> ReturnSuccess{"/fas:fa-check Return Success"} ReturnSuccess --"Return Success"--> End- Flow Chart Description:
This flowchart illustrates the snapTo_Edg function:
Starts the process by checking if shArgs exist.
If shArgs exist, it proceeds to iterate through source objects.
If shArgs do not exist, it defaults to iterating through source objects.
It gets the position of the specified edge.
It snaps the source objects to the edge position.
The function returns success.
- eRig.snapTo_Obj(self, srcObjList, destObj=[0, 0, 0], snapRot=False, **shArgs)#
[shArgs : sol=srcObjList, do=destObj, sr=snapRot]
Purpose:
:: Snaps a list of source objects to a destination object or position, with an optional rotation snap.
This function allows precise positioning of objects in 3D space, useful in rigging and scene layout.
The optional rotation snap feature aligns the source objects’ orientations with the destination, enhancing the utility for animation tasks.
- Parameters:
srcObjList – (<list>) # List of source objects to be snapped. srcObjList = srcObj | srcObjList (list of srcObjs)
destObj – (<list/str>, optional) # Destination object or position. Defaults to [0, 0, 0]. If a string is provided, it is interpreted as an object name.
snapRot – (<bool>, optional) # If True, snaps the rotation of source objects to the destination object. Default is False. if snapRot : Snaps srcObj’s rotation to destObj #_ destObj needs to be given
- Returns:
None # This function does not return any value.
Code Examples:
>>> source_objects = ["obj1", "obj2", "obj3"]
>>> destination_position = [5, 10, 15]
>>> snap_to_obj = snapTo_Obj(source_objects, destination_position, snapRot=True)
graph TB style CheckShArgs fill:#ffcc00,stroke:#000,stroke-width:2px style IterateObjects fill:#99ccff,stroke:#000,stroke-width:2px style GetDestination fill:#00ccff,stroke:#000,stroke-width:2px style SnapPosition fill:#00cc00,stroke:#000,stroke-width:2px style SnapRotation fill:#00cc00,stroke:#000,stroke-width:2px style ReturnSuccess fill:#00cc00,stroke:#000,stroke-width:3px style End fill:#ff6666,stroke:#000,stroke-width:3px CheckShArgs --"If shArgs Exist"--> IterateObjects{"/fas:fa-cogs Check Arguments"} CheckShArgs --"If shArgs Does Not Exist"--> IterateObjects IterateObjects --"Iterate Through Source Objects"--> GetDestination{"/fas:fa-search Get Destination"} GetDestination --"Get Destination"--> SnapPosition{"/fas:fa-map-marker Snap Position"} SnapPosition --"Snap Position"--> SnapRotation{"/fas:fa-sync Snap Rotation"} SnapRotation --"Snap Rotation"--> ReturnSuccess{"/fas:fa-check Return Success"} ReturnSuccess --"Return Success"--> End- Flow Chart Description:
This flowchart illustrates the snapTo_Obj function:
Starts the process by checking if shArgs exist.
If shArgs exist, it proceeds to iterate through source objects.
If shArgs do not exist, it defaults to iterating through source objects.
It gets the destination object or position.
It snaps the source objects to the destination position.
If the snapRot parameter is set to True, it also snaps the rotation of source objects to the destination.
The function returns success.
- eRig.snapTo_Vtx(self, srcList, vtxOrPosList=[0, 0, 0], **shArgs)#
[shArgs : sl=srcList, vpl=vtxOrPosList]
Purpose:
:: Snaps a list of source objects to specified vertices or positions.
- Parameters:
srcList – (<list>) # List of source objects.
vtxOrPosList – (<list, optional>) # List of vertices or positions to snap to. Default is [0, 0, 0].
- Returns:
None
Usage:
source_objects = ["obj1", "obj2", "obj3"]
vertices_to_snap = [2.0, 1.5, 2.2]
snapTo_Vtx(source_objects, vertices_to_snap)
graph TB style CheckShArgs fill:#ffcc00,stroke:#000,stroke-width:2px style IterateObjects fill:#99ccff,stroke:#000,stroke-width:2px style CheckVertexOrPositionList fill:#ff9999,stroke:#000,stroke-width:2px style SnapToVertex fill:#00cc00,stroke:#000,stroke-width:2px style SnapToPosition fill:#00cc00,stroke:#000,stroke-width:2px style ReturnSuccess fill:#00cc00,stroke:#000,stroke-width:3px style End fill:#ff6666,stroke:#000,stroke-width:3px CheckShArgs --"If shArgs Exist"--> IterateObjects{"/fas:fa-cogs Check Arguments"} CheckShArgs --"If shArgs Does Not Exist"--> IterateObjects IterateObjects --"Iterate Through Source Objects"--> CheckVertexOrPositionList{"/fas:fa-search Check Vertex/Position List"} CheckVertexOrPositionList --"If vtxOrPosList is a single position"--> SnapToPosition{"/fas:fa-map-marker Snap To Position"} CheckVertexOrPositionList --"If vtxOrPosList is not a single position"--> SnapToVertex{"/fas:fa-map-marker Snap To Vertex"} SnapToVertex --"Snap To Vertex"--> ReturnSuccess{"/fas:fa-check Return Success"} SnapToPosition --"Snap To Position"--> ReturnSuccess ReturnSuccess --"Return Success"--> End- Flow Chart Description:
This flowchart illustrates the snapTo_Vtx function:
Starts the process by checking if shArgs exist.
If shArgs exist, it proceeds to iterate through source objects.
If shArgs do not exist, it defaults to iterating through source objects.
It checks whether vtxOrPosList is a single position or not.
If vtxOrPosList is a single position, it snaps the source objects to that position.
If vtxOrPosList is not a single position, it snaps the source objects to specified vertices.
The function returns success.
- eRig.sortByDict(self, dictName, sortType='up', returnType='keys', sortListIndex=0, sliceDict=None, **shArgs)#
[**shArgs: dn=dictName, st=sortType, rt=returnType, sli=sortListIndex, sd=sliceDict]
Purpose:
:: Sorts a dictionary by its values, with optional slicing and filtering.
:: Sorts a dictionary by its values, with optional slicing and filtering. eRig.sortedByDict({‘j1’:10, ‘j2’:2, ‘j3’:-1.0, ‘j4’:50.0, ‘j5’:0, ‘j6’:10}, ‘up’) sliceDict : None | [‘>’, val] | [‘<’, val] | [‘>=’, val] | [‘<=’, val] | [‘==’, val]
- Parameters:
dictName – (<type dict>) # Dictionary to be sorted.
sortType – (<type str, optional>) # Sorting order, ‘up’ for ascending, ‘down’ for descending. Default is ‘up’.
returnType – (<type str, optional>) # Type of return, ‘keys’ or ‘values’. Default is ‘keys’.
sortListIndex – (<type int, optional>) # Index to sort by if the value is a list. Default is 0.
sliceDict – (<type list, optional>) # Criteria to slice the dictionary. Default is None.
- Returns:
(<type list>) # Sorted list based on the specified parameters.
Code Example:
>>> dictName = {'j1':[10], 'j2':[2], 'j3':[-1.0], 'j4':[50.0], 'j5':[0], 'j6':[10]}
>>> sortType = 'up'
>>> returnType = 'keys'
>>> sortListIndex = 0
>>> sliceDict = ['>=', 0]
>>> sortByDict(dictName, sortType, returnType, sortListIndex, sliceDict)
# Returns: ['j1', 'j4', 'j6', 'j5']

>>> dictName = {'a': 10, 'b': 2, 'c': -1.0, 'd': 50.0, 'e': 0, 'f': 10}
>>> sortType = 'down'
>>> returnType = 'values'
>>> sortByDict(dictName, sortType, returnType)
# Returns: [50.0, 10, 10, 2, 0, -1.0]
graph TD Start[("fa:fa-play Start")] --> CheckShArgs{"/fas:fa-question-circle Check shArgs"} CheckShArgs --"Arguments Provided"--> SortByDict{"/fas:fa-sort-amount-down Sort by Dict"} SortByDict --"Sort Dict"--> End["/fas:fa-stop End"] style Start fill:#00cc00,stroke:#000,stroke-width:3px style CheckShArgs fill:#ffcc00,stroke:#000,stroke-width:2px style SortByDict fill:#99ff99,stroke:#000,stroke-width:2px style End fill:#ff6666,stroke:#000,stroke-width:3px- Flow Chart Description:
This flowchart illustrates the sortByDict function:
The function starts with the provided arguments.
It checks if arguments are provided.
It sorts the dictionary based on the specified parameters, including sorting type, return type, and slicing.
The function ends after sorting the dictionary.
- eRig.sortByHI(self, objList, objType='jnt', **shArgs)#
[**shArgs: ol=objList, ot=objType]
Purpose:
:: Sorts a list of objects based on their hierarchy information.
- Parameters:
objList – (<type list>) # List of objects to be sorted.
objType – (<type str, optional>) # Type of objects to consider in the sorting. Default is ‘jnt’.
- Returns:
(<type list>) # Sorted list of objects based on hierarchy.
Code Example:
>>> objList = ['group1|pSphere1', 'group2|pSphere2|pCylinder1', 'group2|pSphere2', 'pCube1']
>>> objType = 'jnt'
>>> sortByHI(objList, objType)
# Returns: [['group1', 'group2', 'pCube1'], {'group1': ['group1|pSphere1'], 'group2': ['group2|pSphere2', 'group2|pSphere2|pCylinder1'], 'pCube1': ['pCube1']}]

>>> objList = ['group1|pSphere1', 'group2|pSphere2|pCylinder1', 'group2|pSphere2', 'pCube1']
>>> objType = 'mesh'
>>> sortByHI(objList, objType)
# Returns: [['group1', 'group2', 'pCube1'], {'group1': ['group1|pSphere1'], 'group2': ['group2|pSphere2', 'group2|pSphere2|pCylinder1'], 'pCube1': ['pCube1']}]
graph TD Start[("fa:fa-play Start")] --> CheckShArgs{"/fas:fa-question-circle Check shArgs"} CheckShArgs --"Arguments Provided"--> SortByHI{"/fas:fa-sort-amount-down Sort by HI"} SortByHI --"Sort Objects by Hierarchy"--> End["/fas:fa-stop End"] style Start fill:#00cc00,stroke:#000,stroke-width:3px style CheckShArgs fill:#ffcc00,stroke:#000,stroke-width:2px style SortByHI fill:#99ff99,stroke:#000,stroke-width:2px style End fill:#ff6666,stroke:#000,stroke-width:3px- Flow Chart Description:
This flowchart illustrates the sortByHI function:
The function starts with the provided arguments.
It checks if arguments are provided.
It sorts the list of objects based on their hierarchy information.
The function ends after sorting the objects.
- eRig.sortByList(self, itemList, sortType='up', **shArgs)#
[**shArgs: il=itemList, st=sortType]
Purpose:
:: Sorts items in a given list in ascending or descending order.
- Parameters:
itemList – (<type list>) # List of items to be sorted.
sortType – (<type str, optional>) # Sorting order, ‘up’ for ascending or ‘down’ for descending. Default is ‘up’.
- Returns:
(<type list>) # Sorted list of items.
Code Example:
>>> itemList = ["pSphere_3_Jnt", "pSphere_1_Jnt", "pSphere_2_Jnt"]
>>> sortType = "up"
>>> sortByList(itemList, sortType)
# Returns: ["pSphere_1_Jnt", "pSphere_2_Jnt", "pSphere_3_Jnt"]

>>> itemList = ["pCube_3_Grp", "pCube_1_Grp", "pCube_2_Grp"]
>>> sortType = "down"
>>> sortByList(itemList, sortType)
# Returns: ["pCube_3_Grp", "pCube_2_Grp", "pCube_1_Grp"]
graph TD Start[("fa:fa-play Start")] --> CheckShArgs{"/fas:fa-question-circle Check shArgs"} CheckShArgs --"Arguments Provided"--> SortByList{"/fas:fa-sort-amount-down Sort by List"} SortByList --"Sort List"--> End["/fas:fa-stop End"] style Start fill:#00cc00,stroke:#000,stroke-width:3px style CheckShArgs fill:#ffcc00,stroke:#000,stroke-width:2px style SortByList fill:#99ff99,stroke:#000,stroke-width:2px style End fill:#ff6666,stroke:#000,stroke-width:3px- Flow Chart Description:
This flowchart illustrates the sortByList function:
The function starts with the provided arguments.
It checks if arguments are provided.
It sorts the list of items based on the provided sorting type (ascending or descending).
The function ends after sorting the list.
- eRig.sortByNum(self, itemList, rev=False, **shArgs)#
[**shArgs: il=itemList, rv=rev]
Purpose:
:: Sorts a list of items numerically.
- Parameters:
itemList – (<type list>) # List of items to be sorted.
rev – (<type bool, optional>) # If True, sorts in descending order. Default is False.
- Returns:
(<type list>) # Numerically sorted list of items.
Code Example:
>>> itemList = ["pSphere_3_Jnt", "pSphere_1_Jnt", "pSphere_2_Jnt"]
>>> rev = False
>>> sortByNum(itemList, rev)
# Returns: ["pSphere_1_Jnt", "pSphere_2_Jnt", "pSphere_3_Jnt"]

>>> itemList = ["pCube_3_Grp", "pCube_1_Grp", "pCube_2_Grp"]
>>> rev = True
>>> sortByNum(itemList, rev)
# Returns: ["pCube_3_Grp", "pCube_2_Grp", "pCube_1_Grp"]
graph TD Start[("fa:fa-play Start")] --> CheckShArgs{"/fas:fa-question-circle Check shArgs"} CheckShArgs --"Arguments Provided"--> SortByNum{"/fas:fa-sort-numeric-down Sort by Num"} SortByNum --"Sort List"--> End["/fas:fa-stop End"] style Start fill:#00cc00,stroke:#000,stroke-width:3px style CheckShArgs fill:#ffcc00,stroke:#000,stroke-width:2px style SortByNum fill:#99ff99,stroke:#000,stroke-width:2px style End fill:#ff6666,stroke:#000,stroke-width:3px- Flow Chart Description:
This flowchart illustrates the sortByNum function:
The function starts with the provided arguments.
It checks if arguments are provided.
It sorts the list of items numerically based on the provided criteria (ascending or descending order).
The function ends after sorting the list.
- eRig.startProgressBar(self, progBar, numObjs, **shArgs)#
[shArgs : pb=progBar, no=numObjs]
Purpose:
:: Initializes a progress bar for a specified number of objects in Maya.
Essential for providing visual feedback during long-running operations such as batch processing or heavy computations.
Enhances user experience by indicating the progress of tasks and estimated time of completion.
- Parameters:
progBar – <str> # Name of the progress bar.
numObjs – <int> # Number of objects to track in the progress bar.
- Returns:
None # This function does not return any value but initializes a progress bar in the Maya UI.
Code Examples:
>>> progress_bar_name = "myProgressBar"
>>> number_of_objects = 50
>>> startProgressBar(progress_bar_name, number_of_objects)
graph TD Start[("fa:fa-play Start")] --> CheckShArgs{"/fas:fa-question-circle Check shArgs"} CheckShArgs --"Arguments Provided"--> InitializeProgressBar{"/fas:fa-cogs Initialize Progress Bar"} InitializeProgressBar --"Initialize Progress Bar"--> End["/fas:fa-stop End"] style Start fill:#00cc00,stroke:#000,stroke-width:3px style CheckShArgs fill:#ffcc00,stroke:#000,stroke-width:2px style InitializeProgressBar fill:#99ff99,stroke:#000,stroke-width:2px style End fill:#ff6666,stroke:#000,stroke-width:3px- Flow Chart Description:
This flowchart illustrates the startProgressBar function:
The function starts with the provided arguments.
It checks if arguments are provided.
It initializes a progress bar for a specified number of objects in Maya.
The function ends after initializing the progress bar.
- eRig.startProgressWin(self, numObjs=0, winTitle=None, progressNote=None, doInterrupt=True, innerObjs=None, innerList=None, refreshView=0, useProgress=1, innerNote='Inner Progress', **shArgs)#
[shArgs : no=numObjs, wt=winTitle, pn=progressNote, di=doInterrupt, io=innerObjs, il=innerList, rv=refreshView, up=useProgress]
Purpose:
:: Starts a progress window with customizable options for tracking progress in Maya.
Ideal for monitoring the progress of lengthy or complex operations in scripts and tools.
Enhances user experience by offering a configurable progress window with notes and interruption options.
- Parameters:
numObjs – <int, optional> # Number of objects to track. Default is 0.
winTitle – <str, optional> # Title of the progress window. Default is None.
progressNote – <str, optional> # Note to display in the progress window. Default is None.
doInterrupt – <bool, optional> # If True, allows interruption of the progress. Default is True.
innerObjs – <list, optional> # List of inner objects to track. Default is None.
innerList – <list, optional> # List of inner list items to track. Default is None.
refreshView – <bool, optional> # If True, refreshes the view. Default is 0.
useProgress – <bool, optional> # If True, uses the progress bar. Default is 1.
- Returns:
None # This function does not return any value but initiates a progress window.
Code Examples:
>>> num_objects = 10
>>> window_title = "Processing"
>>> progress_note = "Currently processing..."
>>> allow_interrupt = True
>>> inner_objects = ["obj1", "obj2"]
>>> inner_list = [1, 2, 3]
>>> startProgressWin(num_objects, window_title, progress_note, allow_interrupt, inner_objects, inner_list)
graph TB Start[("fa:fa-play Start")] --> CheckUseProgress{"/fas:fa-tasks Check Use Progress"} CheckUseProgress --"If useProgress is False" --> End[("/fas:fa-stop End")] CheckUseProgress --"If useProgress is True" --> CheckInnerList{"/fas:fa-list Check Inner List"} CheckInnerList --"If innerList provided" --> InitializeTopProgress["/fas:fa-cog Initialize Top Progress"] InitializeTopProgress --> End CheckInnerList --"If innerList not provided" --> InitializeNumObjs{"/fas:fa-list-ol Initialize Number of Objects"} InitializeNumObjs --> CheckWinTitle["/fas:fa-window-maximize Check Window Title"] CheckWinTitle --> CheckProgressNote["/fas:fa-sticky-note Check Progress Note"] CheckProgressNote --> InitializeProgress["/fas:fa-hourglass-start Initialize Progress Values"] InitializeProgress --> CreateProgressWin["/fas:fa-window-restore Create Progress Window"] CreateProgressWin --> End style Start fill:#00cc00,stroke:#000,stroke-width:3px style CheckUseProgress fill:#ffcc00,stroke:#000,stroke-width:2px style CheckInnerList fill:#ff9999,stroke:#000,stroke-width:2px style InitializeTopProgress fill:#99ccff,stroke:#000,stroke-width:2px style InitializeNumObjs fill:#cc99ff,stroke:#000,stroke-width:2px style CheckWinTitle fill:#99ff99,stroke:#000,stroke-width:2px style CheckProgressNote fill:#ff6666,stroke:#000,stroke-width:3px style InitializeProgress fill:#00cc00,stroke:#000,stroke-width:2px style CreateProgressWin fill:#ffcc00,stroke:#000,stroke-width:2px style End fill:#ff6666,stroke:#000,stroke-width:3px- Flow Chart Description:
This flowchart illustrates the startProgressWin function:
Begins by checking if the progress window is to be used.
If useProgress is False, the process ends.
If useProgress is True, checks if an innerList is provided.
If innerList is provided, initializes the top progress values and concludes.
If no innerList, initializes the number of objects to track and checks window title and progress note.
Initializes progress values and creates the progress window.
The function concludes by displaying the progress window.
- eRig.startTime(self, runCompute=True, specialNote=None, overallCompute=False, refreshView=True, **shArgs)#
[shArgs : rc=runCompute, sn=specialNote, oc=overallCompute, rv=refreshView]
Purpose:
:: Initiates a timer for tracking compute time in Maya, with options for special notes and overall computation tracking.
Essential for performance analysis and optimization in script execution and complex operations.
Provides a way to measure the duration of specific processes, enhancing efficiency and debugging capabilities.
- Parameters:
runCompute – <bool, optional> # If True, starts the computation time tracking. Default is True.
specialNote – <str, optional> # Special note to be displayed. Default is None.
overallCompute – <bool, optional> # If True, tracks overall computation time. Default is False.
refreshView – <bool, optional> # If True, refreshes the view during the computation. Default is True.
- Returns:
None # This function does not return any value but starts a timer for computation tracking.
Code Examples:
>>> run_computation = True
>>> special_note = "Tracking script execution time"
>>> overall_computation = False
>>> refresh_view = True
>>> startTime(run_computation, special_note, overall_computation, refresh_view)
# Initiates a timer and displays the special note if provided.
graph TB Start[("fa:fa-play Start")] --> CheckRunCompute{"/fas:fa-tasks Check Run Compute"} CheckRunCompute --"If runCompute is False" --> End[("/fas:fa-stop End")] CheckRunCompute --"If runCompute is True" --> CheckOverallCompute{"/fas:fa-clock Check Overall Compute"} CheckOverallCompute --"If overallCompute is True" --> StartOverallTimer["/fas:fa-hourglass-start Start Overall Timer"] StartOverallTimer --> CheckSpecialNote{"/fas:fa-sticky-note Check Special Note"} CheckOverallCompute --"If overallCompute is False" --> StartTimer["/fas:fa-hourglass-half Start Timer"] StartTimer --> CheckSpecialNote CheckSpecialNote --"If specialNote provided" --> DisplayNote["/fas:fa-comment Display Note"] CheckSpecialNote --"If no specialNote" --> DisplayStartMsg["/fas:fa-info-circle Display Start Message"] DisplayNote --> RefreshView{"/fas:fa-sync-alt Refresh View"} DisplayStartMsg --> RefreshView RefreshView --"If refreshView is True" --> End RefreshView --"If refreshView is False" --> End style Start fill:#00cc00,stroke:#000,stroke-width:3px style CheckRunCompute fill:#ffcc00,stroke:#000,stroke-width:2px style CheckOverallCompute fill:#ff9999,stroke:#000,stroke-width:2px style StartOverallTimer fill:#99ccff,stroke:#000,stroke-width:2px style StartTimer fill:#cc99ff,stroke:#000,stroke-width:2px style CheckSpecialNote fill:#99ff99,stroke:#000,stroke-width:2px style DisplayNote fill:#ff6666,stroke:#000,stroke-width:2px style DisplayStartMsg fill:#ccffcc,stroke:#000,stroke-width:2px style RefreshView fill:#99ffff,stroke:#000,stroke-width:2px style End fill:#ff6666,stroke:#000,stroke-width:3px- Flow Chart Description:
This flowchart represents the startTime function:
The process begins by checking if computation time tracking (runCompute) is enabled.
If runCompute is False, the function ends.
If runCompute is True, it checks for overall computation tracking (overallCompute).
If overallCompute is True, it starts an overall timer.
Otherwise, it starts a regular timer.
The function then checks if a special note is provided.
If a special note exists, it displays the note; otherwise, it displays a standard start message.
Finally, it checks if the view should be refreshed (refreshView) and concludes.
- eRig.stripNum(self, objName, **shArgs)#
[**shArgs : o=objName]
Purpose:
:: Strips the numerical suffix from an object name, returning the base name.
Essential for handling naming conventions in Maya where objects are often named with numerical suffixes.
Efficiently extracts the base name of an object by removing any numerical suffix at the end of its name.
- Parameters:
objName – <str> # Name of the object with a numerical suffix.
- Returns:
<str> # The base name of the object without the numerical suffix.
Usage:
>>> stripNum("obj10")  # Returns 'obj'
>>> stripNum("box25")  # Returns 'box'
graph TB Start[("fa:fa-play Start")] --> CheckShArgs{"/fas:fa-question-circle Check shArgs"} CheckShArgs --"If shArgs Exist"--> ParseShArgs["/fas:fa-cogs Parse shArgs"] CheckShArgs --"If shArgs Does Not Exist"--> InitializeParameters["/fas:fa-wrench Initialize Parameters"] InitializeParameters --> ExtractNumericalSuffix{"/fas:fa-arrow-right Extract Numerical Suffix"} ExtractNumericalSuffix --"Extract Numerical Suffix"--> End["/fas:fa-stop End"] style Start fill:#00cc00,stroke:#000,stroke-width:3px style CheckShArgs fill:#ffcc00,stroke:#000,stroke-width:2px style ParseShArgs fill:#ff9999,stroke:#000,stroke-width:2px style InitializeParameters fill:#99ccff,stroke:#000,stroke-width:2px style ExtractNumericalSuffix fill:#cc99ff,stroke:#000,stroke-width:2px style End fill:#ff6666,stroke:#000,stroke-width:3px- Flow Chart Description:
This flowchart illustrates the stripNum function:
Checks if shArgs exist, and if so, parses the objName from it.
If shArgs do not exist, initializes parameters with default values.
Extracts the numerical suffix from the objName and returns the base name without the suffix.
- eRig.transferAnim(self, src, dest, attr='r', remove=False, **shArgs)#
[shArgs : s=src, d=dest, a=attr, r=remove]
Purpose:
:: Transfers animation data from one object to another, with optional attribute control and removal of source animation.
Facilitates the transfer of keyframe data between objects, useful in refining animation sequences.
Option to remove the source animation post-transfer simplifies cleanup in complex animation tasks.
- Parameters:
src – <str> # The source object from which to move the animation.
dest – <str> # The destination object to which the animation will be moved.
attr – <str, optional> # The attribute to transfer (e.g., ‘r’ for rotation).
remove – <bool, optional> # Flag to remove the animation from the source object after transfer.
- Returns:
None # This function does not return any value.
Code Examples:
>>> source_object = "animated_obj"
>>> destination_object = "new_obj"
>>> transfer_anim = transferAnim(source_object, destination_object, attr='t', remove=True)
graph TB style Start fill:#00cc00,stroke:#000,stroke-width:3px style CheckShArgs fill:#ffcc00,stroke:#000,stroke-width:2px style SetAttributes fill:#ff9999,stroke:#000,stroke-width:2px style TransferOrRemove fill:#99ccff,stroke:#000,stroke-width:2px style PasteKey fill:#99ff99,stroke:#000,stroke-width:2px style End fill:#ff6666,stroke:#000,stroke-width:3px Start[("fa:fa-play Start")] --> CheckShArgs{"/fas:fa-question-circle Check shArgs"} CheckShArgs --"If shArgs provided"--> SetAttributes["/fas:fa-sliders-h Set Attributes"] CheckShArgs --"If shArgs not provided"--> SetAttributes SetAttributes --> TransferOrRemove{"/fas:fa-exchange-alt Transfer or Remove"} TransferOrRemove --"If remove"--> PasteKey["/fas:fa-paste Paste Key (Remove)"] TransferOrRemove --"If not remove"--> PasteKey["/fas:fa-paste Paste Key"] PasteKey --> End[("fas:fa-stop End")]- Flow Chart Description:
This flowchart illustrates the transferAnim function:
The process starts by checking if shArgs are provided, updating parameters like src, dest, attr, and remove.
It sets the attributes to be transferred based on attr.
Depending on the remove flag, the function either transfers or removes and transfers the animation.
The function pastes the keyframes to the destination object.
The function concludes after the animation transfer is complete.
- eRig.transferAnimToGrp(self, attr='r', **shArgs)#
[shArgs : at=attr]
Purpose:
:: Transfers animation to a group for specified attributes.
Facilitates the transfer of animation data from individual controls to their respective groups.
Particularly useful in complex rigging setups where animation needs to be transferred without altering the control’s local transforms.
- Parameters:
attr – <str, optional> # Attribute(s) to transfer. Default is ‘r’ for rotation.
- Returns:
None # This function does not return any value.
Code Examples:
>>> attribute_to_transfer = 'r'
>>> transfer_anim_to_grp = transferAnimToGrp(attribute_to_transfer)
graph TB style Start fill:#00cc00,stroke:#000,stroke-width:3px style CheckShArgs fill:#ffcc00,stroke:#000,stroke-width:2px style DetermineAttributes fill:#ff9999,stroke:#000,stroke-width:2px style LoopThroughControls fill:#99ccff,stroke:#000,stroke-width:2px style GetGroupAttrs fill:#cc99ff,stroke:#000,stroke-width:2px style GetCtrlAttrs fill:#cc99ff,stroke:#000,stroke-width:2px style TransferAttrs fill:#99ff99,stroke:#000,stroke-width:2px style ResetCtrlAttrs fill:#99ff99,stroke:#000,stroke-width:2px style End fill:#ff6666,stroke:#000,stroke-width:3px Start[("fa:fa-play Start")] --> CheckShArgs{"/fas:fa-question-circle Check shArgs"} CheckShArgs --"If shArgs provided"--> DetermineAttributes["/fas:fa-toggle-on Determine Attributes"] CheckShArgs --"If shArgs not provided"--> DetermineAttributes DetermineAttributes --> LoopThroughControls["/fas:fa-repeat Loop Through Controls"] LoopThroughControls --> GetGroupAttrs["/fas:fa-object-group Get Group Attributes"] GetGroupAttrs --> GetCtrlAttrs["/fas:fa-cube Get Control Attributes"] GetCtrlAttrs --> TransferAttrs["/fas:fa-exchange-alt Transfer Attributes"] TransferAttrs --> ResetCtrlAttrs["/fas:fa-undo Reset Control Attributes"] ResetCtrlAttrs --> End[("fas:fa-stop End")]- Flow Chart Description:
This flowchart illustrates the transferAnimToGrp function:
The process starts by checking if shArgs are provided, updating attr accordingly.
It determines the attributes to transfer (e.g., translation or rotation).
The function loops through selected controls.
For each control, it retrieves the corresponding attributes from the control group.
It also gets the attributes from the control.
The attributes are then transferred from the control to the group.
The control attributes are reset to their default values.
The function concludes after processing all selected controls.
- eRig.unfreezeRotation(self, objList, grpLevel, vtxNumOrObj_Aim, trgtType='vtx', vtxNumOrObj_ObjUp=None, addExGrp=False, **shArgs)#
[**shArgs: ol=objList, gl=grpLevel, vnoa=vtxNumOrObj_Aim, tt=trgtType, vnoo=vtxNumOrObj_ObjUp, aeg=addExGrp]
Purpose:
:: Unfreezes the rotation of objects based on the provided parameters.
- Parameters:
objList – (<type list>) # List of objects to unfreeze the rotation for.
grpLevel – (<type int>) # The group level to use for hierarchy manipulation (0, 1, or 2).
vtxNumOrObj_Aim – (<type int/str>) # Vertex number or object to aim at.
trgtType – (<type str>) # Type of target (‘vtx’ or ‘obj’).
vtxNumOrObj_ObjUp – (<type int/str>) # Vertex number or object to orient up to (optional).
addExGrp – (<type bool>) # Whether to add an extra group (optional).
- Returns:
None
Code Examples:
>>> objList = ["pCube1", "pCube2"]
>>> grpLevel = 0
>>> vtxNumOrObj_Aim = "pSphere1.vtx[0]"
>>> trgtType = 'vtx'
>>> vtxNumOrObj_ObjUp = None
>>> addExGrp = True
>>> unfreezeRotation(objList, grpLevel, vtxNumOrObj_Aim, trgtType, vtxNumOrObj_ObjUp, addExGrp)
# Unfreezes the rotation of the provided objects.
graph TD Start[("fa:fa-play Start")] --> CheckShArgs{"/fas:fa-question-circle Check shArgs"} CheckShArgs --"Arguments Provided"--> UnfreezeRotation{"/fas:fa-undo Unfreeze Rotation"} UnfreezeRotation --"Unfreeze Rotation"--> End["/fas:fa-stop End"] style Start fill:#00cc00,stroke:#000,stroke-width:3px style CheckShArgs fill:#ffcc00,stroke:#000,stroke-width:2px style UnfreezeRotation fill:#99ff99,stroke:#000,stroke-width:2px style End fill:#ff6666,stroke:#000,stroke-width:3px- Flow Chart Description:
This flowchart illustrates the unfreezeRotation function:
The function starts with the provided arguments.
It processes the objects and their hierarchy based on the provided group level.
It calculates the necessary rotations and orientations for the objects.
It sets the final rotation values for the objects.
It moves and parents the objects to their new positions.
The function ends after completing the rotation and placement operations.
- eRig.unfreezeTrans(self, objList, **shArgs)#
[shArgs : ol=objList]
Purpose:
:: Unfreezes transformations on a list of objects, specifically the translation component.
Useful in scenarios where the object’s transformations need to be reset without affecting its world position.
Often used in rigging and animation to clean up and standardize object transformations.
- Parameters:
objList – <list> # List of objects to unfreeze transformations for.
- Returns:
None # This function does not return any value.
Code Examples:
>>> objects_to_unfreeze = ["obj1", "obj2", "obj3"]
>>> unfreezeTrans(objects_to_unfreeze)
graph TB style Start fill:#00cc00,stroke:#000,stroke-width:3px style CheckShArgs fill:#ffcc00,stroke:#000,stroke-width:2px style ConvertToList fill:#ff9999,stroke:#000,stroke-width:2px style LoopThroughObjects fill:#99ccff,stroke:#000,stroke-width:2px style ResetPosition fill:#99ff99,stroke:#000,stroke-width:2px style UnfreezeTransformations fill:#99ff99,stroke:#000,stroke-width:2px style RestorePosition fill:#99ff99,stroke:#000,stroke-width:2px style End fill:#ff6666,stroke:#000,stroke-width:3px Start[("fa:fa-play Start")] --> CheckShArgs{"/fas:fa-question-circle Check shArgs"} CheckShArgs --"If shArgs provided"--> ConvertToList["/fas:fa-list-ul Convert to List"] CheckShArgs --"If shArgs not provided"--> ConvertToList ConvertToList --> LoopThroughObjects["/fas:fa-repeat Loop Through Objects"] LoopThroughObjects --> ResetPosition["/fas:fa-undo-alt Reset Position"] ResetPosition --> UnfreezeTransformations["/fas:fa-snowflake-o Unfreeze Transformations"] UnfreezeTransformations --> RestorePosition["/fas:fa-redo-alt Restore Position"] RestorePosition --> End[("fas:fa-stop End")]- Flow Chart Description:
This flowchart illustrates the unfreezeTrans function:
The process starts by checking if shArgs are provided, updating objList accordingly.
It converts objList into a list if it’s not already one.
The function loops through each object in the list.
It resets the position of each object to the origin temporarily.
Transformations are unfrozen for each object.
The original position of each object is restored.
The function concludes after processing all objects in the list.
- eRig.vtx(self, mNode, vtxNum, **shArgs)#
[shArgs : mn=mNode, vn=vtxNum]
Purpose:
:: Returns the vertex name in the format ‘obj.vtx[205]’ based on provided object and vertex number.
Argument | Description:
:param mNode: (<type str>) # The object for which to return the vertex name.
:param vtxNum: (<type int>) # The vertex number to be included in the vertex name.
:return: (<type str>) # The vertex name in the format ‘obj.vtx[205]’.
Code Examples:
>>> object_name = "cube"  # Example object name
>>> vertex_number = 205  # Example vertex number
>>> vertex_name = vtx(object_name, vertex_number)
# Returns 'cube.vtx[205]'
graph TB Start[("fa:fa-play Start")] --> CheckShArgs{"/fas:fa-question-circle Check shArgs"} CheckShArgs --"If shArgs Exist"--> ParseShArgs["/fas:fa-cogs Parse shArgs"] CheckShArgs --"If shArgs Does Not Exist"--> InitializeParameters["/fas:fa-wrench Initialize Parameters"] InitializeParameters --> ConstructVertexName{"/fas:fa-list-alt Construct Vertex Name"} ConstructVertexName --"Construct Vertex Name"--> End["/fas:fa-stop End"] style Start fill:#00cc00,stroke:#000,stroke-width:3px style CheckShArgs fill:#ffcc00,stroke:#000,stroke-width:2px style ParseShArgs fill:#ff9999,stroke:#000,stroke-width:2px style InitializeParameters fill:#99ccff,stroke:#000,stroke-width:2px style ConstructVertexName fill:#00cc00,stroke:#000,stroke-width:3px style End fill:#ff6666,stroke:#000,stroke-width:3px- Flow Chart Description:
This flowchart illustrates the vtx function:
Checks if shArgs exist, and if so, parses the mn and vn from it.
If shArgs do not exist, initializes parameters with default values.
Constructs the vertex name in the format ‘obj.vtx[205]’ based on the provided object and vertex number.