
AutoAnim#
as_AutoAnim : Auto Animation & Path Animation
Visit as_AutoAnim : Auto Animation & Path Animation for more information.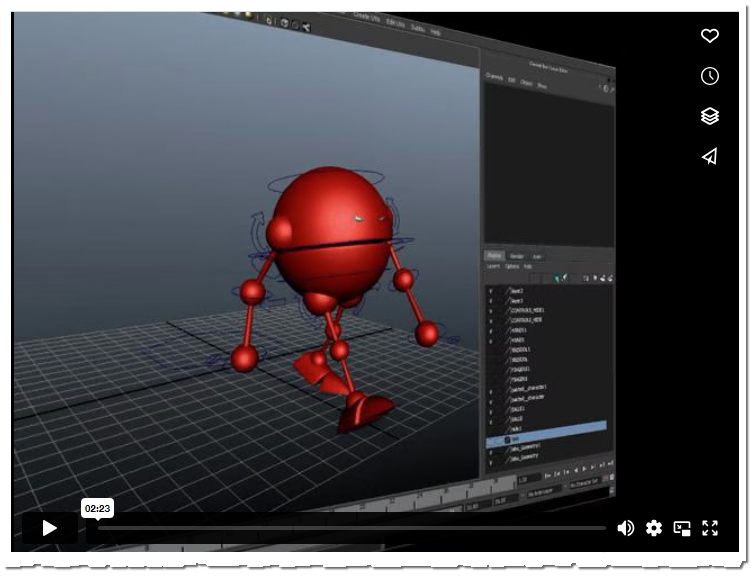
as_EasyBird : Auto Bird Rigging In Maya -By Subbu Addanki
Visit as_EasyBird : Auto Bird Rigging In Maya -By Subbu Addanki for more information.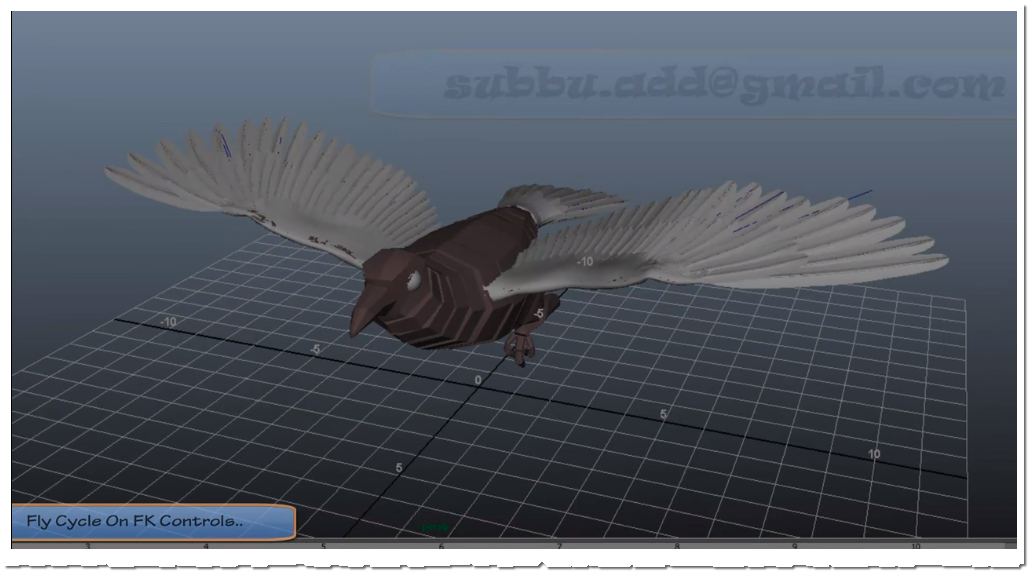
Character TD Reel (2020) -Silencer Vibration
Visit Character TD Reel (2020) -Silencer Vibration for more information.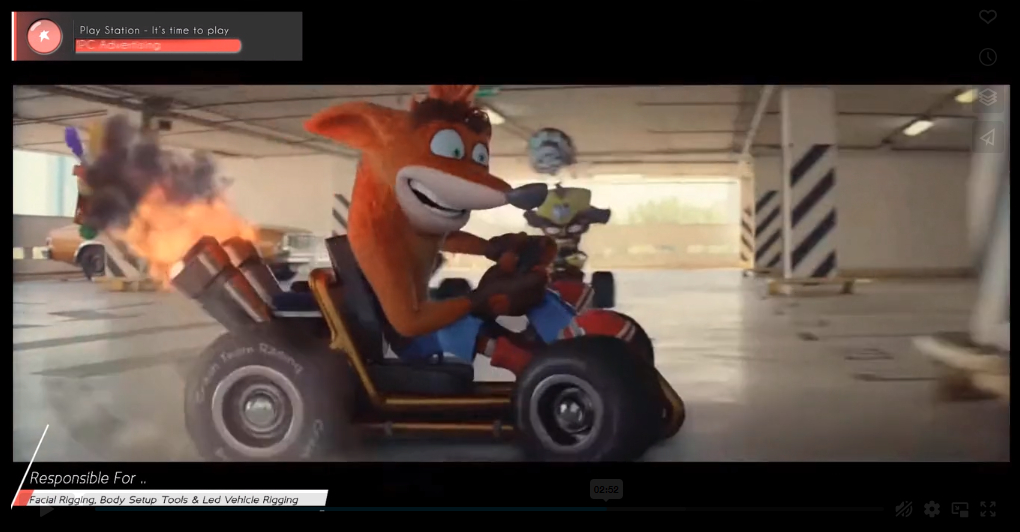
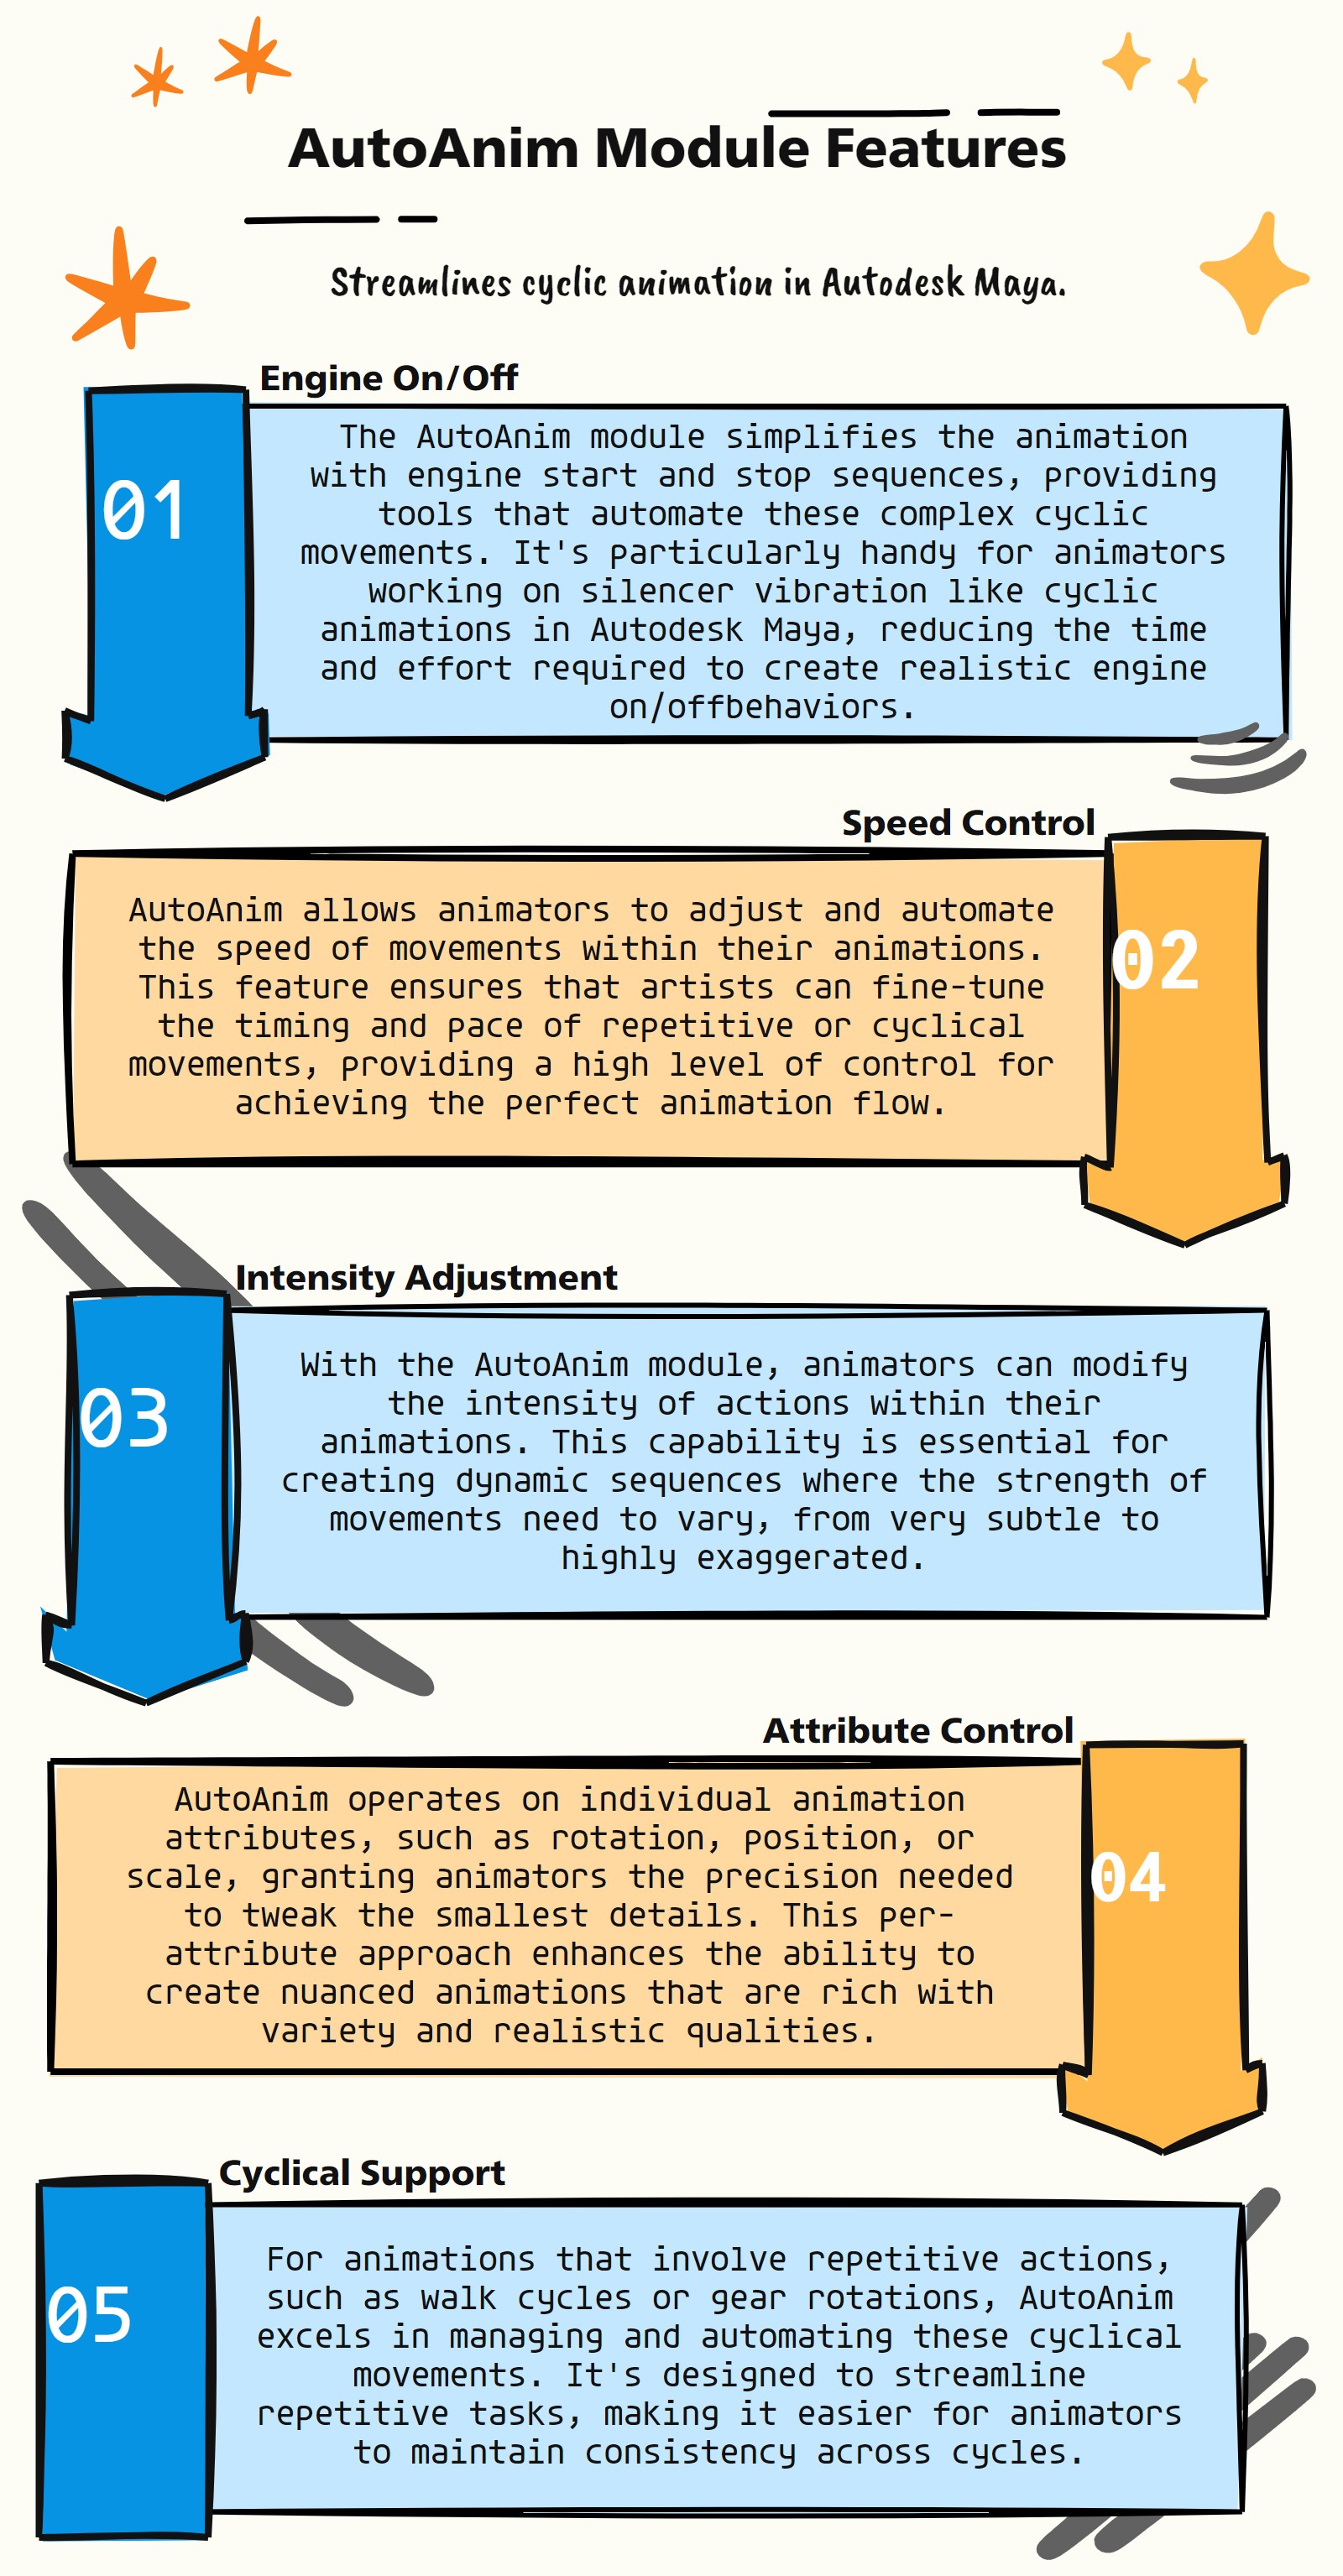
AutoAnim Features
:Enhancing Animation Efficiency: Key Features of the AutoAnim Module in Autodesk Maya:
The AutoAnim module, specifically designed for Autodesk Maya, focuses on automating aspects of animation, particularly for repetitive or cyclical movements
Engine On/Off Animation: AutoAnim provides tools to automate the animation of engine start and stop sequences, useful in mechanical or vehicular animations.
Speed Control: The module allows for the manipulation and automation of speed within animations, enabling artists to easily adjust the pace of cyclical movements.
Intensity Adjustment: AutoAnim includes features to modify the intensity of animations, offering flexibility in how pronounced or subtle an action appears.
Attribute-Based Control: The module operates on a per-attribute basis, giving animators precise control over individual aspects of an animation, like rotation, position, or scale.
Cyclical Animation Support: AutoAnim is particularly useful for creating and managing cyclical animations, streamlining the process of repeating actions or movements.
User-Friendly Interface: The module provides a user-friendly interface, allowing animators to implement complex animation effects without extensive technical know-how.
Seamless Integration with Maya: AutoAnim is designed to integrate seamlessly with Maya’s existing animation tools, enhancing the overall animation workflow.
Customizable Animation Curves: The module offer customizable options for animation curves, enabling more nuanced and tailored animation effects.
- AutoAnim.__confirmAction(self, action)#
[shArgs : action]
Purpose:
:: The __confirmAction method is designed to display a confirmation dialog with a warning message and halt the execution by raising a RuntimeError.
Line 1, Additional Description as needed by sphinx HTML doc, if any
Line 2, Additional Description as needed by sphinx HTML doc, if any
- Parameters:
action (str) – A string containing the message to be displayed in the confirmation dialog.
- Returns:
None #The method does not return any value, but raises an error to stop execution.
Code Examples:
>>> autoAnim.__confirmAction("Are you sure you want to proceed?")
# Displays a confirmation dialog with the message "Are you sure you want to proceed?" and halts execution if the condition is not met.
graph TB Start[("fa:fa-play Start")] --> DisplayDialog[/fas:fa-comment-alt Display Warning Dialog/] DisplayDialog --> RaiseError[/fas:fa-exclamation-triangle Raise RuntimeError/] RaiseError --> End[("fas:fa-stop End")] style Start fill:#00cc00,stroke:#000,stroke-width:3px style DisplayDialog fill:#ffcc00,stroke:#000,stroke-width:2px style RaiseError fill:#ff6666,stroke:#000,stroke-width:3px style End fill:#ff6666,stroke:#000,stroke-width:3px- Flow Chart Description:
This flowchart illustrates the __confirmAction method:
Displays a warning dialog with the specified message.
If the condition is not met, a RuntimeError is raised, halting the execution.
The method finishes its execution.
- AutoAnim.__init__(self)#
To Automate The Animation Cycle
Module Name
**as_AutoAnimMain_v1.0**
About
Author: (Subbaiah) Subbu Addanki
Character Supervisor (Rigging) & Programmer
Visit
http://www.pythonscripting.com
http://subbuadd.blogspot.com
Contact
Mail Id: subbu.add@gmail.com
Mobile No: +91-9741454400 / +91-9949005359
Copyright (c) as_AutoAnimMain
** (Subbaiah) Subbu Addanki. All Rights Reserved. **
- AutoAnim._isInTime(self, startDate=[2017, 1, 1], endDate=[2018, 1, 1], onlineTime=True, showDaysLeft=True)#
[shArgs : startDate=[2017, 1, 1], endDate=[2018, 1, 1], onlineTime=True, showDaysLeft=True]
Purpose:
:: The _isInTime method checks if the current date is within a specified time range. It can use either the system date or an online time service.
- Parameters:
startDate (list) – The start date for the time range, in the format [YYYY, MM, DD].
endDate (list) – The end date for the time range, in the format [YYYY, MM, DD].
onlineTime (bool) – If True, uses an online service to get the current date; otherwise, uses the system date.
showDaysLeft (bool) – If True, displays the number of days left until the end date.
- Returns:
True if the current date is within the specified range; False otherwise.
- Return type:
Code Examples:
>>> autoAnim._isInTime([2020, 1, 1], [2021, 1, 1])
# Returns True if the current date is between January 1, 2020, and January 1, 2021; False otherwise.
graph TB Start[("fa:fa-play Start")] --> GetDate[/fas:fa-calendar-alt Get Current Date/] GetDate --"Using online service or system date" --> CheckDate{{"/fas:fa-clock Check Date Range"}} CheckDate --"Date within range" --> DaysLeft[/fas:fa-hourglass-half Show Days Left/] CheckDate --"Date not within range" --> OpenWeb[/fas:fa-globe Open Web Page/] DaysLeft --> ReturnTrue[/fas:fa-check-circle Return True/] OpenWeb --> ReturnFalse[/fas:fa-times-circle Return False/] ReturnTrue --> End[("fas:fa-stop End")] ReturnFalse --> End style Start fill:#00cc00,stroke:#000,stroke-width:3px style GetDate fill:#ffcc00,stroke:#000,stroke-width:2px style CheckDate fill:#ff9999,stroke:#000,stroke-width:2px style DaysLeft fill:#99ccff,stroke:#000,stroke-width:2px style OpenWeb fill:#ff9999,stroke:#000,stroke-width:2px style ReturnTrue fill:#99ff99,stroke:#000,stroke-width:2px style ReturnFalse fill:#ff9999,stroke:#000,stroke-width:2px style End fill:#ff6666,stroke:#000,stroke-width:3px- Flow Chart Description:
This flowchart illustrates the _isInTime method:
Retrieves the current date either from an online time service or the system date.
Checks if the current date is within the specified start and end dates.
If within range, displays the number of days left until the end date (if enabled).
If not within range, opens a web page and returns False.
- AutoAnim._mayaVer(self)#
[shArgs : None]
Purpose:
:: The _mayaVer method is designed to determine the version of Autodesk Maya being used.
Line 1, Additional Description as needed by sphinx HTML doc, if any
Line 2, Additional Description as needed by sphinx HTML doc, if any
- Returns:
The year of the Maya version as an integer if it starts with ‘20’ and is alphanumeric; otherwise, returns None.
- Return type:
int or None
Code Examples:
>>> autoAnim._mayaVer()
# Returns the year of the Maya version being used, like 2020, or None if the version is not detectable.
graph TB Start[("fa:fa-play Start")] --> GetVersion[/fas:fa-info-circle Get Maya Version/] GetVersion --"If version starts with '20' and is alphanumeric" --> ReturnYear[/fas:fa-calendar-alt Return Maya Year/] GetVersion --"If version does not meet criteria" --> ReturnNone[/fas:fa-ban Return None/] ReturnYear --> End[("fas:fa-stop End")] ReturnNone --> End style Start fill:#00cc00,stroke:#000,stroke-width:3px style GetVersion fill:#ffcc00,stroke:#000,stroke-width:2px style ReturnYear fill:#99ccff,stroke:#000,stroke-width:2px style ReturnNone fill:#ff9999,stroke:#000,stroke-width:2px style End fill:#ff6666,stroke:#000,stroke-width:3px- Flow Chart Description:
This flowchart illustrates the _mayaVer method:
Retrieves the version information of Autodesk Maya.
If the version starts with ‘20’ and is alphanumeric, the year part of the version is returned.
If the version does not meet the criteria, None is returned.
- AutoAnim.as_AboutAutoAnim(self)#
[shArgs : ]
Purpose:
:: Displays the credit and about information for as_AutoAnim version 1.0, providing details about the author, the website, contact information, and copyright.
Line 1, Additional Description as needed by sphinx HTML doc, if any
Line 2, Additional Description as needed by sphinx HTML doc, if any
Code Examples:
>>> autoAnim = as_AutoAnim()
>>> autoAnim.as_AboutAutoAnim()
# This will create and display a window with credit and about information for as_AutoAnim version 1.0.
graph LR Start[("fa:fa-play Start")] --> CreateWindow[/fas:fa-window-maximize Create About Window/] CreateWindow --> PopulateInfo[("fas:fa-info-circle Populate Information")] PopulateInfo --> ShowWindow[/fas:fa-eye Show Window/] ShowWindow --> AutoClose[("/fas:fa-clock Auto Close After 3 Secs/")] AutoClose --> End[("fas:fa-stop End")] style Start fill:#00cc00,stroke:#000,stroke-width:3px style CreateWindow fill:#ffcc00,stroke:#000,stroke-width:2px style PopulateInfo fill:#ff9999,stroke:#000,stroke-width:2px style ShowWindow fill:#99ccff,stroke:#000,stroke-width:2px style AutoClose fill:#ff9999,stroke:#000,stroke-width:2px style End fill:#ff6666,stroke:#000,stroke-width:3px- Flow Chart Description:
This flowchart illustrates the as_AboutAutoAnim method:
Creates a new window to display the about information for as_AutoAnim v1.0.
Populates the window with author’s information, contact details, website links, and copyright notice.
Displays the populated window to the user.
Automatically closes the window after 3 seconds.
Ends the process after closing the window.
- AutoAnim.as_AutoAnim(self)#
[shArgs : ]
Purpose:
:: Creates and manages the Auto Animation interface for as_AutoAnim, allowing for automated animation cycles.
Line 1, Additional Description as needed by sphinx HTML doc, if any
Line 2, Additional Description as needed by sphinx HTML doc, if any
Code Examples:
>>> autoAnim = as_AutoAnim()
>>> autoAnim.as_AutoAnim()
# This will create the Auto Animation interface and initialize the as_AutoAnim functionalities.
graph LR Start[("fa:fa-play Start")] --> CreateWindow[/fas:fa-window-maximize Create UI Window/] CreateWindow --> Initialize[("fas:fa-cog Initialize Interface")] Initialize --> SetupElements[("fas:fa-sliders-h Setup UI Elements")] SetupElements --> ShowWindow[/fas:fa-eye Show UI Window/] ShowWindow --> End[("fas:fa-stop End")] style Start fill:#00cc00,stroke:#000,stroke-width:3px style CreateWindow fill:#ffcc00,stroke:#000,stroke-width:2px style Initialize fill:#ff9999,stroke:#000,stroke-width:2px style SetupElements fill:#99ccff,stroke:#000,stroke-width:2px style ShowWindow fill:#ff9999,stroke:#000,stroke-width:2px style End fill:#ff6666,stroke:#000,stroke-width:3px- Flow Chart Description:
This flowchart illustrates the as_AutoAnim method:
Creates a new UI window for the Auto Animation setup.
Initializes the interface with necessary elements and settings.
Sets up all the UI elements including text fields, buttons, and layout.
Displays the UI window to the user, ready for interaction.
The user can now interact with the UI to create and manage auto animations.
- AutoAnim.as_EasyAnimate(self)#
[shArgs : None]
Purpose:
:: The as_EasyAnimate function facilitates easy and efficient animation control in Autodesk Maya through a user interface. :: It allows animators to dynamically adjust blend ranges, intensity, and speed of animations with real-time feedback and keyframe integration.
Code Examples:
>>> as_EasyAnimate()
# This example demonstrates the execution of the as_EasyAnimate function on a selected animation control in Maya, allowing for on-the-fly adjustments to animation parameters.
graph TB Start[("fa:fa-play Start")] --> CheckAnimCtrl[("fas:fa-check-circle Check for Animation Control")] CheckAnimCtrl --> GetAnimCtrlFromUI[("/fas:fa-desktop Get Animation Control from UI")] GetAnimCtrlFromUI --> GetStartBlendValue[("/fas:fa-sliders-h Get Start Blend Value")] GetStartBlendValue --> GetEndBlendValue[("/fas:fa-sliders-h Get End Blend Value")] GetEndBlendValue --> SetStartEndBlend[("/fas:fa-toggle-on Set Start and End Blend")] SetStartEndBlend --> GetIntensitySpeed[("/fas:fa-bolt Get Intensity and Speed")] GetIntensitySpeed --> SetIntensitySpeed[("/fas:fa-toggle-on Set Intensity and Speed")] SetIntensitySpeed --> GetFormulaAtStart[("/fas:fa-calculator Get Formula at Start")] GetFormulaAtStart --> GetFormulaAtEnd[("/fas:fa-calculator Get Formula at End")] GetFormulaAtEnd --> FlattenTangents[("/fas:fa-level-up-alt Flatten Tangents of Shudder_Offset")] FlattenTangents --> End[("fas:fa-stop End")] style Start fill:#00cc00,stroke:#000,stroke-width:3px style CheckAnimCtrl fill:#ff9999,stroke:#000,stroke-width:2px style GetAnimCtrlFromUI fill:#99ccff,stroke:#000,stroke-width:2px style GetStartBlendValue fill:#99ccff,stroke:#000,stroke-width:2px style GetEndBlendValue fill:#99ccff,stroke:#000,stroke-width:2px style SetStartEndBlend fill:#99ccff,stroke:#000,stroke-width:2px style GetIntensitySpeed fill:#99ccff,stroke:#000,stroke-width:2px style SetIntensitySpeed fill:#99ccff,stroke:#000,stroke-width:2px style GetFormulaAtStart fill:#99ccff,stroke:#000,stroke-width:2px style GetFormulaAtEnd fill:#99ccff,stroke:#000,stroke-width:2px style FlattenTangents fill:#99ccff,stroke:#000,stroke-width:2px style End fill:#ff6666,stroke:#000,stroke-width:3px- Flow Chart Description:
This flowchart details the as_EasyAnimate function’s process:
The function begins by checking if an animation control is selected or specified through the user interface.
It retrieves the animation control either from the UI or the current selection.
Start and end blend values are obtained from the UI.
These blend values are then applied to the animation control.
Intensity and speed values are also retrieved from the UI.
These values are then set on the animation control, with corresponding keyframes created.
The function calculates and sets the shudder offset at the start of the animation.
A similar process is repeated to calculate and set the shudder offset at the end of the animation.
The function then flattens the tangents of the ‘Shudder_Offset’ attribute to ensure smooth animation transitions.
The process concludes by selecting the animation control for further adjustments or review, offering a streamlined approach to animating in Maya.
- AutoAnim.attr_Generator(self)#
[shArgs: ac=animCtrl, aa=animAttr, lk=lastKey, fk=firstKey, fk=fromKey, tk=toKey, er=endRange, ns=numSamples]
Purpose:
:: The attr_Generator method adds custom attributes and an expression to the specified animation control. These attributes are used to automate and fine-tune the animation process.
Additional descriptions and explanations can be provided here as necessary for the Sphinx documentation.
- Parameters:
animCtrl – <PyNode> #The control object to which the attributes are added.
animAttr – <str> #The animation attribute used to define keyframe information.
lastKey – <float> #The last keyframe in the animation.
firstKey – <float> #The first keyframe in the animation.
fromKey – <float> #The starting key of the animation range.
toKey – <float> #The ending key of the animation range.
endRange – <float> #The range from the last key to the end of the animation.
numSamples – <int> #The number of samples to take from the animation.
- Returns:
None. This method modifies the animation control by adding new attributes and an expression.
Code Examples:
>>> autoAnim = as_AutoAnim()
>>> autoAnim.attr_Generator()
# This adds new attributes and an expression to the specified control object, facilitating automated animation control.
graph TB Start[("fa:fa-play Start")] --> RetrieveData[/fas:fa-database Retrieve Animation Data/] RetrieveData --> GenerateAttrs[("fas:fa-plus-circle Generate Attributes")] GenerateAttrs --> CreateExpression[/fas:fa-code Create Expression/] CreateExpression --> UpdateInterface[("/fas:fa-sync-alt Update User Interface/")] UpdateInterface --> End[("fas:fa-stop End")] style Start fill:#00cc00,stroke:#000,stroke-width:3px style RetrieveData fill:#ffcc00,stroke:#000,stroke-width:2px style GenerateAttrs fill:#ff9999,stroke:#000,stroke-width:2px style CreateExpression fill:#99ccff,stroke:#000,stroke-width:2px style UpdateInterface fill:#ff9999,stroke:#000,stroke-width:2px style End fill:#ff6666,stroke:#000,stroke-width:3px- Flow Chart Description:
This flowchart illustrates the attr_Generator method:
Retrieves necessary data from the animation, such as keyframes and attribute names.
Generates new attributes on the specified control object for animation control.
Creates an expression that links the new attributes to the animation data.
Updates the user interface to reflect the changes.
Ends the process after updating the interface.
- AutoAnim.create_AllAnimSetup(self)#
[shArgs : None]
Purpose:
:: This function, create_AllAnimSetup, is designed to automate the animation setup process in Autodesk Maya for multiple selected objects. :: It streamlines the workflow by configuring set-driven keyframes and adding control attributes for intensity and speed, thus enhancing the animation control efficiency.
Code Examples:
>>> create_AllAnimSetup()
# This example applies the create_AllAnimSetup function on selected objects in Maya, automating the animation setup with set-driven keyframes and control attributes.
graph TB Start[("fa:fa-play Start")] --> GetSelectedObjects[("/fas:fa-mouse-pointer Get Selected Objects")] GetSelectedObjects --> ApplyAutomationOnEachObject[("/fas:fa-robot Apply Automation on Each Object")] ApplyAutomationOnEachObject --> GetAnimatedAttrList[("/fas:fa-list Get Animated Attribute List")] GetAnimatedAttrList --> GetAnimRange[("/fas:fa-calendar-alt Get Animation Range")] GetAnimRange --> GetStepValues[("/fas:fa-cog Get Step Values")] GetStepValues --> SaveAnimData[("/fas:fa-save Save Animation Data")] SaveAnimData --> RemoveAnimConnections[("/fas:fa-unlink Remove Animation Connections")] RemoveAnimConnections --> SetDrivenConnections[("/fas:fa-link Set Driven Connections")] SetDrivenConnections --> FinalConnections[("/fas:fa-plug Add Intensity & Speed Controls")] FinalConnections --> End[("fas:fa-stop End")] style Start fill:#00cc00,stroke:#000,stroke-width:3px style GetSelectedObjects fill:#ff9999,stroke:#000,stroke-width:2px style ApplyAutomationOnEachObject fill:#99ccff,stroke:#000,stroke-width:2px style GetAnimatedAttrList fill:#99ccff,stroke:#000,stroke-width:2px style GetAnimRange fill:#99ccff,stroke:#000,stroke-width:2px style GetStepValues fill:#99ccff,stroke:#000,stroke-width:2px style SaveAnimData fill:#99ccff,stroke:#000,stroke-width:2px style RemoveAnimConnections fill:#99ccff,stroke:#000,stroke-width:2px style SetDrivenConnections fill:#99ccff,stroke:#000,stroke-width:2px style FinalConnections fill:#99ccff,stroke:#000,stroke-width:2px style End fill:#ff6666,stroke:#000,stroke-width:3px- Flow Chart Description:
This flowchart illustrates the create_AllAnimSetup function:
The process begins by retrieving a list of selected objects in Maya.
The function then applies automation to each object in the list.
It retrieves a list of animated attributes for each object.
The animation range is determined based on keyframe data.
Step values for keyframes and set-driven keys are calculated.
Animation data is saved into a dictionary, storing keyframe values at specified intervals.
Existing animation connections are removed to make way for new configurations.
Set-driven keyframe connections are established based on the saved animation data.
Finally, intensity and speed control attributes are added to enhance the animation’s versatility and control.
The process concludes with a comprehensive animation setup for all selected objects, allowing for more efficient animation management.
- AutoAnim.create_AnimSetup(self)#
[shArgs : None]
Purpose:
:: The function create_AnimSetup automates the creation of an animation setup in Autodesk Maya. :: It configures an animation control object, extracts keyframe data, creates set-driven keyframes, and adds intensity and speed control to the animation.
Code Examples:
>>> create_AnimSetup()
# This example configures an animation setup based on user input from the Maya UI, extracting keyframe data and creating set-driven keyframes for animation control.
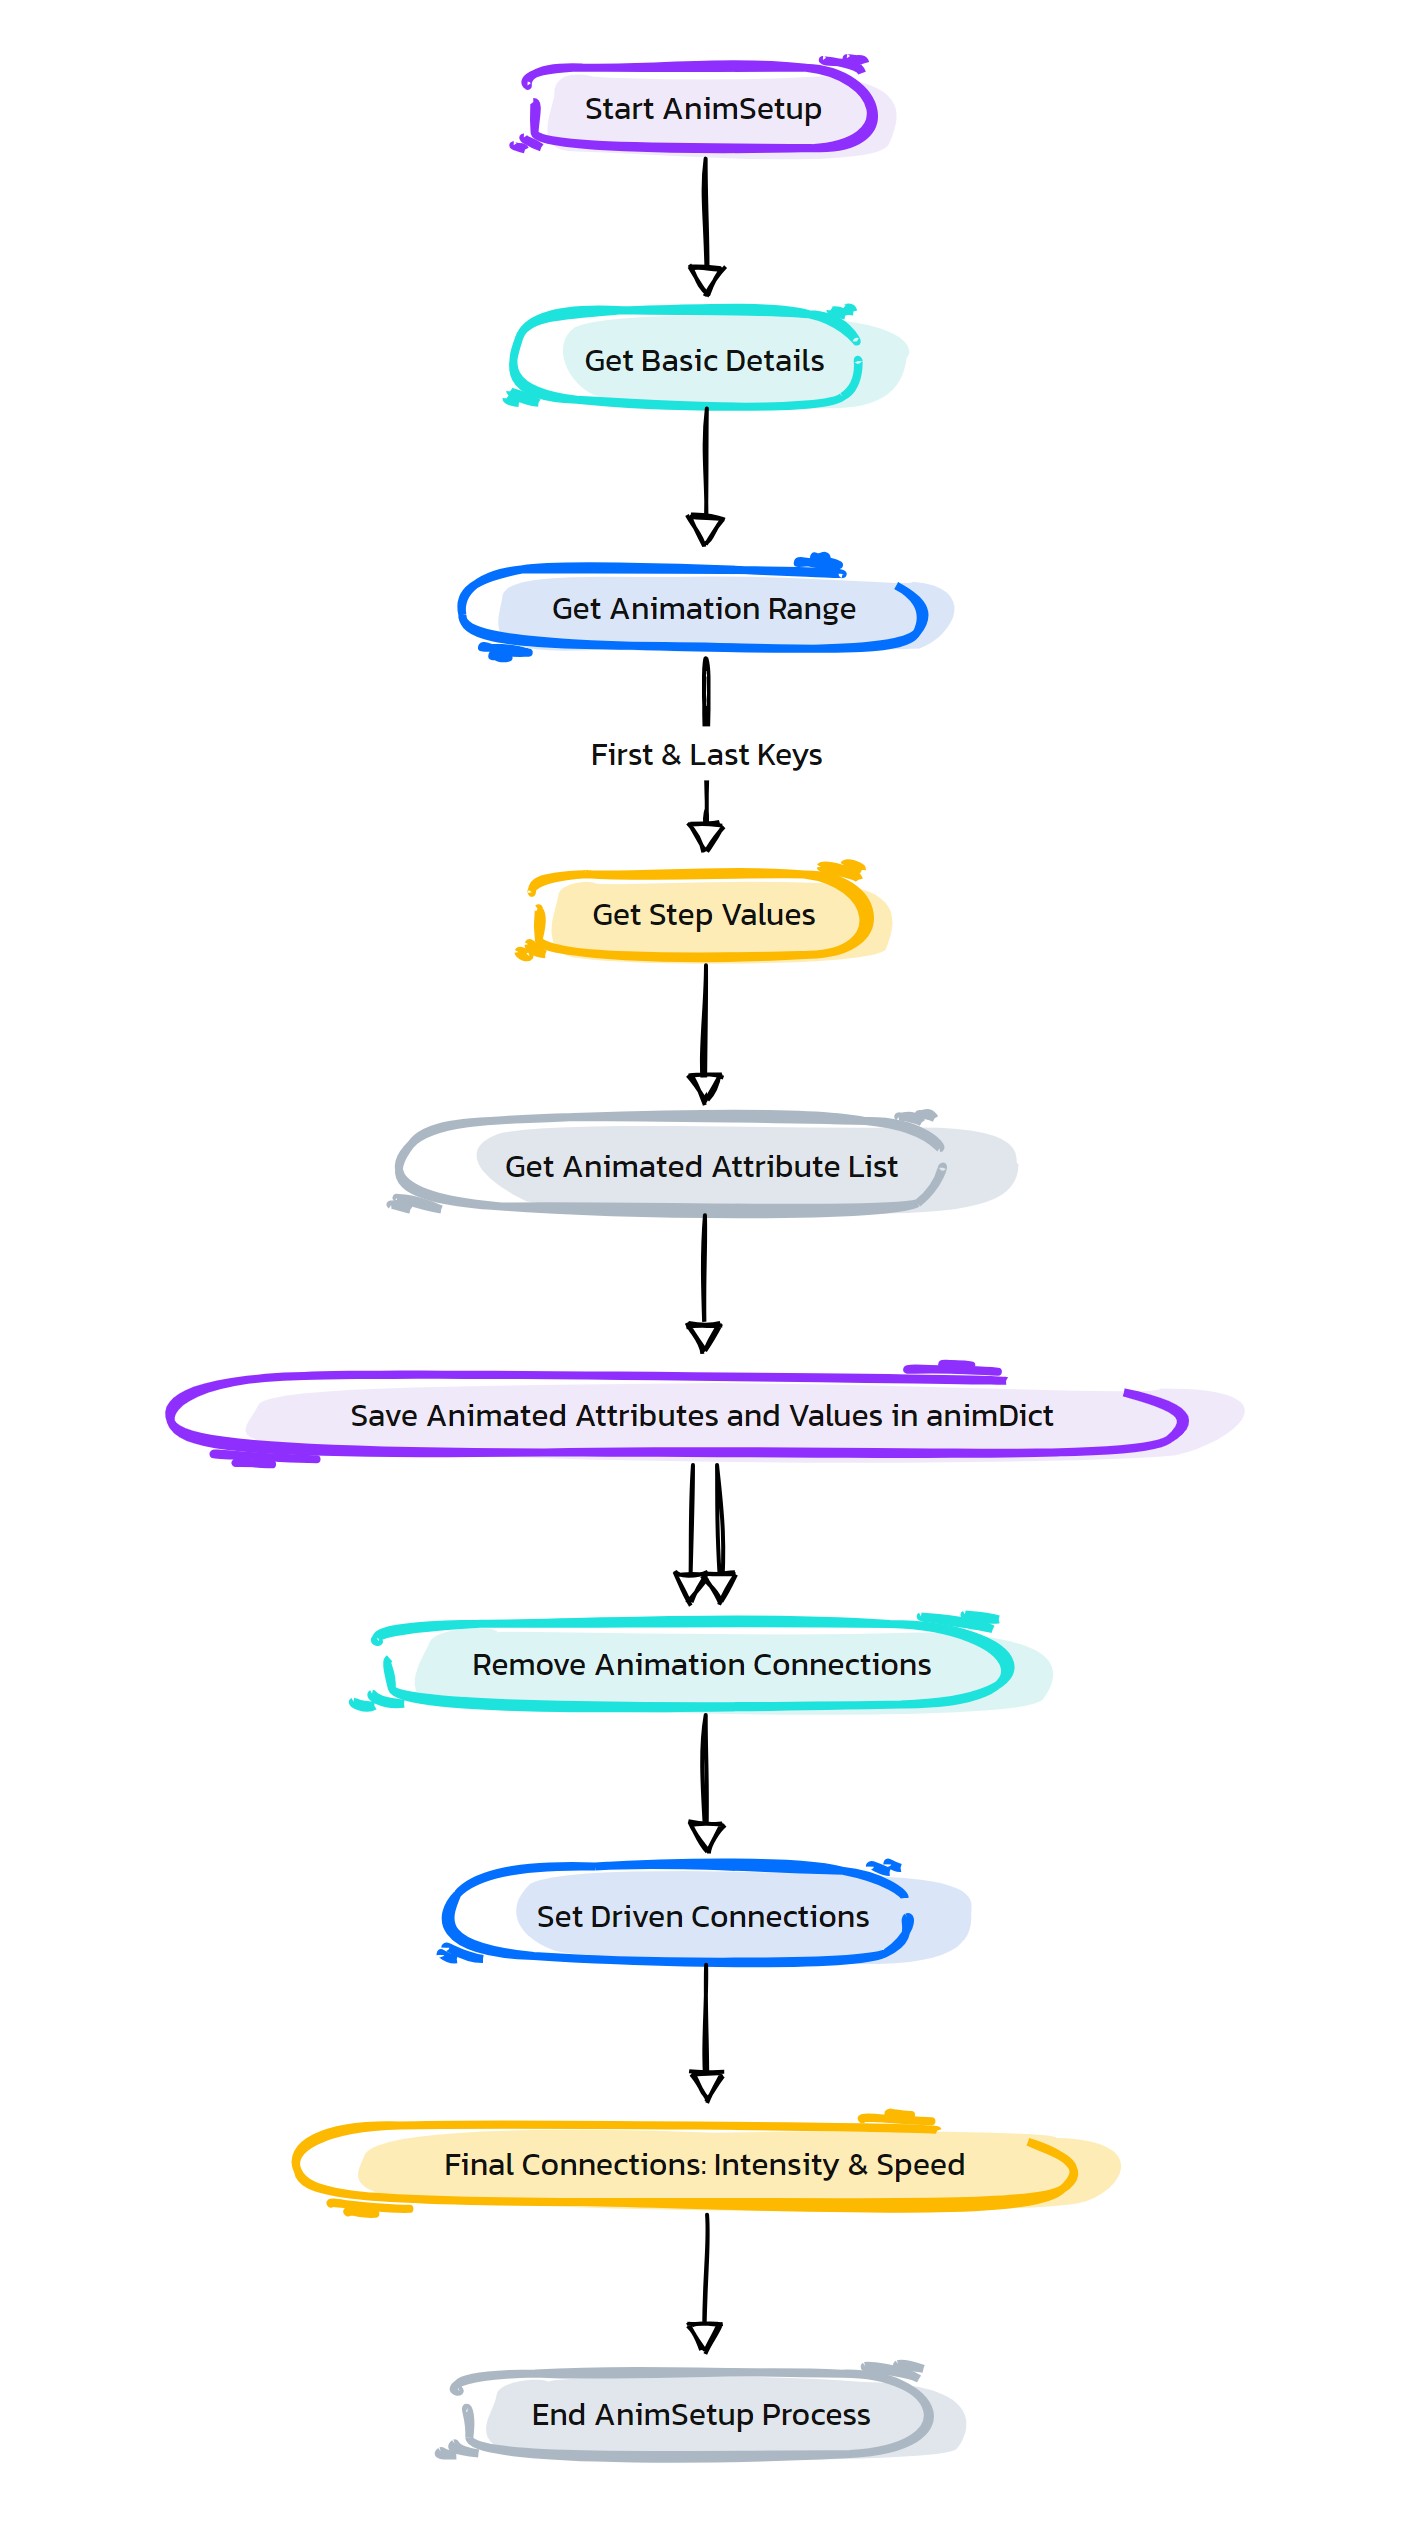
graph TB Start[("fa:fa-play Start")] --> GetBasicDetails[("/fas:fa-info-circle Get Basic Details")] GetBasicDetails --> GetAnimRange[("/fas:fa-calendar-alt Get Animation Range")] GetAnimRange --> GetStepValues[("/fas:fa-cog Get Step Values")] GetStepValues --> GetAnimatedAttrList[("/fas:fa-list Get Animated Attribute List")] GetAnimatedAttrList --> SaveAnimData[("/fas:fa-save Save Animation Data")] SaveAnimData --> RemoveAnimConnections[("/fas:fa-unlink Remove Animation Connections")] RemoveAnimConnections --> SetDrivenConnections[("/fas:fa-link Set Driven Connections")] SetDrivenConnections --> FinalConnections[("/fas:fa-plug Add Intensity & Speed Controls")] FinalConnections --> End[("fas:fa-stop End")] style Start fill:#00cc00,stroke:#000,stroke-width:3px style GetBasicDetails fill:#ff9999,stroke:#000,stroke-width:2px style GetAnimRange fill:#99ccff,stroke:#000,stroke-width:2px style GetStepValues fill:#99ccff,stroke:#000,stroke-width:2px style GetAnimatedAttrList fill:#99ccff,stroke:#000,stroke-width:2px style SaveAnimData fill:#99ccff,stroke:#000,stroke-width:2px style RemoveAnimConnections fill:#99ccff,stroke:#000,stroke-width:2px style SetDrivenConnections fill:#99ccff,stroke:#000,stroke-width:2px style FinalConnections fill:#99ccff,stroke:#000,stroke-width:2px style End fill:#ff6666,stroke:#000,stroke-width:3px- Flow Chart Description:
This flowchart illustrates the create_AnimSetup function:
The function starts by retrieving basic details such as the animation control object and attributes from the user interface.
It determines the animation range by finding the first and last keyframes.
Step values for keyframes and set-driven keys are calculated to distribute the animation evenly.
The function then retrieves a list of animated attributes from the animation object.
Animation data is saved into a dictionary, capturing keyframe values at specified intervals.
Existing animation connections are removed to prepare for new configurations.
Set-driven keyframe connections are established based on the saved animation data.
Finally, intensity and speed controls are added to the animation, enhancing the control over the animated object.
The process concludes with a fully configured animation setup, ready for further animation work.
- AutoAnim.refreshView(self, num)#
[shArgs : ]
Purpose:
:: Refreshes the Maya viewport to update changes.
- Returns:
None
Code Examples:
>>> EasyBird.refreshView(1)
graph TB Start[("fa:fa-play Start")] --> CheckNumValue{"/fas:fa-check-circle Check Num Value"} CheckNumValue --"If num value is provided" --> RefreshViewMultipleTimes["/fas:fa-sync-alt Refresh View Multiple Times"] CheckNumValue --"If num value is not provided" --> End[("fas:fa-stop End")] RefreshViewMultipleTimes --"Perform refresh on Maya viewport" --> End style Start fill:#00cc00,stroke:#000,stroke-width:3px style CheckNumValue fill:#99ccff,stroke:#000,stroke-width:2px style RefreshViewMultipleTimes fill:#ffcc00,stroke:#000,stroke-width:2px style End fill:#ff6666,stroke:#000,stroke-width:3px- Flow Chart Description:
This flowchart illustrates the refreshView function:
The process begins by checking if a numerical value (num) is provided.
If num is provided, it refreshes the Maya viewport as many times as the num value indicates.
If num is not provided, the function concludes without any action.